Last updated on January 12th, 2015 at 02:00 pm

Oven Glove Pattern
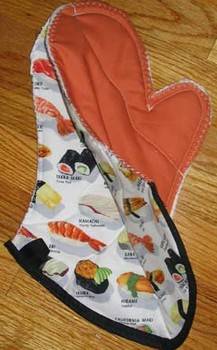
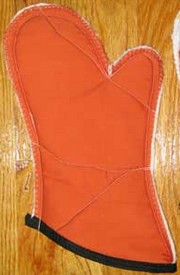
Homemade oven mitts: a free sewing pattern with step-by-step photos and instructions.
A sewing pattern for oven gloves is often one of the first projects offered to sewing beginners because it sews up quickly and is fairly easy to make. This free oven mitts sewing pattern is no exception, with lots of photos and simple sewing instructions to follow.
Oven Mitt Sewing Instructions:
 First, download the PDF oven mitt pattern and print it out. Alternatively, you can trace around your hand in an oven mitten shape, or trace around an existing oven mitt, to make your own pattern.
After you have made a paper pattern, follow the instructions below:
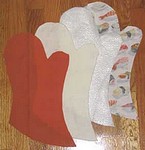
Step 1. For each mitt, you need two of fabric, two of lining, two of cotton batting, and two of mylar/poly batting (or additional cotton batting). Layer the pieces as shown: fabric, poly, cotton, lining. Pin them together.
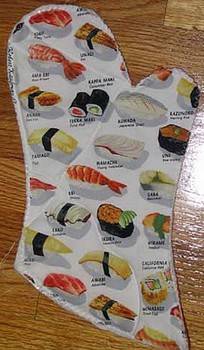
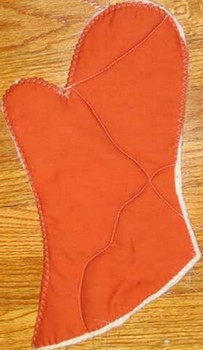
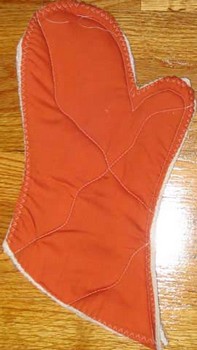
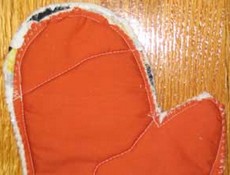
Step 2: Quilt the layers together by topstitching through all four layers. How you decide to do this is a style choice – I did wandering lines through the sushi print. You can make the quilting design the focus, make it more subtle, or you don’t even need it at all if you choose a sturdy batting (I like the Warm Company’s Warm + Natural).
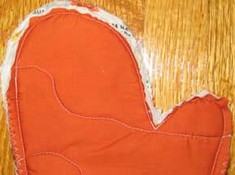
Step 3: Zig-zag stitch around all the edges. This keeps the layers even when you sew the two pieces together. It also serves to finish the seams. You may choose to do this before the quilting, but I find doing this second alleviates some potential bunching problems.
You can see the quilting stitch and zig-zag binding on the lining side more clearly.
Step 4: Now place the two pieces together, right sides facing each other, and starting at the long side, stitch half way around. Use a 1/2″ seam allowance. 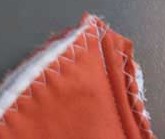
When you are sewing through the thumb crotch, backstitch a before and after the pivot to strengthen the joint. Clip the seam allowance in the lower corner.
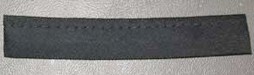 Step 5: Make a hanging loop out of bias tape. Just take a two or three inch piece and topstitch along the open side.
Step 6: Finger press the seam open and – using a steamy iron – shape double fold bias tape around the bottom edges. Then secure with a zig-zag stitch. Don’t forget to tuck in your hanging loop! To secure the hanging loop, straight stitch across the top of the bias tape just where the hanging loop is attached.
 Step 7: Now finish stitching all the way around the oven mitt. Back stitch several times and the bottom to make sure it’ll stay put 🙂
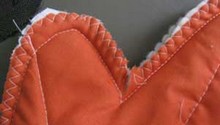
Step 8a: Clip the seam allowance in the thumb crotch nearly to the seam.
Step 8b: To reduce bulk in the seams, trim the seam allowances. In the thumb area, trim both sides to 1/4″. In the fingers area, trim only on side to ¼.
 Step 9: Now that you’ve made the seams “unfinished” again, zig-zag stitch through all layers around the fingers and thumb.
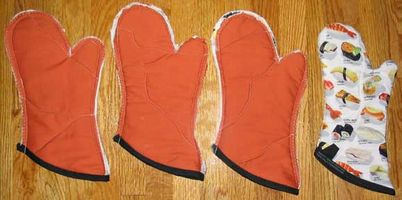 The Ascent of the Oven Mitt (steps 7, 8, 9 and 10)
Step 10: Turn right side out. Cook.
Copyright © 2004-2013 SavvySeams

Copyright 2004-2005. Some rights reserved. Made Available by Creative Commons License by SavvySeams.


Luk3 says
Wondering how best to go about sewing the thick layers.
Have a walking foot but then in terms of needle type and thread and other settings… What is best for this?
Thank you. And great guide!