Last updated on December 8th, 2024 at 12:20 am
Homemade Pine Cone Elves for Christmas
by Jane Lake
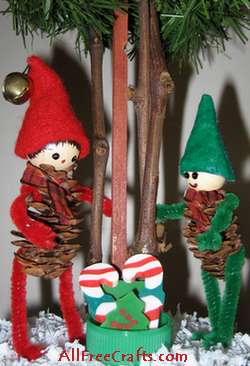
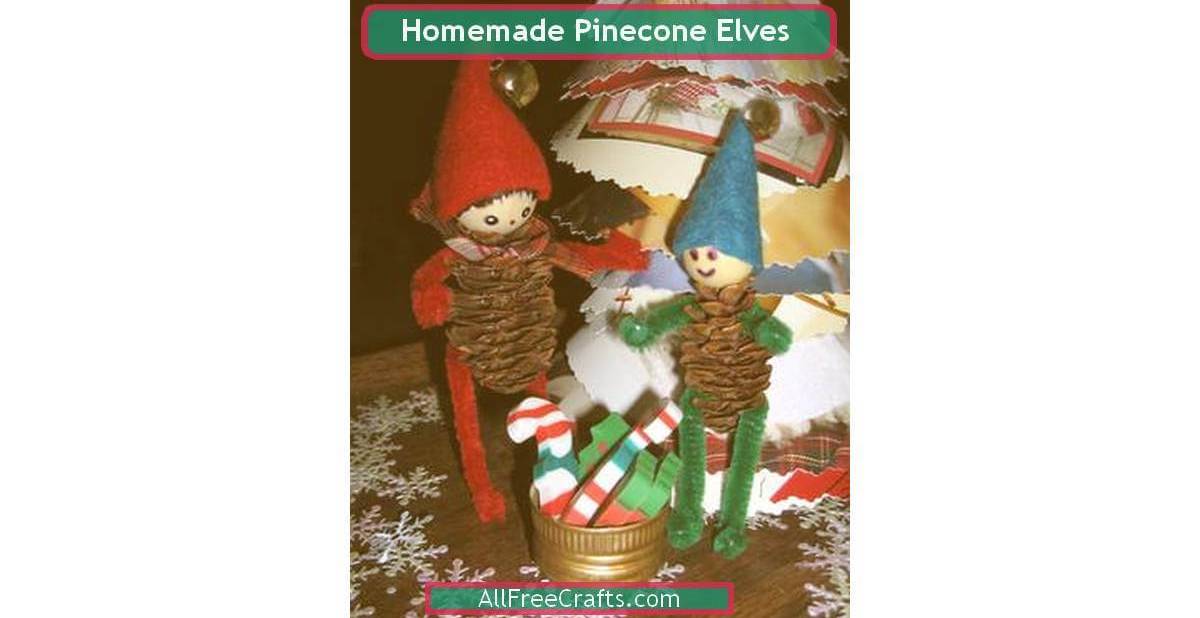
I remember the elves on our Christmas tree when I was a child; they were vintage ornaments even then, dating from the 1950s or early 1960s. To be honest, they had lost a lot of their original glitter, and their pipe cleaner arms and legs were a little less bendable than they used to be. But they were part of our family tradition, and I loved them all. Sadly, only one remained – until recently, when this homemade pair of jolly little elves appeared to keep him company.
You’ll find these easy to make. I hope you love them and they become a cherished part of your family Christmas decorations.
AllFreeCrafts is reader supported! Many supplies are found at thrift stores so try that first! However, if you buy from an affiliate link on this site, I earn a commission at no extra cost to you. As an Amazon associate, I earn from qualifying purchases. This has kept AllFreeCrafts.com online since 2002. Thank you!
Craft Supplies – (for one elf):
- small pine cone
- small piece of felt
- small piece of thin ribbon or thick yarn
- chenille stem
- wooden bead
- scissors
- permanent markers
- tacky glue (I used Aleene’s Tacky Glue from Amazon.
- optional: small jingle bell or golden bead, along with sewing needle and thread to sew it in place
Craft Project Directions:
How to Make the Head
Decide which way up you want the pine cone to go. I liked mine with the thin end up so I needed to cut off the top few tips to get a nice flat area for the head. Apply glue to the top of the pine cone and press the wooden bead into place, with the hole in the bead positioned vertically so it is hidden at the bottom on the pine cone and at the top under the elf’s hat. Hold the bead in place for a minute, if needed, until the tacky glue holds.
Make the Arms and Legs
Cut a chenille stem into two pieces, each about four inches long. This is the measurement used to make the slightly larger red elf shown in the photo. The green elf has a smaller pine cone, so all parts and measurements were cut down just a little to fit him.
Bend each piece of the chenille stem in half, to find the center point, then open it up again. On each end of the two stems, bend about ¼ inch of the tip back against itself to form hands and feet.
For the arms, press the center of the first piece of chenille stem in between two layers of bracts at the upper back of the pine cone, just below the head and neck area. Once you are sure the position is correct, remove the chenille stem, apply a little glue to the center section, and press firmly back into place.

Make the legs in the same way, pressing the center of the second chenille stem between two layers of bracts on the lower back of the pine cone. Remove, apply glue to secure, and press back into position. Stretch the legs straight down, fold out the feet, and let the glue dry.
Make the Hat
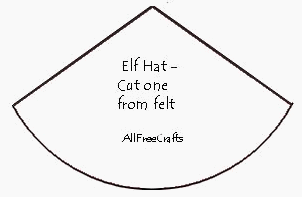
Use the hat pattern shown on this page to cut out a hat from felt to fit a 3/4″ wooden bead. You can print and cut out the hat pattern or just draw your own paper pattern in a similar cone shape.
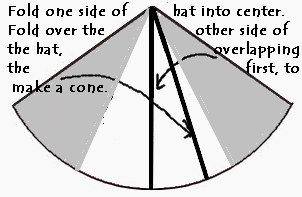
Bring one side of the cone into the middle, as shown in the diagram, then fold over the other side, overlapping the edges. You can adjust the size of the hat, to suit different sized beads, by adjusting the amount of overlap. Once you are happy with the size, glue the overlap together.
If you’re attaching a jingle bell, wait for the glue to dry, then sew the bell to the top of the hat with a few stitches of sewing thread. Knot the ends of the thread to secure.
Draw the Face
Test fit the hat on top of the wooden bead. Using permanent markers, draw a simple elf face below the hat, making two black dots for eyes and a small nose or smile. Check photo for details and practice drawing the face on paper first; it is surprising how different facial features can change the character of each elf.
Embellishments
Have some fun dressing up your elves by making them some winter accessories. Tie a little thin ribbon or yarn around the neck to make a scarf or cut out little felt mittens and glue in place over the hands.
Other props can be added as well – make skis and ski poles from mini craft sticks, a flute or trumpet from a golf tee, or make an elvin choir by folding a square of paper into a music “book” for each elf to hold.
Variations
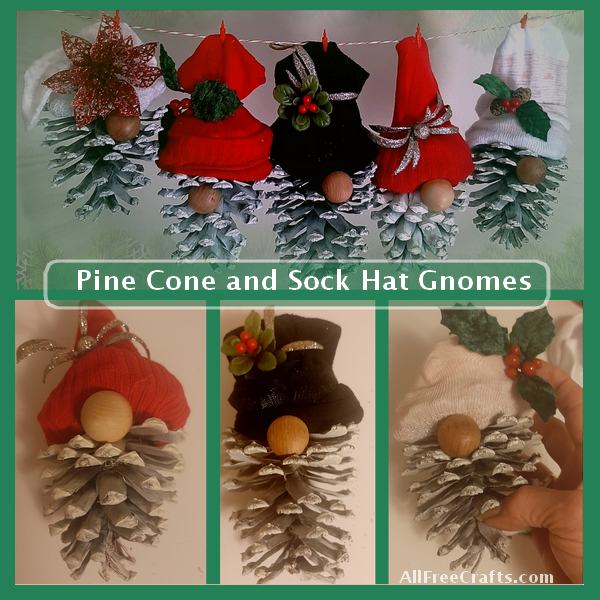
I’m sure you’ll also enjoy our Tiny Clay Pot Elves , Alphabet Block Elves and the easiest Pine Cone Gnomes with Kid’s Socks Hats that you ever saw.


Leave a Reply