Last updated on October 23rd, 2015 at 12:19 pm
[clear]
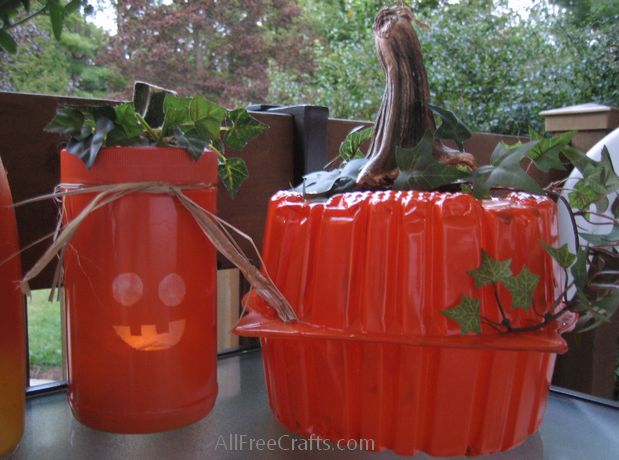
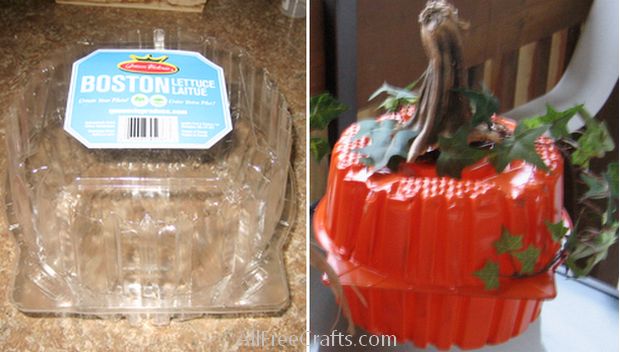
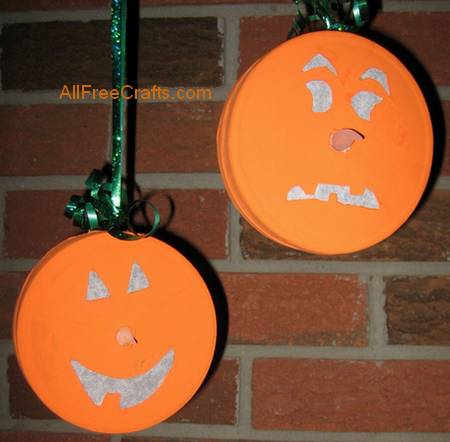
Recycle common containers to make spray painted pumpkins for Fall or Halloween decorating. I used a peanut butter jar to make an illuminated Jack o’Lantern and a plastic lettuce container to make a plump orange pumpkin for the table on my front porch.
You could also recycle cardboard cracker or tea boxes, milk boxes, juice boxes or plastic deli containers. Look around and store suitable containers for this project before Halloween, then do the spray painting for all of them in one session.
by Jane Lake
What You Will Need:
» orange spray paint (I used Krylon 2337 ‘Fusion for Plastic’ Pumpkin (Safety) Orange Plastic Paint – 12 oz. Aerosol)
» plastic peanut butter jar with lid
» raffia
» plastic lettuce container or deli container
» newspaper and a cardboard box
» plain adhesive stickers
» low-temperature glue gun and glue sticks
» dried pumpkin stems or branch sections
» artificial ivy vine, silk leaves, or paper leaf shapes
» optional: vinyl or plastic gloves
» optional: LED Tea Lights with Timer
Project Instructions:
Prepare your containers for painting. Wash them well and dry them completely.
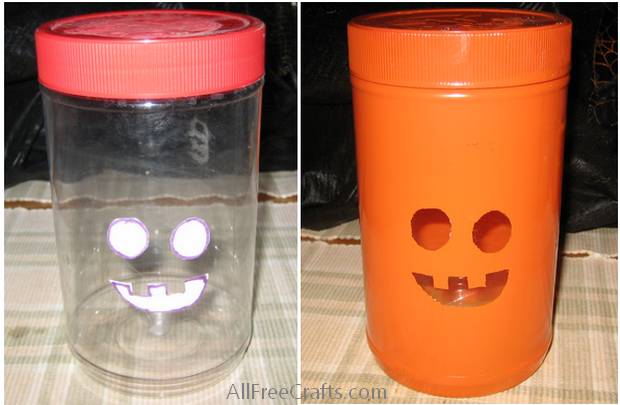
To give the peanut butter jar, or a similar container, some Jack o’Lantern features, simply cut two eyes and a mouth shape from a self-adhesive label and stick them on the jar.
Prepare a place for spray painting your containers. Ideally, the area should be outside, on a dry day with no wind. If this isn’t possible, work in a well-ventilated area such as a garage with the main doors open.
Spread newspaper over a wide area. An open cardboard box set on its side, on top of the newspaper, works wonders to contain the overspray. Set your container inside the box.
Following the instructions on the spray paint can, spray each container with several light coats of paint. I kept the lid on the peanut butter jar and sprayed them both together. Wear gloves while you work, turning the container as needed for complete paint coverage.
Note: It’s very easy to overdo spray paint. Restrain your enthusiasm and stick with applying several light coats rather than doing trying to do it all at once. Too much wet paint equals runs and drips (care to ask how I know)? A first coat which barely covers the surface drys quickly and can be re-painted usually within minutes.
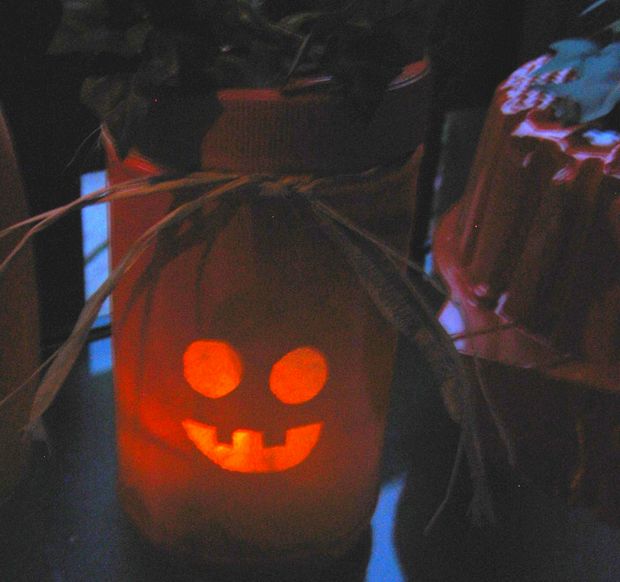
Once the paint is dry, peel away the adhesive label cut-outs to leave behind the facial features. If desired, glue a small piece of white tissue paper inside the jar to cover the facial features. You’ll still see the flickering candlelight, but the tea light isn’t so obvious. Screw on the lid and tie a length of raffia around the neck of the lid.
For the larger pumpkin, made from a living lettuce container, I let the paint dry on top of the container before flipping it upside down to finish spraying the bottom. I found the bottom had a rather appealing, pebbled texture so I decided to keep it as the top of my pumpkin.
Adding a Stem and Leaves
A few years ago, I began saving the stems of pumpkins and gourds. I just cut them out of the pumpkin, or saved them if they fell off, then let them dry naturally. Consequently, I now have a great selection of stems for pumpkin crafts.
If you don’t yet have dried stems like this, begin with this year’s real pumpkins; choose only those that have a nice, long stem rather than a short nub. After the rest of the pumpkins are either eaten or thrown away, save the stems.
As a substitute for a real stem, try a cutting from a suitable sized branch from a tree or shrub. If that isn’t possible, get creative and make a stem from construction paper, felt, chenille stems or other materials.
Use a hot glue gun to glue the stem in the center of an artificial ivy vine, or to a selection of dried or silk leaves.
Glue the stem and vine to the top of the pumpkin.
Light the Way
Add a battery-operated LED tea light to a jar pumpkin for indoor or outdoor Halloween decorating. An LED light will also illuminate the lettuce container pumpkin, but I didn’t need it for mine.


Leave a Reply