Last updated on February 15th, 2021 at 11:47 pm
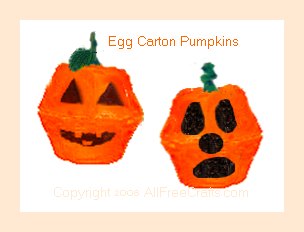
Recycle your cardboard or paper egg cartons and teach your kids how to make these bright and cheerful pumpkins.
By Jane Lake
What You Need:
- cardboard egg carton
- orange craft paint
- black or yellow craft paint (or black marker)
- green twist tie or piece of chenille stem
- newspaper
- scissors
- craft glue
- rice, beans, or candy to place inside the pumpkin
- optional: green silk sleeves, or leaves cut from felt or construction paper
Craft Project Instructions:
1. Cut two cups from the bottom of an egg carton, then trim around the top edge of each cup to make it even and tidy.
2. Spread newspaper on your work surface, then turn the two cups upside down on the newspaper. Paint the cups orange and let dry.
3. Turn the cups over and partially fill one with a little rice, beans or something similar to add weight and stability to the pumpkin.
4. Apply glue to the rim of the bottom cup and put the top cup in place. If necessary, touch up the orange paint around the center line.
5. Use the tip of the scissors, or a pencil point, to poke a small hole in the top of the pumpkin.
6. Cut a length of chenille stem, or a twist tie, to use as the pumpkin’s stem. Dip the end of the stem in a little glue, then insert into the hole at the top of the pumpkin.
7. Paint a face on the pumpkin to look like a Halloween jack o’lantern.
Variation:
If you wish, replace the rice or beans with a few candies to use the pumpkin as a party favor, place setting, or Halloween treat.


Leave a Reply