Last updated on March 1st, 2018 at 10:05 pm
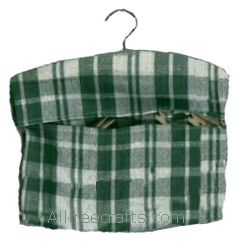
Tea Towel Peg Bag
Free Sewing Pattern – Clothes Peg Bag (or Clothespin Bag!)
by Jane Lake
Whatever name you use, peg bag or pin bag, this is a very easy and functional beginner’s sewing project. It uses only one tea towel and one clothes hanger and takes only about 30 minutes to complete. No more stooping to get clothes pegs when you hang out the laundry – a very cool and practical homemade gift project.
If you like this project, you may also be interested in making a Peg Bag from a Child’s Dress using just one seam.
Supplies:
- Wooden clothes hanger, approximately 15″ wide
- tea towel, approximately 15.5″x24″, or a half inch wider than your clothes hanger
- sewing machine
- thread
- measuring tape
- tailor’s chalk
Skills:
Easy sewing project.
What You Do:
 Place tea towel on your work surface right side up. Fold over the top edge, right sides together, to form a 4″ pocket (see diagram).
Place hanger, as shown, on the pocket and mark directly along the upper edge of the the hanger with tailor’s chalk. This will be your sewing line. Mark position of hanger hook.
Sew along the left side of the top pocket, with 1/4″ seam, up to the marked sewing line, then along the sewing line to 1/8″ from hook position. Resume sewing 1/8″ to the right of the hanger position (this creates a 1/4″ gap for the hook); sew along the curved line and down the right side to the pocket edge.
Trim excess fabric above the curved sewing line to within 1/4″ of sewn seam.
Fold up the bottom of tea towel, right sides together, to overlap the upper pocket edge by 1/4″. Sew along both sides with 1/4″ seams.
Turn both pockets right side out. Slip hanger inside the top pocket and poke the hook through the gap left in the top seam. Fill with pegs, hang on the clothes line, and slide the clothespin bag along the line as you put out the laundry.
 Decoration:
Depending on the fabric of the tea towel you choose, you may want to decorate the front lower pocket with embroidery, fabric paint, or appliques. Do any decoration before sewing up the clothespin bag.


Leave a Reply