Last updated on February 25th, 2023 at 01:13 am
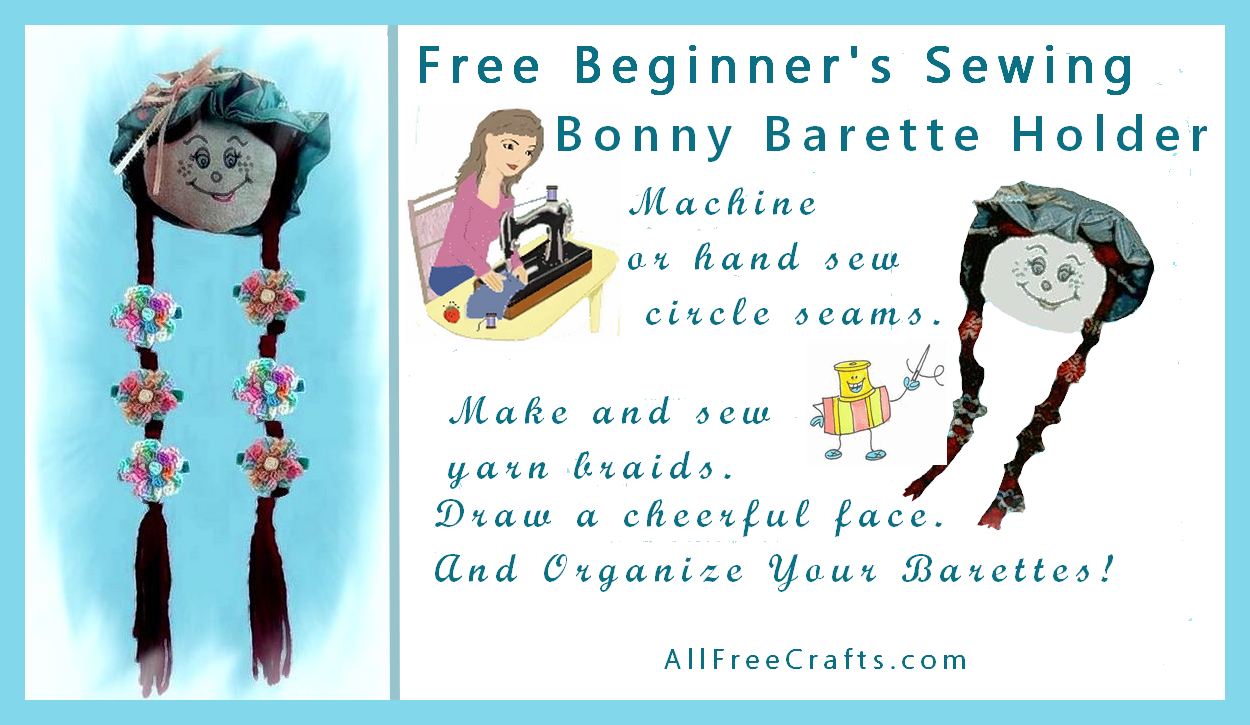

Bonny Barrette is a simple doll face hair barrette holder that can be hand sewn or machine sewn from fabric scraps.
So simple! Basic construction is sewing together two circles; one for the face and one for the bonnet, then adding yarn braids.
This beginner’s sewing pattern can be done quickly either by hand or on the sewing machine.
Beginner’s Free Sewing Pattern
Bonny Barrette holds your barrettes, hair ornaments, scrunchies and earrings. This is ideal for encouraging a young child to organize hair accessories for easy morning selection before school (my daughter and I both agreed on this!)
As a beginner’s sewing project, she’s a cinch to sew from fabric scraps and yarn, by hand or sewing machine, and teaches the basics of sewing a curved line. Either way, this free pattern should take only about an hour to make.
AllFreeCrafts is reader supported! Many supplies are found at thrift stores so try that first! However, if you buy from an affiliate link on this site, I earn a commission at no extra cost to you. As an Amazon associate, I earn from qualifying purchases. This has kept AllFreeCrafts.com online since 2002. Thank you!
You Will Need:
- Fabric scraps for bonnet, enough to cut two 11″ circles
- skin colored fabric for doll head, enough to cut two 6″ circles
- fabric paint (or carefully used fine permanent markers) for facial features (I like fabric marker pens for fine details (Amazon link)
- ribbon or bow
- yarn (at least worsted weight), 12 strands, each 3 yards long
- fibre fill or other stuffing (I used an old cotton bed sheet ripped in strips as stuffing)
- adhesive tape such as painter’s tape, masking tape or scotch tape
- thread
- safety pin and hook for hanging
- scissors
- needle and thread or sewing machine
- optional: glue gun and glue sticks
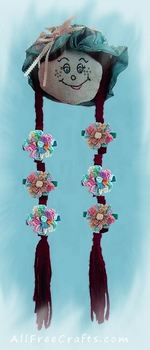
Note: The Crocheted Hibiscus Flowers are a new free crochet pattern which are easily layered, as shown, to make beautiful Hibiscus Crocheted Hair Clips.
Pattern Instructions:
Sew Two Circles Together – Six Inch Circles for the Face and Eleven Inch Circles for the Bonnet
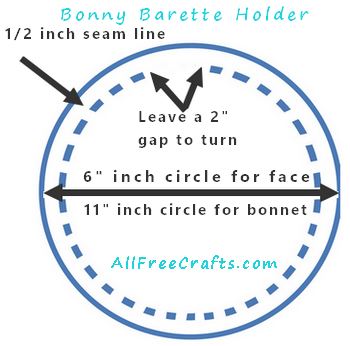
Cut two six inch circles from the doll’s head fabric. I used Indian cotton from bulk rags sold at Costco and I traced around a saucer for the circle template.
Place the fabric circles right sides together and sew all around, about half an inch from the outside edge.
This makes a half inch seam. End your seam about two inches away from where you started. This leaves a small opening to turn the fabric right side out.
But clip the seam first, as detailed below!

If you are hand sewing the seam, I recommend using a full back stitch for strength and stability. You’ll find how-to’s for hand sewing strong seams, including the full back stitch on ThreadsMonthly.com.
On the same page, you’ll also see how to sew a simple running stitch which comes in handy when you are hand sewing the bonnet.
Clip the Seam
Clipping seams, especially on a curved line, helps you keep the shape of the line when you turn your work right sides out.
To do this all around the circles that you just sewed together, make careful snips with scissors, about three inches apart, about 1/8″ inch from your stitch line. Please take care not to cut through any of your stitches.
Use the opening that you created previously to turn the circles right side out. Now gently stuff the doll head with fibre fill or your choice of stuffing material. Close the opening with a hand sewn slip stitch and trim the thread.
Repeat Instructions for the Bonnet
Cut two 11″ circles for the bonnet. Tracing around a large plate or cookie tin should work fine for this step. Follow the same instructions used for the Bonny’s face and then proceed, as follows, to sew a gathering stitch which shapes the bonnet.
Shaping the Bonnet
Approximately 1-1/4″ inches in from the edge, begin top stitching around the bonnet, about 1-1/4 inches from the edges of the circle.
If hand-sewing, use a simple running stitch, going all the way around to the start of your sewing line, then leave a long thread rather than fastening it off.
When using a sewing machine, set it up for large stitches (8 to the inch). Do not reverse stitch at the end to finish sewing line; instead leave the threads long and clip to release from sewing machine.
Pull gently on your thread (for the hand sewing) or pull gently on the back stitch of a sewing machine line. This gathers the bonnet in slight ruffles, tucks and folds.
Test fit on the doll head and adjust as needed, then thread a sewing needle with your thread and fasten off the seam with a double stitch or two.
Create the Doll Hair and Braids
For the braids, you will need 12 strands of yarn, at least 3 yards long.
Lay the 12 strands out, side by side, then for machine sewing, fasten with low-adhesive tape (painter’s masking tape is good!) at the center point. Place tape on both the front and back then sew through the middle of the tape on the sewing machine, using a zig-zag stitch, to fasten yarn strands together.
For hand sewing, lay the 12 strands out, side by side, then place two pieces of low-adhesive tape on either side of the center point. Use a needle and thread to sew the yarn together between the tape strips, doubling back to repeat this at least once or until you are sure the yarns are securely sewn together.

Remove tape from the yarn. Keeping the strands fairly straight, tie off both sides with a piece of thread, about three inches from each side of the center point. This is where you begin braiding.
Begin the Braids
Separate strands in 3 groups of 4 strands, and braid using each group of 4 as a single strand. Continue until you reach the decided length and tie at the end of the braid. Leave a few inches of yarn loose on the end of each braid and trim evenly.
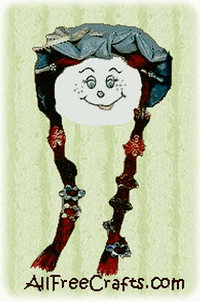
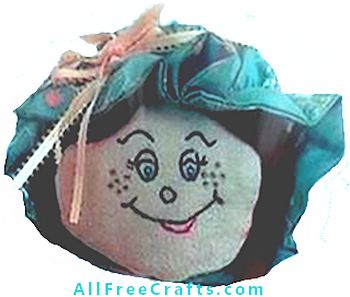
Arrange Hair and Bonnet
Here’s where you can get creative and play with Bonny Barette, arranging her hair and bonnet until you have a pleasing outline and make her face.
Notice where the facial features should begin; this is usually halfway down the face. Design your own smiley or use the photo as a guide.
You should practice first on paper as fabric paint markers (Amazon link) or permanent markers aren’t forgiving of mistakes. If you’re nervous, faintly draw on the face with pencil first.

Either hand sew, or use a glue gun and glue sticks, to attach hair at center point. Adjust and attach the braids in several places from the side to the bottom of the face.
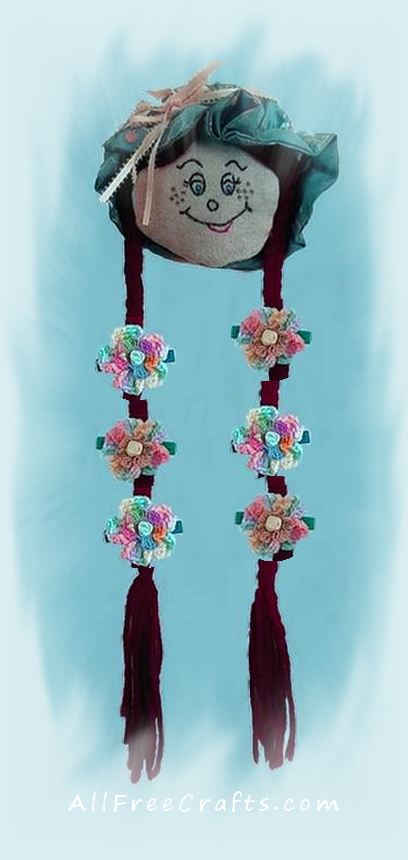
Hand sew or glue a bow, flowers, or other decorations to the bonnet.
Add a safety pin to the back of the bonnet to hang it from a picture hook on the wall.
Finish by adding a collection of new barettes (Amazon link), crocheted Hibiscus Flower Hair Clips or organize all of your own favorite hair ornaments on your Bonny Barette Holder!


Lenda K Irelan says
Need to make patterns printable
Jane Lake says
Hi, Lenda, If you look at the last of the social media icons, below the title and just above the comments, there is a red printer icon that gives you the option to save the page as a PDF file or a document that should be easy to print. Unfortunately, the icon doesn’t look much like a printer; I’ll have to see if I can fix that! Thanks for your feedback!