Last updated on January 4th, 2024 at 05:38 pm
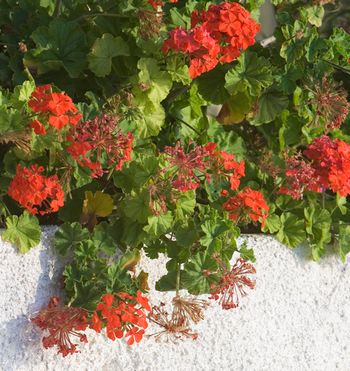
Those beautiful geraniums in your garden can be brought indoors for dormant storage, or replanted in containers to bloom indoors through the fall and winter.
Here are two comprehensive articles detailing exactly how to do that; the first, on this page, from Penn State Extension and on page two from the Iowa University Dept. of Horticulture.
Saving Your Geraniums Over the Winter
from Penn State Extension
Many gardeners like to keep their geraniums from one year to the next. This provides plants for the home in the winter and reduces the cost of new plants the following spring.
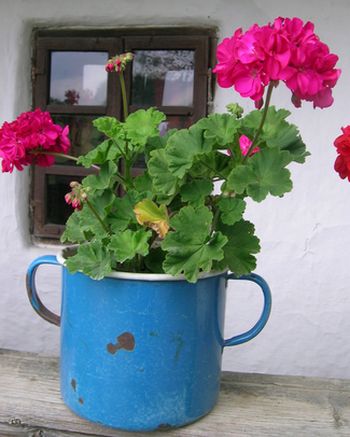
Potted Geraniums
Rather than take cuttings, some people prefer to pot their best plants and bring them inside to overwinter. If this is your choice, cut the plant back to about one-third its original height. Carefully dig up the plant, and pot it into a five or six-inch flower pot. After you pot it, water thoroughly. Location and care is then the same as for rooted cuttings. A sunny, cool location is best.
Cuttings or “Slips”
There are several methods of handling the plants over winter. One way is to take cuttings and root them in the fall, just prior to a killing frost. Geranium stem cuttings, often called “slips,” should be four to six inches long. Take the slips from the tips of the healthiest stems. Remove the leaves on the bottom two inches of the cuttings. Stick the cuttings in coarse sand, perlite, vermiculite or a well-drained potting soil. Cuttings will root faster if you dip the ends in rooting hormone powder.
Stick the cuttings two inches deep in the medium and water thoroughly. Place in a north or east window or underneath artificial lights until rooted. This generally takes three to four weeks. After the cuttings have rooted, plant them in individual pots and put them in a well-lighted spot. Keep the soil evenly moist, and begin fertilizing monthly once new growth appears.
Dormant Hanging
One of the old but very successful methods of carrying geraniums over winter is to dig up the entire plant prior to frost. Shake the soil from the roots and hang it from basement rafters. Years ago fruit cellars were quite common, and they made excellent places to hold the plants with this method. It will not work in many basements today because temperatures are too high and humidity too low.
However, some people report success with hanging geraniums in modern basements. Temperature and humidity seems to differ in every basement. Since there is no way of knowing whether this will work in your basement, try it with several plants.
If you decide to try this method, take the plants down occasionally, and place the roots in water for several hours. Then, hang them back up. Do this several times during the winter to prevent them from completely drying.
Whether you carry your geraniums through the winter as young plants started from cuttings, as old plants in flower pots, or dried plants hanging in the basement, keep them inside until all danger of frost has passed in the spring.
Find more information on Overwintering Geraniums from Iowa University.
Overwintering Geraniums
from Iowa University Dept. of Horticulture
With the rainbow of flower and leaf colors, it is hard to watch beautiful and costly geraniums die from a hard frost. There are several ways to keep those geraniums through the winter for a head start on blooms next spring and a savings to your garden budget.
Keep them growing in containers
Geraniums grow easily indoors in containers with proper care and environmental conditions. Before the first frost, cut back plants to half of their original size and inspect them for signs of insects or disease. Then, dig up healthy plants and transplant into containers. Use a potting mix made for containerized plants instead of garden soil. Garden soil is often heavy, compacted, and drains poorly in containers. Place containerized plants in a cool location with plenty of bright, direct sunlight. Water plants well after potting and as needed when the soil begins to dry. Shoot tips may need pinching once or twice during the winter to promote branching and prevent weak growth. Before planting outside in May, fertilize lightly. Plants kept in containers over the winter are typically larger than most geraniums sold in the spring. This allows you to have a head start on growth and blooms for next year’s garden.
Taking cuttings from outdoor plants
Geraniums root readily from cuttings. This is also a great way to multiply the number of plants for next year’s garden. To take a cutting, remove a 3- to 4-inch section of the plant’s stem tip with a sharp knife. Pinch off the leaves from the lower half of the cutting and dip the cut end into a rooting hormone. Rooting hormones are sold in powder or liquid form at your local garden center or discount store. Stick the cuttings in a moist, porous, well-drained rooting media such as coarse sand, perlite, or vermiculite. Cuttings can be rooted in individual pots or several cuttings can be placed per container. Make sure the container has holes for drainage. Ideally, cuttings root best in a moist, humid environment. This is easy to achieve by securing a clear plastic bag over the cuttings and container. This “mini-greenhouse” should be placed in bright, but indirect light. Check the media occasionally to insure it remains evenly moist. Rooting normally occurs in 6 to 8 weeks. After roots are approximately 1-inch long, transplant cuttings into a 3- to 4-inch container with a standard well-drained potting soil. Place in a sunny window and water as needed. Pinch shoot tips back to force branching and prevent spindly growth. New plants produced from cuttings should be vigorous and about the same size as most geraniums sold in spring.
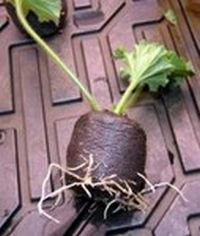
Dormant Storage
Geraniums are unusual and unlike many annual flowers, they have the ability to survive for most of the winter without soil. If properly stored, they can resist extended dry periods due to their thick, succulent-like stems. To overwinter geraniums in dormant storage, dig up the entire plant before frost and gently shake the soil from the roots. Place the plants inside open paper bags or hang them upside-down from the rafters in a cool, dark location for the winter. Ideally the temperature should be between 45-50°F. Two or three times during the winter, take the plants out the bags or down from the rafters and soak the roots in water for 1 or 2 hours. At this time, inspect the stems. While many of the leaves will die and fall off, the stems should remain firm and solid. Discard any geraniums with shriveled stems, since those plants will most likely die. Pot up healthy dormant geraniums in containers in late March or early April. Water plants thoroughly and cut back the dead stem tips. Place potted plants in a sunny window to initiate new growth. It often takes several weeks for plants to initiate growth after dormant storage.
No matter how geraniums have been overwintered, they should be healthy, free-flowering plants for spring. After being indoors all winter, your geraniums may be as anxious as you are for spring planting. Plant them after the danger of frost has passed and enjoy their colorful blooms all summer. You can invest your savings in new geranium varieties to overwinter next year.
See more on this topic in Overwintering Geraniums by Penn State Extension.


Leave a Reply