Last updated on November 22nd, 2024 at 11:27 pm
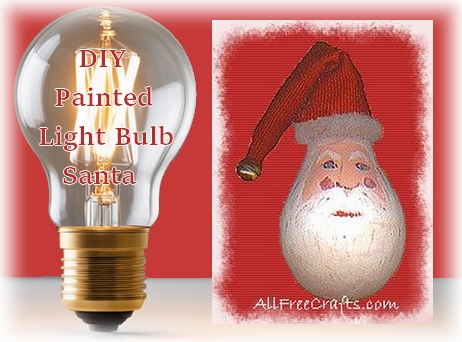
Do you need a small Christmas gift for the teacher or babysitter? This charming DIY light bulb Santa is quick, easy and inexpensive to make. The main supplies are a burned-out light bulb and craft paint. Older children who enjoy painting projects may wish to give this one a try
You will need:
- One burned out light bulb
- acrylic craft paints in white, red, flesh toned, black and blue (or you could use paint markers or even plain markers for the blue eyes and black eye shape and beard highlights)
- paint brushes
- rubbing alcohol
- 1 white chenille stem or pipe cleaner for the hanger
- scrap of red fabric for hat
- jingle bell trim or pom pom
- scrap of white hat trim (quilt batting, felt, fleece or similar)
- hot glue or craft glue
What You Do:
1. Clean the light bulb thoroughly with rubbing alcohol to help the paint adhere to the glass.
2. Paint the bulb in a base coat of white, let dry, and repeat.
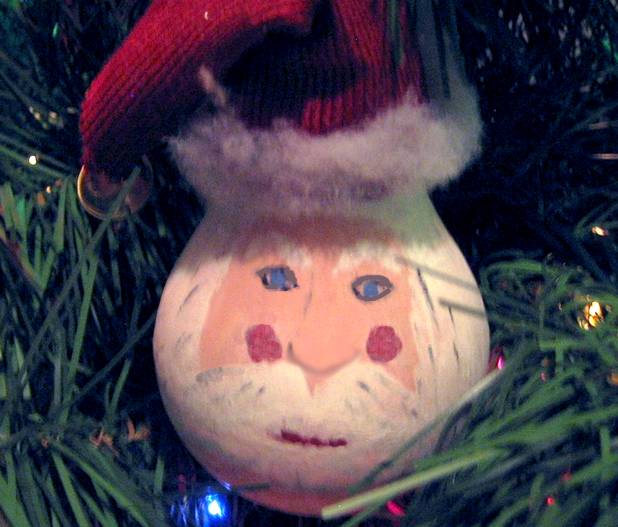
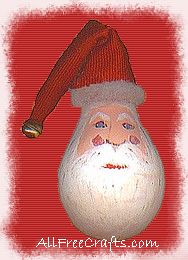
3. When dry, copy the facial features from the photo above. Paint an oval for the face area in flesh tone.
4. When dry, add white whiskers around the face, creating a fairly large moustache.
5. In red, add a thin line for lips below the moustache. Add two red circular shapes for the red cheeks.
6. When dry, dab white onto the red cheeks to make them reddish-pink. Add white eyebrows.
7. In black, with a small, fine tipped brush – or a black paint marker, outline the eye shapes. Add very faint black irregular lines on the moustache and beard to provide definition and shape.
8. When dry, dot on blue paint or paint marker for eye color.
9. For the hat, create a cone shape from a square of red felt or other red fabric and use hot gun to retain the shape you want, making sure it will fit over the metal part of the bulb. Cut the bottom of the hat in a straight line and a hot glue a strip of white trim around the brim.
10. Bend the top of the hat to one side, and hot glue in place. Add a bell trim or pom pom at the end, either stitching in place or using a small amount of hot glue.
11. Twist the chenille stem around the bottom of the metal base, above the face, and twist the two ends together in an oval shape to create a hanger. Push the oval down until the hat is in place. Alternatively, you could use some thin wire, or strong thread as a hanger.
12. Place the hat over the metal base and the chenille stem. Hot glue to secure, making sure that you add glue to the chenille stem as well, under the hat, to fasten it securely.
13. Once the glue has set, readjust the chenille stem, pushing it upwards to act as the hanger.
Hang on the tree and enjoy your little Christmas Santa creation!


Leave a Reply