
Last updated on April 19th, 2025 at 11:04 am

Use your microwave and silicone molds to easily create these homemade chocolate Easter treats with your kids. Melt either dark or milk chocolate chunks, candy melts, chocolate chips or even chocolate bars and transform them into solid chocolate Easter eggs, bunnies or other Easter treats.
For chocolates that appeal to the adult crowd, see Homemade Hazelnut Chocolates.
AllFreeCrafts is reader supported! Many supplies are found at thrift stores so try that first! However, if you buy from an affiliate link on this site, I earn a commission at no extra cost to you. As an Amazon associate, I earn from qualifying purchases. This has kept AllFreeCrafts.com online since 2002. Thank you!

What You Need: Easter Theme Chocolate or Candy Silicone Mold (or Mould, in the U.K.):
- Buy a shallow chocolate or candy making mold with an Easter theme. Both are available at bulk food stores or department stores; you’ll also find great selection of chocolate candy molds online at Amazon.
- And, of course, some type of meltable chocolate; chocolate bars, candy melts, chocolate chips or even solid chocolate bars.
by Anna and Sophie Cadman
How to Melt Chocolate in the Microwave
1. Choose Your Chocolate:
- Chocolate Bars: Break or chop into small, uniform pieces for even melting.
- Chocolate Chips: These are designed for easy melting. Hershey has a great page of tips for melting chocolate chips.
- Candy Melts: Specifically formulated for melting and often come in vibrant colors.
- Solid Chocolate Bars: Chop finely before melting.
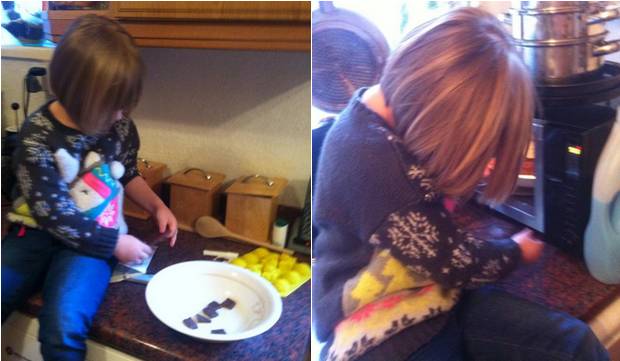
2. Melting Chocolate
Microwave: Use a glass jug with a spout, or a ceramic bowl, to melt chocolate in the microwave. Start with a short 30 second interval on high power unless your microwave manual recommends a different power setting.
Remove the bowl of melting chocolate and stir well. Chocolate goes from melted to “seized” (or thick, grainy and unusable) in the microwave very quickly. So take it slowly, continue to microwave the chocolate in short 15-second intervals, stirring between each interval.
When you see only a few small remaining pieces of solid chocolate, let the bowl sit for a minute. The residual heat often melts these last solids away, leaving you with perfect, soft-melt chocolate ready for the next step.
Double Boiler: You can also melt chocolate in a double boiler or over a saucepan of boiling water. Bring water to the boil, then turn off the heat. Add chunks of chocolate to the upper portion of the double boiler; or to a plate or shallow dish suspended over a saucepan of freshly boiled water. Stir the chocolate until melted.
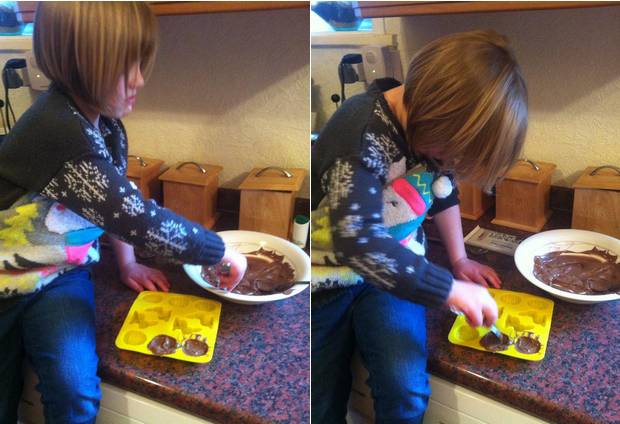
3. Filling the Chocolate Molds
Silicone molds are durable, flexible and relatively inexpensive. Their flexibility makes it quite easy to release the chocolate once it has cooled and hardened. Other types of candy molds also work but may be less flexible; if so, coat with a little oil before using.
Whichever mold you choose, once the chocolate is melted, you can pour it into the molds, which is easier if your chocolate was melted in a glass jug with a spout. If not, spoon the melted chocolate into each cavity in the mold as demonstrated below by Sophie. If the chocolate starts to harden as you work, pop it back into the microwave for a few seconds to liquify again.

The hard working cook gets to lick the spoon!
For Christmas, learn how to make Chocolate Covered Spoons and in spring, why not make some Chocolate-Dipped Strawberries? Use store-bought phyllo pastry sheets and an easy raspberry filling for homemade Raspberry Strudels.
Safety First:
- Adult Supervision: Always supervise children when using the microwave.
- Hot Chocolate: Be careful, melted chocolate is very hot.
Note: These instructions are for general guidance. Refer to the instructions on chocolate or candy melt packaging for best results.
Once all the chocolate is in place, tap the mold gently on the counter to release air bubbles. Flatten the top of each shape with the back of a spoon.
4. Setting the Chocolate

Refrigerate or Freeze: Put the chocolate-filled mold into the refrigerator for about half an hour until cool and fully set. For faster setting, place in the freezer for 15 to 20 minutes.
5. Releasing Your Homemade Chocolate Easter Treats
Here’s the exciting part – releasing your homemade chocolate Easter treats into the wild! Just turn your mold upside down and gently tap it until all the chocolate eggs, yellow candy-melt chicks or white-chocolate bunnies are released.
If any chocolates don’t fall out, press gently on the back of the mold or hold the sides and twist a little bit to loosen them. They should fall out quite easily.

Arrange the Easter goodies on a plate. Smile. Because you’ve done a terrific job. And now there’s a plate full of solid chocolate Easter treats for your whole family to eat!
Whatever the color or type of chocolate you choose, these homemade chocolate Easter treats are also made of the very best ingredients: solid memories of sweet times and family smiles.
Enjoy your delicious homemade chocolate treats!


Leave a Reply