Last updated on December 20th, 2024 at 01:09 am
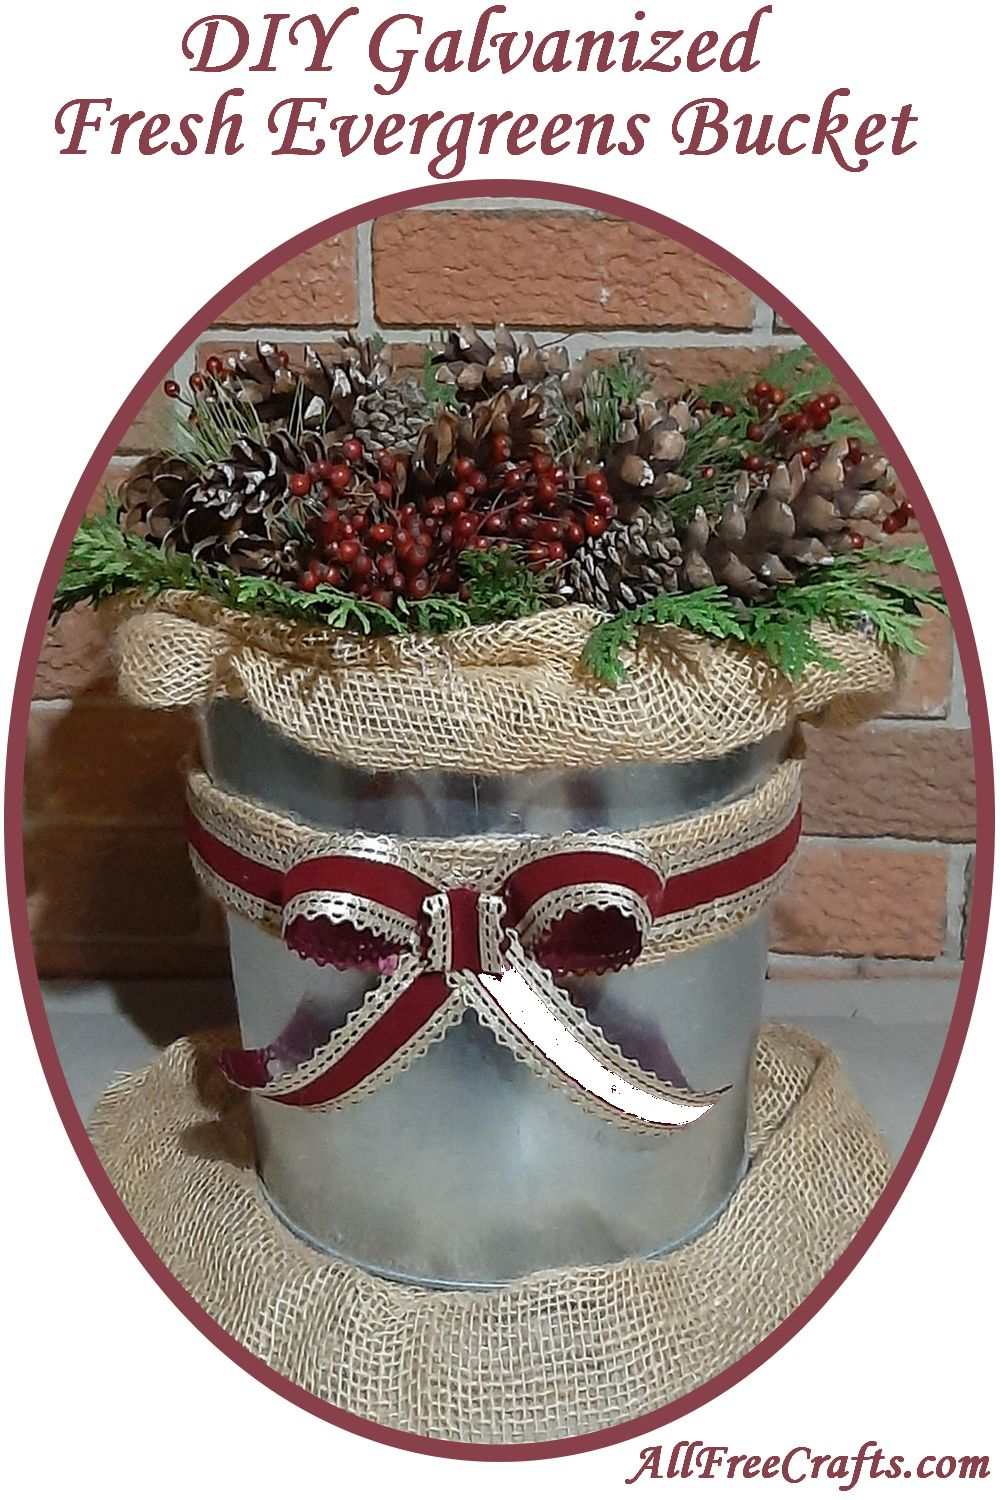
How to Make a Beautiful Galvanized Bucket of Evergreens
Garden burlap brings this DIY galvanized bucket of evergreens together. You can get this look quite cheaply, especially if you have access to pine cones, a few evergreen branches and some left-over garden quality burlap. If you want fancy, add a burlap-backed ribbon. And a bow.
Garden Burlap Re-purposed
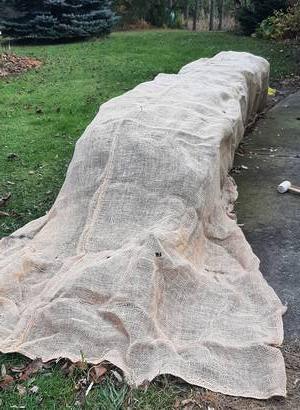
I used left-over garden landscape burlap rather than the expensive burlap rolls sold for crafts. A burlap grain bag would also work.
Here’s the boxwood hedge that I covered for winter in garden grade burlap.
You can see there’s a lot of excess fabric. To start this project, I simply cut off an extra piece of burlap about 16 inches wide by three feet long. Then I cut another strip about 7 inches wide by three feet long.
All you do is turn those rough scraps into burlap rolls, then add sprigs of greenery and pine cones to your bucket.

You Will Need:
- galvanized bucket (Amazon) or a planter
- pine cones
- fresh evergreen sprigs – cedar, pine, spruce or a combination
- wild rosehips or faux red berry sprigs (Amazon)
- garden burlap about 3 feet long by
- wet floral foam block (Amazon)
- container to hold foam inside the bucket
- dry leaves or newspaper to pack bucket below the foam
- wire-edge ribbon
- optional: short string of battery or solar fairy lights (Amazon)
AllFreeCrafts is reader supported! Many supplies are found at thrift stores so try that first! However, if you buy from an affiliate link on this site, I earn a commission at no extra cost to you. As an Amazon associate, I earn from qualifying purchases. This has kept AllFreeCrafts.com online since 2002. Thank you!
Burlap Rolls from Garden Burlap

DIY: Make a Burlap Roll
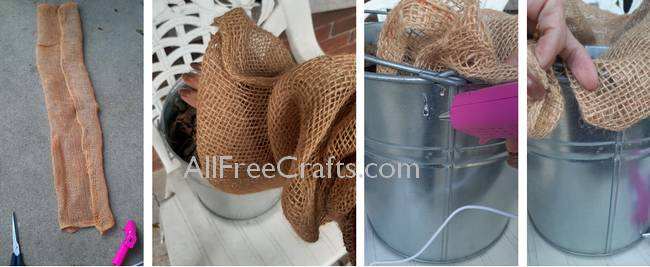
To begin, measure around the top of your bucket and add a few inches for an overlap. This is how long your fabric should be to make your first burlap roll. Mine was 3 feet long by 16 inches wide.
Lay this fabric strip down on a flat surface then overlap the long edges and hot glue those edges together to make a tube. Just use a little hot glue for this as you don’t want it to leak through to the other side.
As soon as I was done gluing, I put my arm through the tube to dislodge any stray glue. I ended up with a flexible burlap tube, perfect for covering the rim of my galvanized bucket.
You can see, below, the finished burlap tube and the start of hot-gluing the burlap roll to the bucket. Make sure the glued side of the burlap roll is at the back, then begin gluing the roll in position at one bucket seam. Continue around the bucket until the short ends of the burlap overlap near the opposite bucket seam, as shown.
Adding Floral Foam to a Metal Bucket
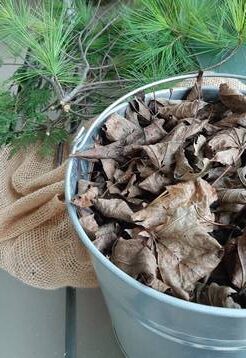
Add dry leaves or newspaper to your galvanized bucket.
Push the leaves down to fill the bucket about three-quarters of the way full.
Set a block of wet floral foam into a shallow pie plate or similar container. Add water and let the water absorb into the floral foam. Drain off any excess water.
Place the pie plate and wet foam on top of the leaves in the bucket.
Make sure the leaves, or paper, are compacted enough to support the weight of the pie plate and wet foam.
Arranging Fresh Evergreens and Adding Pine Cones
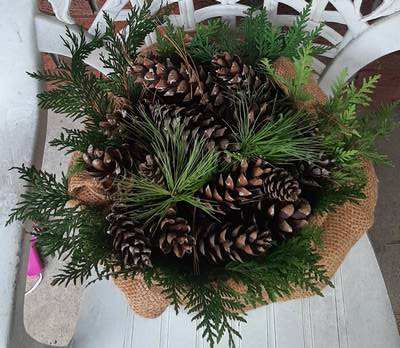
You should now have a layer of burlap going around the top of the bucket. The bucket should also have a thick layer of leaves or paper supporting a pie plate of wet floral foam.
Cut sprigs of cedar, pine or spruce and arrange them in a circle on top of the burlap. Once you like the look, insert each stem into the wet floral foam block.
Add pine cones as desired; I arranged mine with a layer of long pine cones in a wreath-like layer. My pine cones naturally intertwined but, if you like, wire the bottom of them and insert wire into the floral foam for extra stability.
Add more fresh evergreen sprigs between the pine cones. If you have them, place smaller pine cones to fill in any spaces.
Red Berry Highlights
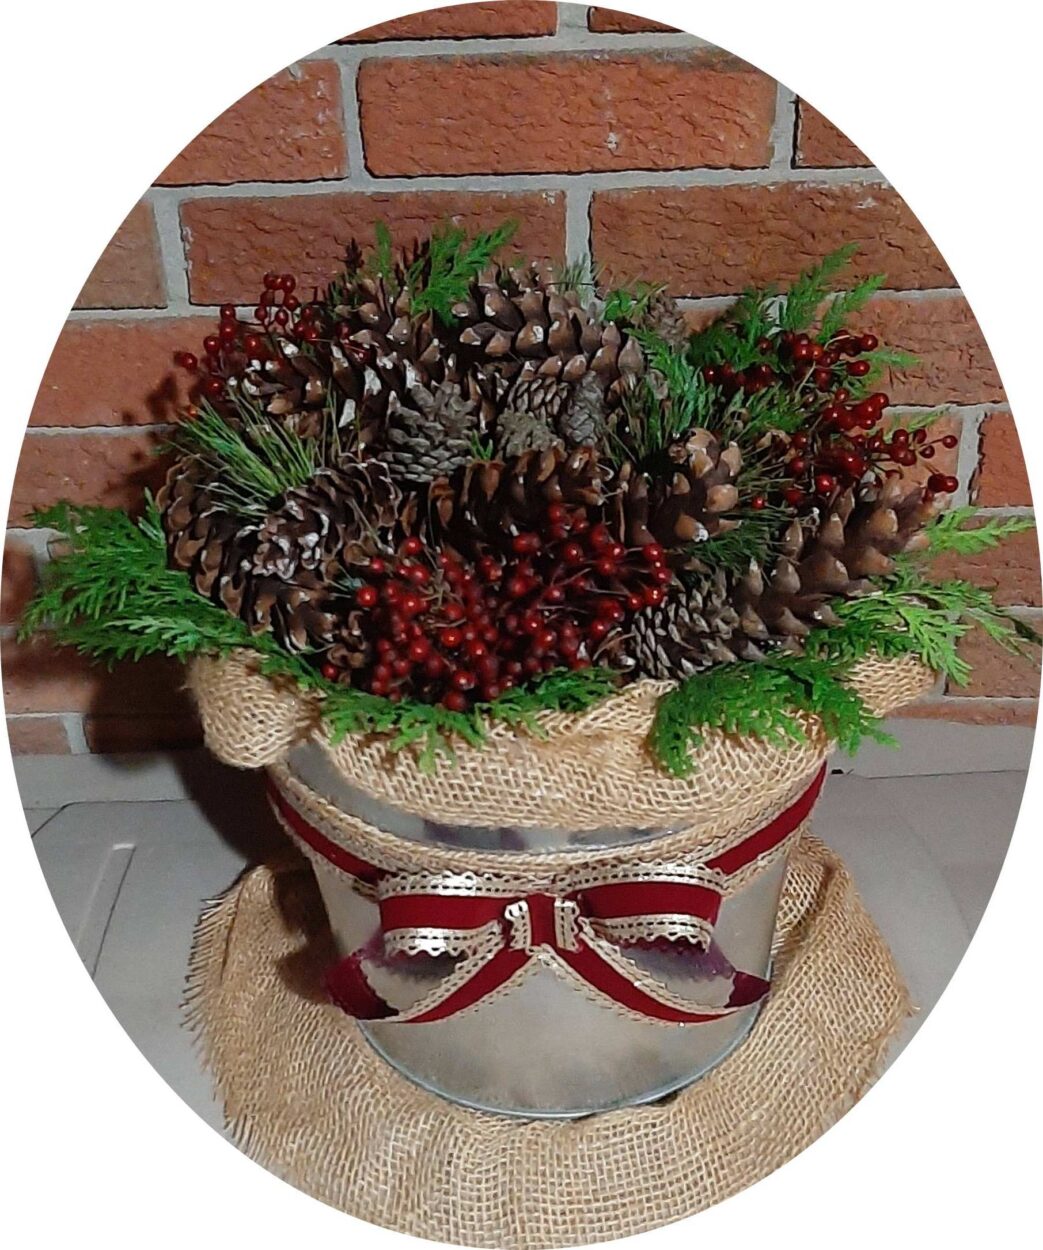
Stems of wild rosehips add texture and a welcoming pop of deep red color to this DIY arrangement. Each stem is inserted into the wet floral foam.
You could also opt for bunches of faux red berries anchored into the floral foam. They won’t need the water but it helps secure them in place.
Burlap Backed Ribbon and Bow
I made a smaller tube of burlap, in the same way as the first one, as a backer for my red and gold ribbon.
Hot glue it in place, making sure to place the overlap for this at the back of your arrangement. Hot glue a circle of red and gold ribbon on top of the burlap, overlapping again at the back.
Finish with a flourishing bow, either ready-made or homemade from matching ribbon (like mine). Glue the bow into the center of the ribbon band and…you’re done!
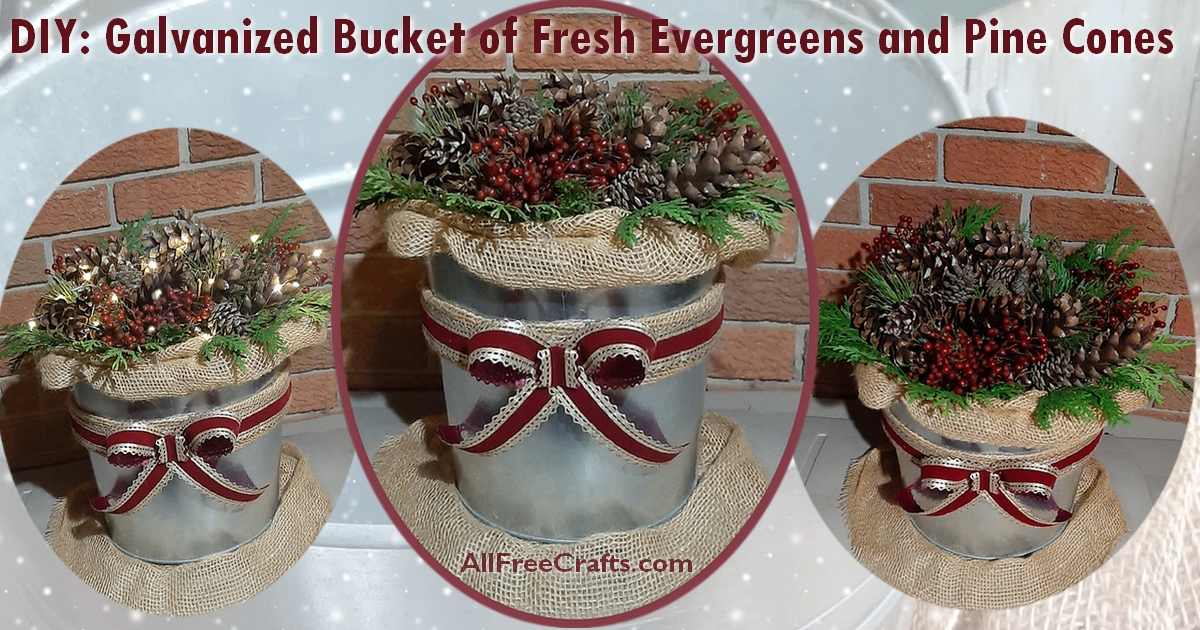
Optional Fairy Lights

If you wish, weave fairy lights through your evergreens and pine cones creation for a pinch of magic. A short string of either battery-powered or solar powered fairy lights would work. Just hide the battery or solar panel at the back of your arrangement.
With, or without lights, I’m delighted with this bucket of tricks. My husband bought the galvanized bucket thinking that I might have a use for it in the garden. He was right, just not quite in the way that he thought. But we both love it.
Comprised of fresh evergreens, pine cones and rose hips gathered from our backyard, it represents home.
On the porch, it welcomes everyone from the mail lady, to parcel delivery drivers, friends and family members. What more could you want from a humble galvanized bucket of fresh evergreens?


Leave a Reply