Last updated on October 3rd, 2015 at 01:09 am
Fast and Easy Toddler Smock to Sew
 by Traci Hudson
Thanks for joining me in the art of making clothes for your child! You’ll be pleased with how quick and easy it is to make pint-sized frocks in one afternoon. As a mother of one, I started selling play food and sewing patterns for your enjoyment. Please help support my dream and do not make copies of this free pattern, distribute copies of this pattern, or sell items made from this pattern.
Materials You’ll Need:
- Toddler Smock PDF – one page
- About half a yard of 45-inch material, or any scrap material that will accommodate the pattern provided.
- Two pieces of 1-inch ribbon, or 1/2-inch wide bias tape; 23 inches for the necktie and 44 inchs for the finishing edges.
Suggested Fabrics:
Any non-stretchy fabric will make for a great smock. Choose a cute calico or mod print with a contrasting solid ribbon or bias tape – let your imagination explore!
Printing and Cutting Directions:
The printable pattern is suitable for sizes 12-18 months if you print at 100% on letter-sized paper (8.5 x 11 inches). You can adjust the sizes with minimizing or maximizing the zoom – if you increase the size, try printing the pattern on a landscape (horizontal) page setup and remember that you can simply slide the pattern along the length of the fabric as you trace to lengthen the smock.
Also the seam allowances are included in the pattern size. Print on a heavy weight paper, such as cardstock and simply trace the pieces for a quick and easy project!
 Fold, trace and cut the following for your child’s smock:
1. Fold both sides of the fabric inwards to the middle.
2. For the front of the smock, trace along the fold and cut.
3. For the back of the smock, trace on second folded section; you want the end result to be two separate pieces.
Got everything cut? Great! Let’s move on to the sewing …<
Now that you have everything cut, sewing is the easy part! You’ll need to do the following to finish your toddler smock:
 1. With right sides facing, stitch, serge shoulders and sides together as in the diagram shown at right (the front piece is enlarged to illustrate fabric placement).
2. With smock remaining inside-out, fold the raw edges of the cuffs over and stitch/serge. (Now is your chance to experiment with one of those great decorative stitches on your machine! Don’t worry if it doesn’t come out perfectly – by lunch this smock will be gummed up with applesauce!)
Now that the smock is sewn together and cuffs hemmed, turn the smock right-side out and get ready for the last steps.
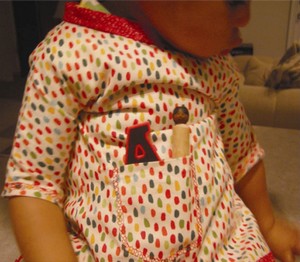
3. For the pocket, cut a simple U-shape from your fabric scraps, press raw edge under, and stitch to the right side of the front of the smock.
4. For the necktie and finishing edges, you really have three options:
a) If you are using ribbon for the finish, heat up your iron and press both the 23-inch and 44-inch ribbons in half, lengthwise, and follow step five.
b) If you are using store-bought bias tape, go directly to step five.
c) If you really want to make this smock all on your own, then you can make your own bias tape. There are a lot of great tutorials online for easy directions. Once you make your bias tape, collect $200 and go to step five.
5. With your desired finishing ribbon/tape, fold the 44-inch ribbon in half, lengthwise. Begin pinning the midpoint of the ribbon at the middle of the front of the smock and work your way along the bottom edges, up the back openings, ending at the top outer corners of the back neckline. Starting at the middle of the smock will ensure that your ribbon is pinned tautly and evenly. Once you have the ribbon pinned, stitch and move to the final step.
6. Finishing the necktie is similar to the finishing edges. Fold the 23-inch piece lengthwise, locate the midpoint of the ribbon and front of the neckline and pin the ribbon around its length. You will wind up with one 8-inch tail on each side of the back of the neckline. Stitch the finishing ribbon from end to end.
So that’s it – a perfectly pleasing smock made during nap time and just in time for lunch!
Designer and crafty mama Traci and her vivacious toddler enjoy exploring the world of handmade arts, Montessori-inspired activities, and cultural celebration.


Leave a Reply