Last updated on February 23rd, 2021 at 10:09 am
How to Knit a Felted Cat Bed –
Free Knitting Pattern
Wendy Johnson, the talented woman who designed this pattern, has a wonderful viewing gallery on Flicka of knitted cat beds in all kinds of colors and variations – as varied, in fact, as the pampered cats occupying them.
Wendy’s Kitty Bed Gallery is well worth a visit, especially if you plan on trying your hand at knitting this felted cat bed!
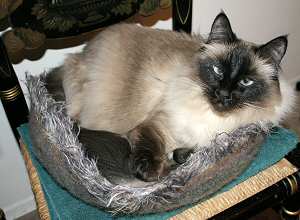
Lucy’s Kitty Bed — a Felted Cat Bed for the Kitty Who Has Everything!
by Wendy Johnson
I think of this as a Kitty Pi, because the shaping is based on the increases used in Elizabeth Zimmerman’s Pi Shawl. Think of it as a pie shell with your kitty as the filling!
You can use any bulky weight 100% wool yarn that will felt.
Materials
Noro Big Kureyon (bulky weight wool, 176 yards/skein) — 2 skeins (I used less than half of the second skein
Eyelash yarn (optional, for trim)
US size 11 (or larger!) dpns and 24″ circular needle
Directions
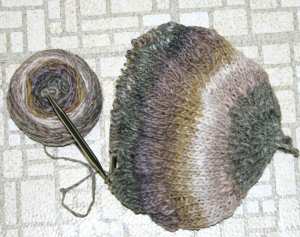
With Kureyon, cast on 9 stitches on dpns
Knit 1 round
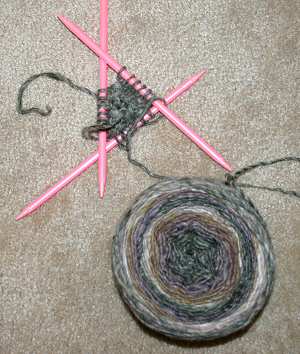
Knit 1 round, increasing by knitting into the front and back of each stitch — 18 stitches
And here’s what it looks like at this point:
Knit 3 rounds
Knit 1 round, increasing by knitting into the front and back of each stitch — 36 stitches
Knit 6 rounds
Knit 1 round, increasing by knitting into the front and back of each stitch — 72 stitches
Knit 12 rounds
Knit 1 round, increasing by knitting into the front and back of each stitch — 144 stitches
You can switch to your circular needle at this point.
Knit 30 rounds (or enough to get the pre-felted diameter you want)
Next round: (Knit 10, knit 2 together) 12 times
Knit 9 rounds straight.
Next round: (Knit 9, knit 2 together) 12 times
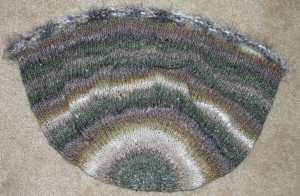
Knit five additional rounds holding one strand of eyelash yarn together with the bulky wool, and cast off on the 5th round
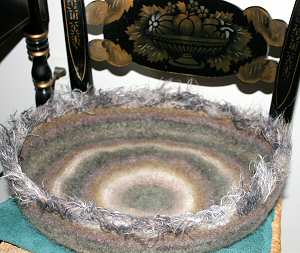
Here is your cat bed after knitting:
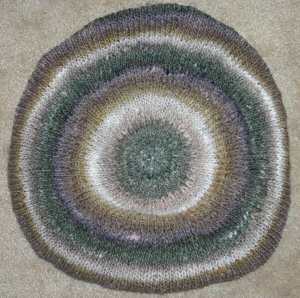
Weave in all yarn ends.
How to Felt the Cat Bed
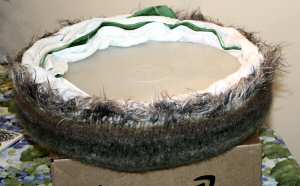
Felt the bed by placing it in a zippered pillowcase cover and washing it in the washing machine on a hot wash/cold rinse cycle with a bath towel in the washer for added friction, until it reaches the finished size you want.
I ran mine through two cycles, then I stretched it over a Tupperware pie carrier with a bath towel folded up and taped around it.
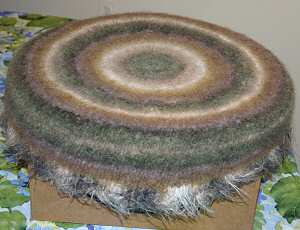
The finished size is approximately 17″ in diameter.
Note: I was a bit over-zealous in my blocking the first time around. But that’s the beauty of felting — after going through another cycle in the washer, it’s at the size I want now — about 15″ in diameter.
© 2003-2021 Wendy D. Johnson
You may view Wendy’s wonderful designer knitting blog at: WendyKnits.net


Nancy Garrison says
I had this pattern years ago and had made it for the cat(s) I had at that time. Disappointing the cats ignored it! Then I found a stray Siamese kitten that loved it. I named the kitty “Bug” and the bed became known as the “Bug Rug”. Unfortunately, in 2018 my house was destroyed in the Carr Fire and I not only lost my house, kitties* and this pattern. I have rebuilt the house, gotten new kitties but until now I hadn’t been able to replace this pattern. A BIG THANK YOU to you!
Nancy
*RIP…Bug, Chuck, Spike, and Louie