Last updated on March 7th, 2018 at 10:51 pm
Easy Paper Kites
20 Kites in 20 Minutes
Editor’s Note:
I am very happy to provide these instructions for one-page paper kites. The kites are perfect for
classroom construction, for home school use, scouts and guides activities, or just as easy summer crafts for kids. Each kite is made from one sheet of paper. You can use plain paper, colored paper, or decorate white paper in art class prior to making the kites for a group science project.
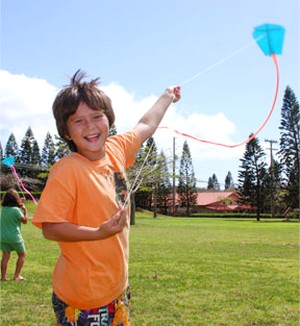
As a class volunteer, I helped a local teacher make these kites with his Grade 5 and 6 kids – and it was an absolute joy. The students loved each part of the project…but the smiles that came when they tried out their new paper kites was awesome. We had a beautiful breezy day, perfect for kite flying…and every one of the 33 paper kites made by our students was up and flying like a dream!
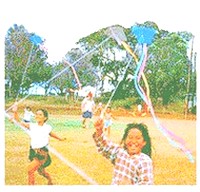 Since we even had other students coming over, eager to learn how to make these kites, I asked the Big Wind Kite Factory for permission to provide the instructions, and step-by-step photos featured here. For over 15 years this company has given kite making classes for children on the island of Moloka’i. These are the complete time tested instructions to get 20 kids making their own kites and flying them in 20 minutes.
I hope you enjoy your kite making as much as I did!
~ Jane Lake
Material list:
- 20 sheets of brightly colored 8 1/2″ x 11″ typing paper.
- 20 8″ bamboo bar-b-que shishkabab sticks.
- 1 roll of florescent surveyor’s flagging plastic tape (available at
any hardware store). - A plastic bag cut in a 1″ wide spiral all
around will also make a great tail. - 1 roll 1/2″wide masking tape or any type of plastic tape.
- 1 roll of string. (At least 200′, 6 to 10 feet for each child.)
- 20 pieces of 1″x 3″ cardboard on which to wind the string.
- Scissors.
- Hole punch. (optional)


Directions:
Fold a sheet of 8 1/2″ x 11″ paper in half to 8 1/2″ x 5 1/2″.
2. Fold again along the diagonal line A in Fig.2
3. Fold back one side forming kite shape in Fig.3 and place tape firmly along fold line AB.(No stick is needed here because the fold stiffens the paper and acts like a spine.)
Place bar-b-que stick from point C to D and tape it down firmly.
Cut off 6 to 10 feet of plastic ribbon and tape it to the bottom of the kite at B.
Flip kite over onto its back and fold the front flap back and forth until it stands straight up.(Otherwise it acts like a rudder and the kite spins around in circles.)
Punch a hole in the flap at E, about 1/3 down from the top point A.
Tie one end of the string to the hole and wind the other end onto the cardboard string winder.


Siani says
I am a 3rd grade teacher, and we did this craft yesterday in our art time. It was excellent! It was easy, used basic materials, and with the nice windy day we had the kites flew quite well. We used strips of newspaper for the tails. Thanks!
Jane Lake says
You are most welcome. I’m so happy that you and your students enjoyed making and flying these paper kites.
Tammy says
Would it be possible to replace the string with yarn?
Would it be possible to use crepe paper for the tails instead of surveyor’s plastic tape?
Jane Lake says
Yes, I think strong yarn would work quite well. Crepe paper streamers I’m not sure about; they might tear a little too easily, especially if they get a little rain or dew on them. But you can take a plastic grocery bag and cut nice long tail strips from that, and you’re recycling as well!
Carol Salmonson says
I am most interested in your free crafts. I’m a Grandma of four kids ages 3-7 yrs. old and every weekend they spend the night with us, Grandma and Grandpa and we have craft time, we are a fairly structured run family. We would feel blessed if you could keep sending us your free ideas and craft ideas. We love keeping them busy. We definitely are going to have to try the kite making craft. Too cute!