Last updated on September 7th, 2015 at 09:15 pm
Styrofoam Tombstones for Halloween
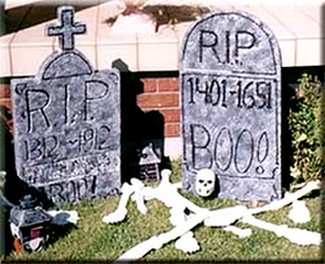
Turn your lawn into a Halloween graveyard with homemade styrofoam tombstones.
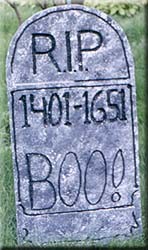
These are really easy to make and fun too! I haven’t included patterns, but you can print out the designs shown here and copy them or be creative and design your own.
Material:
- Styrofoam sheet (20×40)
- Craft Spray Paint (Grey)
- Acrylic Paints (Black and White)
- Sea Sponge
- Carving Tool (Woodburning tool and/or knife)
- Black Marker
- 24″ of Dowel or Bamboo stick
How to:
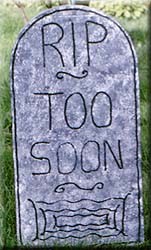
 Begin by drawing the outline of your tombstone in the desired shape and size. My tombstones measure about 20 x 40 inches, but you can make them smaller.
I used a woodburning tool to carve out the lettering and design, but you can use a knife if you don’t have a burning tool. Draw your lettering and any design that you would like carved and then trace over your markings with a woodburning tool or gently cut along the outline of your lettering with a knife and dig small pieces out evenly to form your engraving. If you use a woodburning tool, be sure to work in a well ventilated area!
Once your design is carved and you’re happy with it, spray paint your entire stone with grey spray paint and allow the paint to dry completely.
Using a puddle of white and a separate puddle of black paint, dip a sea sponge first in the white paint and then in the black paint. Blot the excess paint just once on a paper towel and begin blotting patches over the entire grey painted surface of your tombstone. This will create the effect of stone. Continue applying this mixture of paint until the entire stone has been marked with this paint mixture.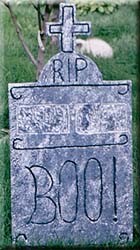
With a paintbrush, fill in all of the carved areas using black paint. To make these stones stand in the ground, I used two pieces of dowel about one foot long. Push about five inches of the dowel up through the bottom of the stone, being extra careful to go straight through the centre of the foam. The remaining length of dowel will be pushed through the ground, hold the dowels as far as you can while pushing the dowel into the ground and then for the final few inches of dowel remaining, gently push from the top of the tombstone, straight into the ground. The remaining few inches will be pushed through the foam and the ground.
I also added a planter behind the stone to give a little extra support against the wind. If you have a place that offers a little back support to the stone, such as a tree or shrub, place your stone in front for the extra support.
Copyright © 1999-2015 Susan Spatone All rights reserved.


Leave a Reply