Last updated on October 31st, 2021 at 02:34 am
By Jane Lake
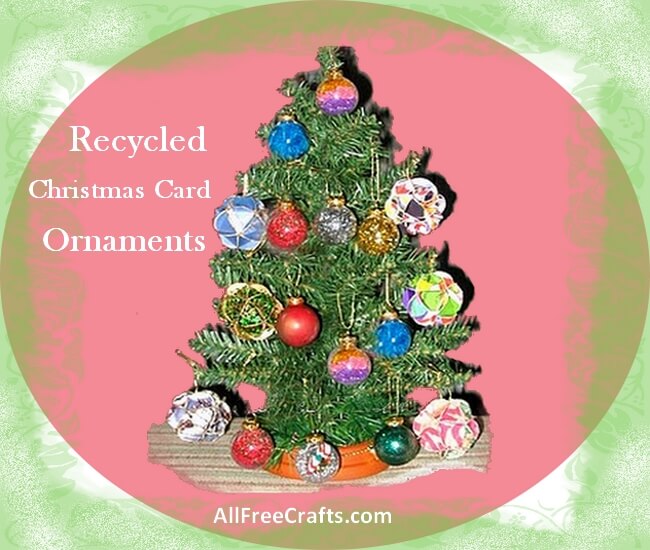
When I originally posted this craft project, this page was one of the few where you could find free instructions on how to reuse Christmas cards to make colorful geometric ornaments for your Christmas tree.
These recycled Christmas card ornaments are still so effective, you’ll want to make a whole collection. Don’t forget to save your Christmas cards this year to make some more crafts for the next holiday season.
Craft Supplies
- used Christmas cards
- pencil
- scissors
- tacky glue
- gold cord or ribbon
- round template or large coin as shown below
- optional: glitter hot glue sticks, glitter or sequins

Craft Instructions:
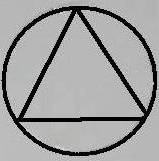
On the back of an old Christmas card, trace around a large coin (I used a Canadian toonie). Cut out this circle. Trace around the coin again, and this time draw an equal sided triangle on the inside of the circle, as shown on our template above. Cut out the triangle.
Cut the face page from a used Christmas card. Use the coin, or your cardboard circle template, to trace 20 circles on the blank side of this card. Trace the triangle shape inside each of these circles, then cut out all the circles.
On each circle, fold up the sides of the triangle. This can be a bit tricky at first, but with practice it is possible to fold up all the triangle shapes without having lines to follow. If so, you can skip tracing the triangles.
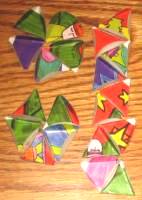
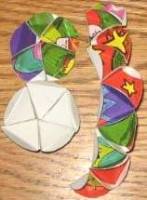
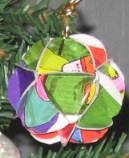
Set out the folded triangle shapes as shown in the pictures to the left. The top and bottom parts of the ornament are formed by gluing five triangle shapes together. The center section is formed by gluing 10 triangle shapes in a line. The second picture shows the triangles glued together, with the bottom section turned upside down to show you the back view.
Tacky glue is much better than white glue for this project, because it enables you to attach one triangle to the next by pinching the side tabs together for a few seconds instead of using clips while the glue dries.
Sometimes there is a small hole at the center of the top and bottom sections; this is normal. You may use the hole in the top section to secure a gold cord or ribbon hanger. Just loop the cord to suitable length and knot the ends. Feed the loop through the top hole and pull through, securing the knot on the inside with a dab of tacky glue.
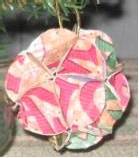
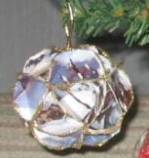
Once your ornament sections are dry and holding together securely, continue construction by gluing both ends of the center section together in a circular band.
Apply tacky glue to each outside tab of the top section and place on top of the center band, aligning all the tabs. It will not be an exact fit. Pinch together two sets of tabs until the tacky glue holds, then do another pair, until all the tabs are holding. Allow this to dry before doing the same with the bottom section.
Your recycled Christmas card ornament is now complete. If you want to recycle the back half of the Christmas card, make another ornament in the same way and spray paint in Christmas colors. You can add embellishments like glitter or sequins or give the ornament a more structured look by outlining each seam in colored or gold glitter hot glue.


Leave a Reply