Last updated on February 27th, 2021 at 04:28 pm
This plump round pillow sewing pattern is so easy – you only need to sew one seam – that it’s difficult to believe the design impact it can bring to your decor. Add a couple to your bed, along with a neck roll pillow, and you have a designer look without the expense of designer bed linens.
by Jane Lake
This pattern would work equally well on the sofa, or to add a touch of comfort to an occasional chair or love seat.
The pillow itself is surprisingly forgiving – you can punch it down to suit your style of reclining pleasure, then plump it back up quite easily. Finally, choose washable fabrics and cleaning this pillow is a breeze – just untie the cord, wash and dry the cover, reassemble and return it to its original shape!
Easy Round Pillow – Supplies:
- two pieces of fabric, each large enough to cut out a 30″ diameter circle
- fibrefill pillow stuffing
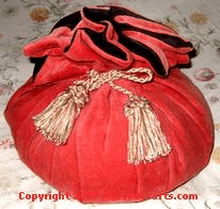
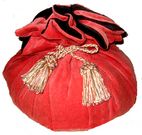
- decorative cord, with tasseled ends
- elastic band
- sewing thread
- sewing needle
- sewing machine
- scissors
- measuring tape
Sewing Pattern Instructions
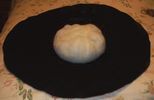
1. Cut two 30″ diameter circles from contrasting fabric – one circle in the main color, or in patterned fabric, and the second one in a contrasting color.
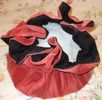
2. Place the fabric circles right sides together and sew all around the perimeter using a 1/2 inch seam. Leave about five inches unsewn; turn the fabric so the right sides are to the outside. Slip stitch the opening closed by hand.
3. Shape the pillow stuffing into a firm, round ball. Hint: use lots of stuffing to give the pillow a resilient, nicely plump, round form. Place the stuffing in the middle of the inside fabric circle (the contrasting color, meant to go on on the inside).
4. Gather the sides of the pillow up, so they meet at the center top of the stuffing.
5. Secure the top of the pillow with a strong elastic band, or a length of elastic cord tied in place. This step isn’t strictly necessary, but I found that the tasselled cord by itself tended to come undone under the strain. An elastic band takes the pressure off the cord.
6. Tie a decorative cord around the elastic band. Done!


Leave a Reply