All Free Crafts

Free Crafts, DIY Projects and Patterns to Make Homemade Gifts

  • Craft Projects
    • Angels
    • Bath and Body
    • Gifts in a Jar
      • The Bakery
      • Soups and Sides
      • Sweets and Treats
      • Pickles and Preserves
      • Decorative Jars and Bottles
    • Paper Crafts
      • Decorations
      • Paper Rolls
      • Paper Plate Crafts
      • Homemade Cards
    • Kid’s Crafts
    • Easy Homemade Gifts
      • Decoupage Crafts
      • Personal Homemade Gifts
      • Candle Making
      • Objets d’art
      • House Gifts
      • Silk and Faux Florals
  • Celebrations
    • Christmas Crafts
      • Santa Crafts
      • Snowman Crafts
      • Christmas Displays
      • Christmas Ornaments
      • Recycled Greeting Cards
    • Easter Crafts
      • Easter Baskets
      • Easter Bunnies
      • Easter Eggs
      • Easter Projects
    • Valentine Crafts
      • Hearts and Crafts
      • Valentines for Kids
      • Romantic Ideas and Projects
      • Homemade Valentine Treats
    • Halloween
      • Pumpkin Crafts
      • Ghosts and Ghouls
      • Witch Crafts
      • Halloween Recipes, Games, Activities
      • Homemade Costumes
    • Thanksgiving
    • Mother’s Day
    • Patriotic Crafts
    • St Patrick’s Day Crafts
  • Patterns
    • Crochet
      • Crocheted Clothing and Accessories
      • Afghans and Blankets
      • Bags, Purses, Wallets
      • Kitchen Crochet
      • Quick and Easy Crochet Patterns
      • Crocheted Toys
      • Vintage Crochet Patterns
      • Filet Crochet
      • Baby Crochet Patterns
    • Knitting
      • Knitting Patterns for Home
      • Knitted Winter Accessories
      • Easy Knitted Gifts
      • Vintage Knitting Patterns
    • Sewing
  • Recycling
    • Cardboard
    • Containers
    • Denim
    • Greeting Cards
    • Household Goods
    • Lightbulbs
    • Recycled Paper
  • Nature
    • Birding
    • Botanicals
    • Bugs and Insects
    • Pine Cone Crafts
    • Shells, Sticks and Stones
  • Gardening
    • Annuals
    • Perennials
    • Clay Pot Crafts
    • Fall
    • Garden Crafts and Projects
    • Herbs
    • Indoor Gardening
AllFreeCrafts » Nature » Shells, Sticks and Stones » Ladybug Rocks

Ladybug Rocks

Sharing is Caring!
PinterestFacebookEmail

Last updated on March 9th, 2020 at 12:30 am

lbugsleaf (3K)Easy Rock Painting: Make Ladybug Rocks!ladybug rocks

by Abigail Beal

With summer coming many of us see ladybugs everywhere. Why not create some special ladybugs you can keep on the porch or even inside in some special places? This is a fun craft that kids can do. They may need some help with putting the tape on to evenly paint a straight line, and you also may want to handle the permanent marker (for putting dots onto the ladybug) – but otherwise should be able to negotiate the project just fine on their own.

This craft does involve painting parts of the ladybugs and then leaving it overnight (or for at least four hours) to dry. This is very important to make sure the paint sets. This is the perfect craft for a weekend project to do with children – by the end of the weekend the bugs are done. Just know going into it that this is not an instant project so children won’t be disappointed. lbugsm2 (1K)

Materials You Will Use:

– Rocks that can fit into the palm of your hand. Select oval or rounded rocks. Can use larger rocks if you wish to.

– Red and black tempura paints

– Paintbrushes with assorted widths – medium to fine sized points

– A black permanent marker

– Masking tape

– Scissors

Optional: gold or silver metallic paint pen (these are often toxic and are not child safe, if using with a small child be sure they do not put this in their mouths!)

lbugreading (5K)What You do:

1. Clean your rocks with warm soapy water and dish detergent. Let rocks dry.

2. Paint rocks red and allow them to dry. Drying may take four hours, olr they may need to dry overnight. It is very important to let rocks dry completely before going onto the next step.

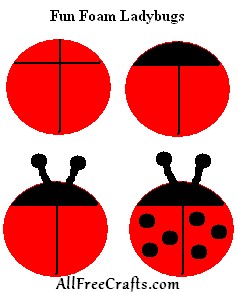
3. Take a piece of masking tape the width of your rock. We will now paint the ladybug’s head on. Place the masking tape on about 1/3 of the way onto the rock, creating a head. Now use your black paint and paint a head for the ladybug. Keep the tape on while the black paint is drying.

***When placing tape onto your ladybug, you only need to press the side that you will be painting onto the ladybug, so do not press the entire piece of tape down. Only press the side that will painted down.***

Remember: by using the masking tape, you are creating very clean and even lines. Your ladybugs will have a very tidy look to them.

4. Next we will create the black stripe down the ladybug’s back. Take two pieces of masking tape and put them on the ladybug’s back, allowing for a thin stripe of red between them. Depending on how large your rock is, this could be 1/8th of an inch or even 1/4 of an inch. Paint this stripe black and allow the tape to remain on until dry.

5. Now it is time to draw dots on the ladybug’s back. You can use paint or even the permanent marker. It is your choice. Most ladybugs have many dots, but if your rock is small then you will probably want to put only three or four spots on each side of the ladybug’s back. Leaving space for the red to show through and provide contrast to the black dots is best. Once this is dry you are done!

6. If you have several children making ladybugs consider writing their name in metallic paint pen along the side of the ladybug’s body. Your bugs are ready for summer!
Sharing is Caring!
PinterestFacebookEmail

Related Posts:

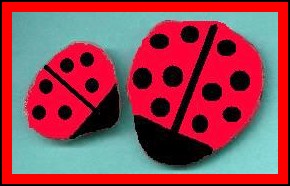
  • ladybug diagram
    Ladybugs
  • rock painting - mouse
    Painting on River Rocks
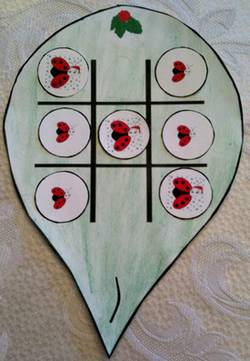
  • ladybug tic-tac-toe for Christmas
    Ladybug Game
  • lovebugs
    Footprint Love Bug
  • ladybug figure holding pompom ladybugs
    Pompom Ladybugs
  • one ladybug
    Ladybug

By Jane Lake Filed Under: Bugs and Insects, Lessons and Projects, Shells, Sticks and Stones

Leave a Reply Cancel reply

Your email address will not be published. Required fields are marked *

Please explore ALL our FREE CRAFTS!

Recent Posts

  • How to Preserve Garden Herbs
  • Easy Willow or Vine Wreath DIY
  • Construction Paper Maple Leaf – DIY plus Video
  • How to Grow Cress Egg Heads
  • Happy Easter Bunny Signs
  • Bread Tag Weatherproof Bird House Roof

Basic Knitted Dish Cloth

Dishcloth – Basic Knitted Dishcloth Pattern

six hand knitted dishcloths is many colors

Free basic knitted dishcloth pattern, very easy to knit in cotton yarn.

...Free Home Knitting Patterns

Build the Right Bird House

How to Build the Right Bird House

build the right birdhouse

How to build the right bird house for the birds you want to attract, including dimensions, entrance hole sizes, check list of tips.

Homemade Hummingbird Food

Hummingbird Food Recipe and Care Tips

hummingbird food recipe and placement tips banner

Homemade hummingbird food; make an ant moat; storage, placement, cleaning and companion flowers.

How to Attract Orioles

Homemade Oriole Food

male Baltimore oriole on orange feeder

Homemade oriole food from a sugar and water recipe; attracting orioles with other foods and nesting materials.

More Birding...

Two Needle Knitted Mittens

free knitting patterns for two needle mittens

Free knitting pattern to make traditional two needle mittens for sizes child to adult.

More Free Winter Knitting Patterns...

Categories

Privacy Policy

Terms of Service

Copyright © 2025 ALLFREECRAFTS.COM