Last updated on April 18th, 2024 at 01:23 am
How to Sew A Quick and Easy Window Valance
by Julie Lohmeier
If you can sew a straight line, you can create this quick and easy window valance in just an hour.
After you’ve found the perfect fabric, fold the material, putting the right sides facing each other. Lay the fabric so the pattern (if any) is going horizontally.
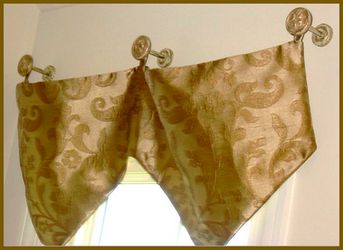
Make a paper pattern or trace the outline of the valance. It could be straight, scalloped, or with points like this example. Make the height 1/3 – 1/4 the height of your window and the width a few inches wider than the window, including the trim around it.
Cut the fabric. Pin the sides together – with right sides still together – to keep the fabric from moving as you sew. Sew all sides except one. If the side you leave open is large (I’d recommend the long top side), leave the middle half open.
Pull the fabric right side out. Press with an iron. Hand stitch the opening closed. Press the seam.
If you’d like to add trim to your valance, pin the trim along the edge of the fabric with trim laying toward the CENTER of the valance. As you pull it right side out, the trim will properly lay on the outside of the seam. Sew very close to edge of the trim so that it hangs evenly.
Make the loops to hang the valance from the material or buy matching cord. For matching material loops, make strips twice as long and twice as wide as you wish the loops to be. Add half an inch to both the width and length. Sew as you did the valance with right sides together, leaving a small opening. Again turn right side out, press, stitch up open side, and press. For cord, simply cut a length that’s double the measurement you desire from the top of the valance to the holder. Make as many loops as you have hangars.
Ideally, the loops should be sewn into the top seam. That means the loop should be inside the valance when the right sides were together as you sewed it up, folded in half. Then when you sew it all together, the end of the loop is hidden neatly in the top seam. If that’s confusing or too much bother, just double up the loops you made above, and hand sew them on to the valance. Be sure to place them even across the top and where the hangars will be.
Secure the valance holders to your window trim or drywall (use drywall anchors if you are not going into wood), then hang your valance. Now, you have a custom valance in about an hour.
Author Julie Lohmeier is the veteran of numerous home remodeling and building projects. From working hands on and doing much of the work herself to hiring contractors and construction manager, she has seen the entire spectrum of home improvement. She shares her remodeling tips, home decorating ideas, and other various rants at My Home Redux and you may enjoy her Decorating with Sheets article with simple instructions for curtains, swags, pillows and even a round table cloth.


Leave a Reply