Last updated on October 29th, 2025 at 07:11 pm
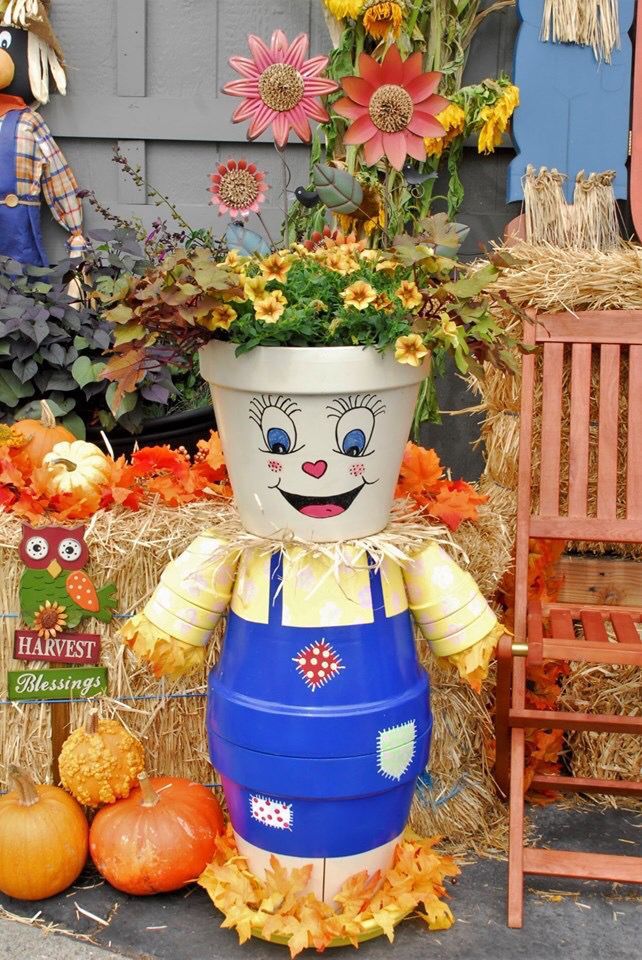
Put your extra clay pots or terra cotta pots to good use and make yourself a clay pot scarecrow for Fall or Halloween decorating.
Supplies:
- 2 clay pots 8 inches
- 1 clay saucer 10 inches
- 1 clay pot 6 inches
- 1 clay saucer 6 inches
- 8 clay pots 2 inches
- Hot glue and gun
- E6000 or Household Goop Glue
- 4 chenille stems
- 8 buttons, larger than the holes in the 2 inch clay pot bottoms
- Large buttons for the shirt and pants
- Patio Paints, colours of choice
- Yellow Raffia
- Medium size straw hat
- black and orange felt scraps
More Scarecrow Crafts: Yarn Doll Scarecrow, Yarn Doll Scarecrow Wreath, Scarecrow Doll on a Swing, Flop Mop Scarecrow, Happy Hat Scarecrow Wreath, Sammy Scarecrow Wreath, Paint Stick Scarecrow, Scarecrows in a Pot.
How to Make a Clay Pot Scarecrow
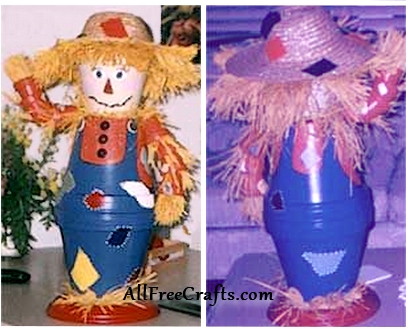
Paint the base colour of all your clay pots, referring to photo for colours. Allow the paint to dry completely.
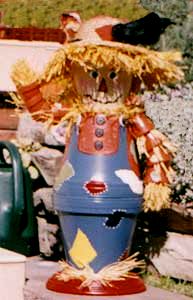
Glue the pots together as shown in the photo. The only piece you cannot see in the photo, at right, is the six inch saucer which is glued to the top of the six inch pot. It is glued with the bottom up and is used only to hold the hat securely in place. Allow this glue to dry for at least 2 days before disturbing.
Now you need to paint some patches, the outline for his pants (I’ve shown a front and back view, above, to show how it is done) and add some little lines around each patch so that it appears each patch has been sewn onto his pants and shirt. I used a blue paint for the pants and orange paint for the arms and shirt. I sponged on white paint over the shirt area to dull the orange a little.
Paint the face as shown in the photo and add little painted stitch marks (can’t be seen in the photo) around the nose and across the mouth. Glue on a few shirt buttons and couple of buttons for the pant suspenders.
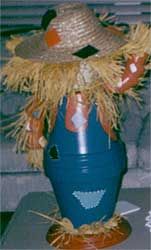
Glue felt pieces to your straw hat and on the inside rim of the hat glue tied together strands of raffia all around the perimeter of the hat rim. You can trim the excess raffia once the hat is placed on the figure.
To attach the arms, begin by threading a button through a chenille stem, going inside one button hole and through another. Twist the chenille stem together to secure the button to the stem. Feed the chenille stem through the hole in a 2 inch clay pot so that the button is on the inside of the pot and covering the hole at the bottom of the pot. On the same stem thread another button about 1 1/2 inches above your first clay pot going through one button hole and out the other and place a dab of glue on the button. Feed another pot onto the chenille stem with the second button covering the inside of the clay pot hole. The glue will help to hold this clay pot in place. Continue feeding pots in the same manner until you have four pots in total. This is one arm. Now repeat the same procedure for the second arm.
Take two chenille stems and twist one end from each together very securely; these will support your arms in place. Now take one completely assembled arm and join the chenille stem from the arm to the two chenille stems you just joined together. Be sure to twist very securely. On the second arm, form a loop at the top of the arm with the chenille stem and secure the loop firmly. Feed this loop through the two chenille stems you joined together.
You should have a piece of chenille stem with the two arms attached to it. Take this stem and wrap it around the neck of the clay pot figure to be sure it fits and lining up the arms to the sides of the figure (do not attach it yet). You may need to add an additional chenille stem to fit all the way around the neck.
Decorate around the scarecrow by taking pieces of raffia and knotting them around the chenille stem. Go all the way along the stem, attaching pieces of raffia until you have the desired fullness. Just wrap the raffia filled stem around the neck and pull the stem taut, while twisting the two ends of the chenille stems to secure in place around the neck.
Take a long piece of raffia (several strands) and tie around the base of figure as shown in photo. Tie a bow with raffia and secure with glue to the bottom clay pot saucer.
Tie little bunches of raffia together and add a dab of hot glue to the tied area. Push it into the little pots (arms) leaving a little raffia extending over the edges of the small pots. For hands, bunch enough raffia to almost fill the pot and leaving two or three strands, each about five inches long, tie together and glue on the inside of the pot. Be sure this bunch is secure as it will be used to tie the arm to the hat.
Glue your hat to the head of the figure and allow to dry completely.

Take the long strands of raffia from the hand area and feed them through the weave about 1 inch in from the brim of the hat. Feed the raffia back through another weave so the raffia is once again under the brim of the hat. Knot the raffia strands together to hold the arm upright. I added a faux crow to the hat, although this was just after I took the picture (it looks really cute).
Finally, stand back take a look and give the little guy a haircut. Trim away raffia from the hair and arms and neck area until you’re happy and that’s it, all done!


Leave a Reply