Last updated on January 5th, 2025 at 09:15 pm
Wrapping paper usually litters the floor on Christmas Day and you’ll often have paper left over after wrapping gifts at other times of the year. This is a creative way to recycle surplus wrapping paper by reusing it to make beautiful paper bows.
You may also like a similar project for these pretty recycled greeting card bows or learn how to make Tiny DIY Gift Bags from leftover gift wrap or scrapbook paper.
This is a nice recycling craft idea for the kids to do after Christmas – just give them the supplies and let them make you a stash of gift wrapping bows for the next holiday season.
How to Make Recycled Wrapping Paper Bows
Supplies:
- left over wrapping paper
- invisible tape such as Scotch Tape
- small piece of cardboard
- scissors
- ruler
- optional: small piece of double-sided tape for each bow
Project Instructions:
1. Cut the wrapping paper into strips that are approximately four inches long and 1/2 inch to 3/4 inch wide. There’s no need to use a ruler to cut each strip, but try to make them all roughly the same.
2. Cut a 1½ inch square of thin cardboard (cereal box or food box cardboard works well for this).
3. Take a cut strip of wrapping paper and fold it over into a curled loop, with the plain sides together. Bring one end about an 1/8 inch away from the other end and hold in place with a small piece of invisible tape, allowing the tape to extend past both ends about 1/8 inch.
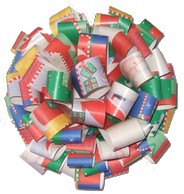
4. Stick the first loop down on the cardboard square, centered at the edge of one side. Repeat with three more paper loops, so you have a loop in the middle of each side.
5. Take four more loops and stick them down at the corners of the square. At this point, your bow should look like the photo here:
Fix loops of wrapping paper to a small square of cardboard.
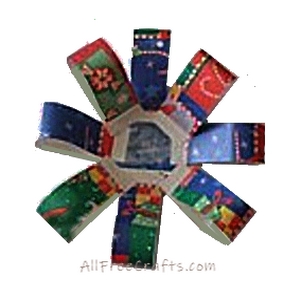
6. Continue making paper loops, sticking each one down just in front of, and between two loops from the previous row. The bow will begin to fill in, like this:
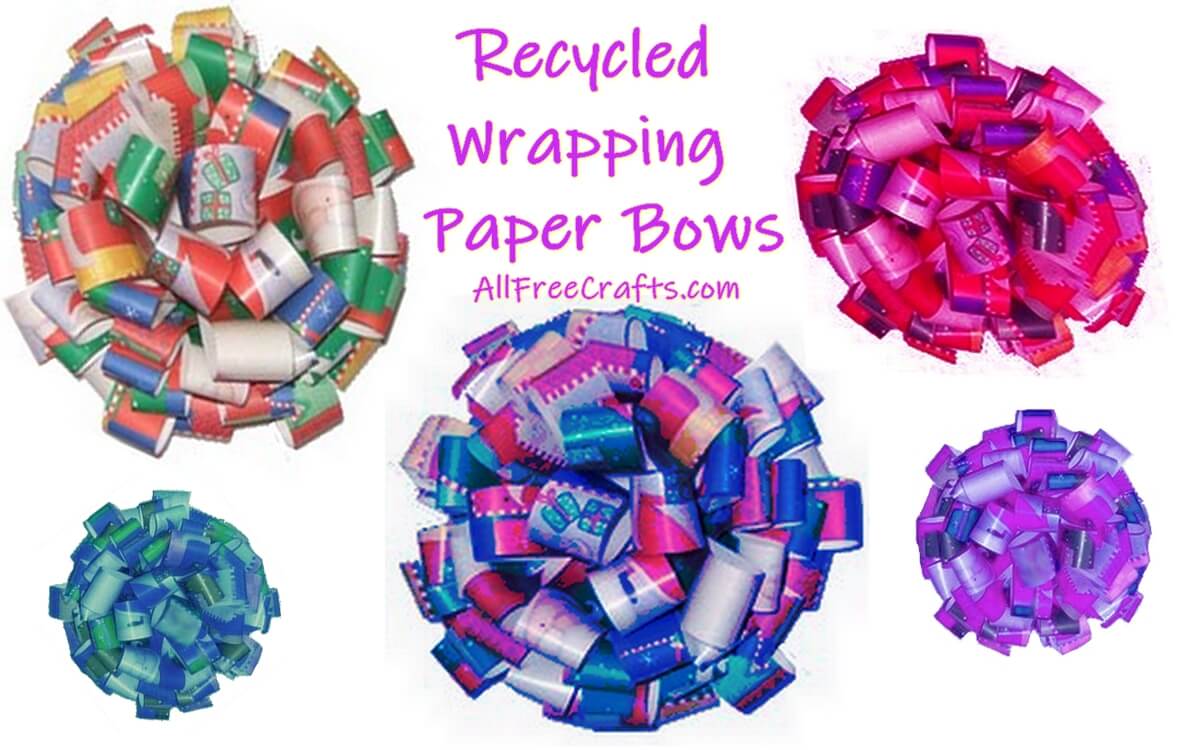
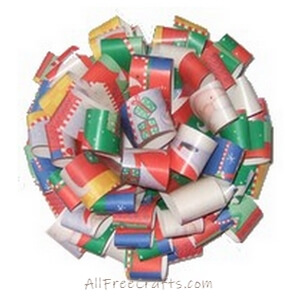
7. When you get to the center of the small square, make a single loop and stick this down right in the middle. Fluff the bow gently with your fingers and it should look like the completed paper bow here:
8. Stick the bow onto a wrapped gift by making a loop of invisible tape with the sticky side out or, if you wish, use a small tab of double-sided tape instead.


Leave a Reply