Last updated on January 17th, 2015 at 06:17 pm
Rubber Stamp Positioner Tool
This is a simple homemade tool that will help you accurately position your rubber stamps. You can buy similar tools, but this version is easy and inexpensive to make yourself – and it works just as well!
Material:
- 3 wooden blocks – I used wooden blocks from a child’s building block set; two that measure about 3 inches by 1 1/2 inches and one that measures about half of that, but you can use any wood pieces with similar measurements for this project
- Tacky glue or wood glue
- 5 x 7 acrylic or glass piece (I used a piece of glass taken from a picture frame)

How to:
I’m fairly new to rubber stamping and I was having a difficult time making a perfect clear impression and sometimes needed to restamp an image. Without a little help, it is almost impossible to line up a stamp perfectly to make an exact impression, exactly where you want it to go. I found the rubber stamp positioning tools in the craft stores to be much too expensive, but also knew that I could make one that would work, for a fraction of the cost!
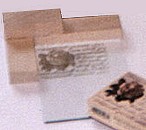
Refer to the photo, and glue your wood pieces together to form an L shape, allow the glue to dry.
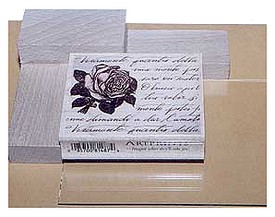
To use your positioner, you place your glass and L shape together as shown in photo, making sure the glass is as tightly fitted to the corner of the wood blocks as possible. Position your inked stamp, fitting tight to the corner and make an impression on the glass.
 Now, remove your stamp and you’ll see an impression of your stamp on the glass (see photo at right) and you can move your positioner around your artwork, until you see the perfect placement of the image you have stamped on the glass.
Once you find the exact placement for your image, holding your wood guide securely in place, slide the glass away from the wood, careflully position your rubber stamp tight to the corner of your L and press down to mark your image.
If you have never tried one of these tools, it’s well worth the effort to make one. They are very inexpensive to make yourself and will make your stamping impressions so much more perfect!
Copyright © 1999-2013 Susan Spatone. Published with permission from CraftAtHome.com


Martha Murphy says
Thank you! I don’t stamp often, and the tools sold for this purpose seem too expensive and seldom needed by me.