Easy Homemade Gifts
...see more
Make a CommentMore Paper Crafts:
Winter Wishes Card
Victorian Fan
Paper Heart Garland
Paper Doily Sachet
Papered Hearts
Victorian Valentines
How to Make a Rose Motif Greeting Card
This homemade greeting card with a rose theme is both feminine and elegant; the fact that every card is individually handmade, so that each one will be a little bit different, just increases the appeal.
Copyright © 1999-2008 Susan Spatone
Published with permission from CraftAtHome.com
8 1/2 x 11 Sheet, white card stock (I used 110lb paper)
Gold embossing powder
Green and Red water colour pencils
Pigment ink stamp pad (I used a metallic green sage)
Craft foam square
Silk Ribbon Scrap
Single hole punch
Deckle edge scissors
Scissors
Glue stick
Craft knife
Large and small single rose stamp
Heat gun (embossing tool)How to:
Cut your sheet of card stock, lengthwise, so that you have a sheet of paper that measures 5 1/2 x 11 inches. Using your deckle edge scissors, cut the shortest (width) edges (2 edges) of your sheet. Cut only enough of the sheet to create a deckled edge.
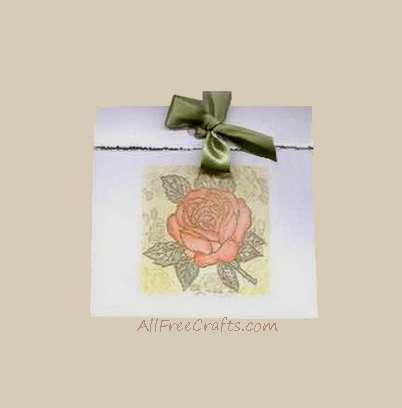
Lay your sheet flat (lengthwise) and fold down 1 inch from the top. Leaving your fold, folded, now fold your sheet in half. You should have a card that is folded as shown in the photo.
On the left over section of card stock (you can use a lighter weight paper for this, but make sure it is at least a 67lb weight), stamp your large rose, using a pigment stamp pad. Sprinkle embossing powder over your stamped image, making sure that powder has covered all the stamped areas and then, shake away the excess powder and apply your heat gun to the powder. Apply only enough heat to raise the powder and be careful not to burn your paper.
Using a craft knife, cut out your rose. Stay as close to the embossed edge as possible. You want a nice clean edge to attach this rose to your card.
Using water colour pencils, colour your rose with red and your leaves with green. You may choose to use markers or crayons or regular coloured pencils for this. To colour with water pencils, simply colour around the edge of all the embossed areas and with a wet paint brush, pull the colour toward the center. If you have never used water colour pencils, you may want to practice a little first.
Set your rose aside and allow the colouring to dry.
Cut a square of craft foam using your deckle edge scissors. Using these scissors will create a nicer edge when you stamp. The size of your square will need to be just slightly larger than your large rose impression. You may be able to use the actual wood block of your rose rubber stamp as a template.
Apply green pigment ink to your foam cut out. Don't worry about applying the ink evenly, just be sure to cover the entire piece of foam. Stamp the foam on a blank piece of paper to remove a little of the excess ink and then, stamp an impression on the front center of the card (refer to photo for placement).
Using your small rose rubber stamp, stamp random impressions on top of the foam impression you just created. To prevent your impressions from extending over the edge of your foam impression, place a sheet of paper along the edge (be careful not to smear your ink) to prevent the rose from being stamped outside of the green area. I stamped all along the edge of the green square and re-applied ink to my stamp after 2 impressions were made. You can see on my card that some rose impressions are lighter than others. I also, didn't worry about making sure the entire rose appeared on the card, I just wanted a messy look to the placement of the small roses.
With your heat gun, apply just enough heat to your stamped area so that the ink will dry. Pigment ink takes quite a bit of time to dry completely and you need to have dry ink before proceeding to the next step.
Now that your ink is dry, apply an even coat of glue (glue stick) to the back of the large rose that you have coloured and glue it to the center of your card (see photo for placement). Press firmly to seal all the edges of your rose.
Punch two holes into the small top fold center of your card, placing your holes approximately one inch apart (you don't want punched holes showing at the back of the card, so with your card folded, mark an outline around the holes you just punched onto the area of the card that your rose has been attached. Punch your holes and then feed your ribbon strand from the inside of the card to the outside and tie in a bow. Tie your bow loosely, so that it can be opened easily.
On the inside of the card, I repeated the impression, without applying the embossed rose and added my message. This card was made for a couple that just purchased a home and was attached to a food gift basket. It really did look pretty and there is no need to use an envelope for this card, it's just too pretty to tuck inside an envelope.
There are 2 comments
Oct 21, 2009 - 19:18
Very nice site!
Sep 15, 2009 - 15:46
Very nice site!
Leave a Comment
Powered by TalkBack
1


