Last updated on February 19th, 2021 at 10:18 pm
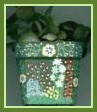

Paint markers make it easy to transform ordinary green plant containers into fanciful flowered pots.
Propagate your own house plants to go with these and you’ll have an economical version of expensive designer plant decorations.
Craft Supplies:
- plastic plant pots
- house plants suitable for easy propagation such as jade plant, spider plant or philodendron
- acrylic paint markers in red, blue, yellow, silver, white and pink
- rooting hormone
- potting soil
- drinking straw
- clear plastic bag
Craft Instructions:
Wash the pots in soap and water; rinse well and dry.
The painted flowers shown on this project are easy to do with paint markers as there’s very nothing complicated about the designs. Just practice a few times on paper first and you’ll be ready to transfer the designs to your pots.
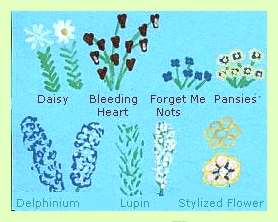
The diagram at right showns the beginning of several plant types, along with the finished flower. Often, small contrasting dots or single strokes of a contrasting color are all that is needed to compete the flower design.
Propagation Methods:
To propagate a spider plant, you can simply cut well-developed plantlets from the mother plant and suspend in water until root growth occurs then transplant to the decorated pot for gift giving. Philodendron and jade plant cuttings, along with many other house plants, will also root well when placed in water.
If you prefer to propagate plants directly in the pot, use sterile potting soil. Dip your cuttings in rooting hormone then plant them in the soil. Cover the potted cutting with a clear plastic bag. This keeps the humidity high and creates a miniature greenhouse atmosphere.
Fasten the bag in place with an rubber band around the pot, then poke a drinking straw under the band and blow the bag up like a balloon. This keeps the bag from touching the plant. You should see moisture droplets gather on the sides of the bag in a fine mist. If the moisture contact is too high, and the water drops are streaming down the bag, remove it and let the pot and plant dry out for a while before replacing the bag.
Roots will develop on your new cuttings in just a few weeks. At this time, you can remove the bag and the plant will survive with normal treatment. The smaller photo (above) shows a propagated spider plant, about six weeks old.


Leave a Reply