Last updated on February 21st, 2016 at 10:43 pm
Origami Bunnies Made from Colored Sticky Note Squares
How to Make Paper Squares into Paper Bunnies
By Jane Lake
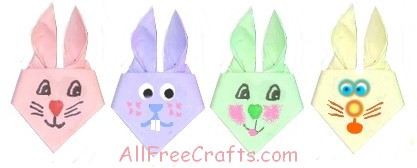
These origami paper bunnies are made from different colors of square sticky notes, but you can also make them from squares of plain paper or gift wrap as well.
You’ll find lots of uses for origami paper bunnies. Add a magnet to the back for paper bunny fridgies, or glue one to the front of a homemade Easter card as a three-dimensional decoration. Of course, they make great additions to Easter baskets or wreaths, and lovely little Easter gifts for anyone.
Just follow the step-by-step photos and our free craft directions to make your own paper Easter bunnies!
 What You Will Need:
- 3 inch square sticky note paper, such as PostIt Notes, or other paper squares
- markers, pencil crayons or paint
- optional: plastic movable eyes, small buttons or pompoms for noses etc.
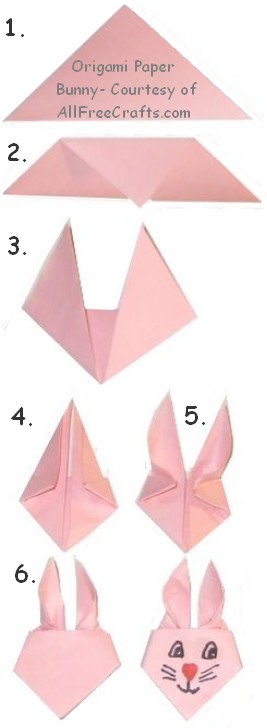
What You Do:
1. Take a square of paper and fold it in half diagonally.
2. Fold the top corner (both layers together) down, so the tip of the corner meets the center of the other side.
3. Fold the left corner and the right corner up to the center.
4. Fold the top left side and the top right side in toward the center. Press the folds down firmly with your fingers. These folds will be the bunny ears.
5. Carefully open out the ears as shown.
6. The next step is a little tricky. When you turn the bunny head around, you will find that the ears are pointing backwards! Hold the bottom of the head firmly with one hand. With the other hand, grasp the bottom of an ear and turn it gently around. Be careful not to tear the paper as you turn the ear! This step needs a little practice because it combines a twisting movement and a fold together. Once you get the hang of it though, you’ll be able to make lots of origami paper bunnies very quickly.
Finishing: Now all you need to finish the bunny is to draw a face. You could glue on a small pompom or button nose, or plastic movable eyes, but you can also draw a wide range of different facial expressions using just colored pencils or markers.
Tips:
We made a great origami paper bunny from a piece of computer paper, folding up one corner on the diagonal and cutting off the excess top to make an eight inch square. It worked very well to make a larger sized bunny!


Leave a Reply