Last updated on March 6th, 2016 at 12:36 am
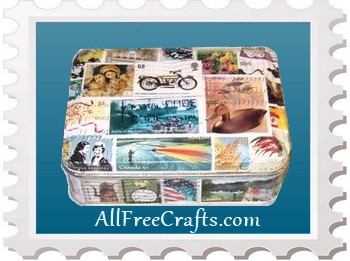
Small tin for new postage stamps is carefully
decoupaged with used postage stamps
then sealed with decoupage medium.
Save the postage stamps from your mail to decoupage a handy postage stamp tin or wooden box.
by Jane Lake
If you prefer, the same decoupage technique can be used on a wooden box for the same purpose. The steps are simple, but the finished box would cost a fortune in speciality stationery shops.
Make your own decoupage postage stamp tin for pennies, then give it to someone special for Father’s Day, Mother’s Day or Christmas!
Craft Supplies:
- small tin or wooden box
- gloss finish decoupage medium such as modge podge
- foam paint brush
- postage stamps
- bowl of water
Project Instructions:
1. If you are using postage stamps torn from envelopes, soak them in bowl of water until you can peel them away from the pap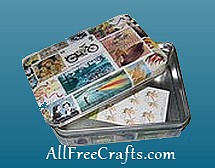 er. Self adhesive stamps may retain a little glue on the back; if so, rub them gently with your fingers until all the glue residue is removed.
2. Take a little time to choose your favourite stamps and set them aside to apply to the top of the lid. If you are making the box as a homemade gift, choose stamps that will appeal to the recipient.
3. Gradually apply stamps around the side edges of the tin lid. Paint a little decoupage medium into the area that you wish to cover, then position the stamp with its bottom edge against, but not covering, the lip of the box lid. If there is no lip, simply position the bottom of the stamp along the bottom of the lid. Gently smooth the stamp into place then brush over it with a light coat of decoupage medium.
Apply the next stamp beside the first one, in the same way, and continue until you have a variety of stamps all around the edge of the lid.
4. As you work, set aside stamps that will fit nicely around the bottom of the tin. If you need to, you can cut these stamps to fit. Decoupage these stamps into place with the same method used on the lid.
5. Finish the decoupaged postage stamp box by arranging a few larger stamps to fill all the spaces left on the lid.
6. Once the decoupaged stamps are dry, apply one or two more coats of decoupage medium to achieve a high gloss effect. Let dry completely. Finally, fill the tin with a variety of postage stamps, address labels or other small stationery items.
Suggestions:
– If you don’t have enough postage stamps to complete this craft, ask at the post office for a free catalogue of the stamp collections that they have for sale. The illustrations are nearly as good as a real stamp for decoupage purposes.
– Buy a mixed bag of stamps in bulk. Amazon offers a mixed bag of 300 U.S. stamps or a mixed bag of 300 world wide stamps – enough to complete several decoupage projects.


Leave a Reply