Last updated on March 4th, 2016 at 12:33 am
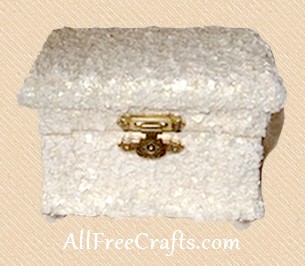
Small trinket box covered in broken
eggshells and iridescent paint.
Ordinary egg shells look extraordinarily beautiful when you use them to decoupage a faux mother-of-pearl effect.
by Jane Lake
Decoupaging with broken eggshells is a technique that I’ve been meaning to try for years. Rather than attempt a collage, I chose this mother-of-pearl effect to decorate a small wooden trinket box. The finished box is surprisingly strong, and there are no flaking egg shells after two coats of decoupage and two heavy coats of pearl paint.
Craft Supplies:
- small wooden box (ours is about 3 inches high, four inches wide and 2½ inches deep)
- decoupage medium or white glue thinned with equal parts water
- about 1½ cups of broken white egg shells
- white or ivory craft paint with a pearl, iridescent or shimmer finish, or Delta Air-Dry Perm Enamel Iridescent Glass Paint in ivory/gold
- stencil “pouncing” type paint brush, foam brush or small piece of sponge to apply thick layers of glue and paint
- strong plastic bag
- rolling pin or another heavy object to break up the eggshells
- small screwdriver
- one sheet of computer paper or similar
- optional: 4 pearl beads to use as legs
Instructions:
1. Place egg shells in a strong plastic bag and crush them against a table or counter surface using a rolling pin or similar heavy object. Ideally, the egg shells should be broken into fairly fine pieces.
2. Use the small screwdriver to remove any hinges or fasteners from the wooden box and set these aside.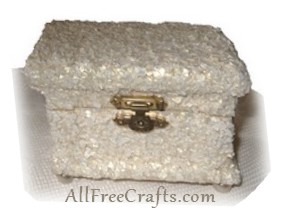
3. Spread a piece of paper over your work surface and begin applying the first coat of decoupage medium to the lid of the box. Do one side at a time, then the top, avoiding any hinge insets or other areas where hardware will be replaced. Apply medium, then sprinkle on a generous mound of broken eggshells, spreading them out and pressing them down firmly with your finger tips. Continue like this until the entire outside surface of the lid is covered, then shake the lid to dislodge any excess shell pieces onto the paper and set the lid aside.
You can slightly fold the paper to funnel the extra egg shells back into their original container.
4. Use the same decoupage technique to cover the bottom half of the box in eggshells. Don’t worry if the eggshells don’t look thick enough; after this layer is touch-dry (a couple of hours), you should add another layer in exactly the same way as the first one. Allow the double-coated box to dry overnight.
5. Run your fingers over both halves of the box to dislodge any pieces of egg shell that didn’t get glued down well.
6. Brush, pounce or sponge a thick layer of paint over all eggshell surfaces and let dry. Apply a second coat of paint in the same way and let dry.
7. Finally, if you wish, use undiluted white glue to fasten four pearl beads to the four bottom corners on the underside of the box and let dry.
Replace the box fastener and hinges.
If desired, paint the inside of the box or line with pretty paper or fabric.


Leave a Reply