Last updated on June 29th, 2020 at 05:49 pm
Punched Tin Can Luminaries for Halloween
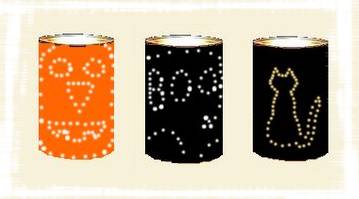
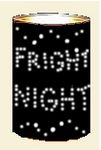
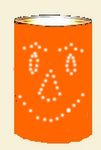
It’s easy to make tin can luminaries to light your walkway or front steps on Halloween. Add a coat hanger wire and you can hang them up, if you like. Just recycle those old tin cans and make a variety of Halloween designs.
By Jane Lake
There are two basic methods you can use for punching designs into tin cans. You can work directly on the tin can, using the ridges on the can as a measure to keep things evenly spaced. Or you can draw your design on paper first, then use the paper as a pattern by wrapping it around the tin can and punching directly through the dots on the paper.
You will need:
If you prefer visual instructions, view this two-minute video from YouTube on How to Make Tin Can Luminaries.
- clean tin cans
- votive candles or tea light candles
- pencil, crayon or permanent marker
- paper and scissors (optional, depending on method used)
- coat hanger or sturdy wire for hanging (also optional)
- towel and firm work surface
- hammer
- large nail
- freezer
- water
- spray paint
Instructions:
 1. Clean and dry the tin cans, fill with water, and freeze overnight. The ice provides support for the can as you drive in the nail holes.
2. It is possible to punch a design directly into the tin can. You can mark where you plan to punch the holes with a marker, because the lines will be covered by spray paint later.
– If you are using a paper pattern, cut paper to fit around the can, then draw your design on the paper.
– Remember that simple shapes are most effective for punched designs.
3. Lay a thick towel on your work surface to absorb the melting ice and to prevent the can from rolling as you work.
 4. Place a tin can on the towel. If using a paper pattern, wrap the can in the paper and tape the pattern in place. If drawing the pattern directly on the can, use a fine marker (in the the same color that you have chosen for the spray paint) to draw the outline.
5. Use the hammer and a large nail to punch the holes. If you’re making a hanging luminary, remember to punch two holes at the top, on either side of your design, to take the hanger.
6. Immerse the can in hot water to melt the remaining ice.
7. Make sure the can is perfectly dry before applying spray paint to the sides and bottom of the can.
8. If you want to hang the luminary, cut a length of sturdy wire, or use a length of wire from a coat hanger, and bend it into an arched hanger shape. Bend up the ends and insert them into the two holes that you placed at the top of the can.
9. Place a votive candle or tea candle inside the can. Light with a long fireplace matchstick, or a barbeque lighter, and place on a flat, fireproof surface. As with all candles, practice common sense and never leave a lit candle unattended.


Leave a Reply