Last updated on September 9th, 2015 at 01:50 am
Clay Pot Witch
Terra cotta or clay pots often accumulate if you do a lot of gardening. Don’t leave them stored on a shelf – recycle them to make this decorative clay pot witch.
Supplies:
- 2 clay pots 8 inches
- 2 clay saucer 10 inches
- 2 clay pot 6 inches
- 1 clay saucer 6 inches
- 1 clay pot 4 inches
- Hot glue and gun
- strong glue such as E6000 or Household Goop
- 4 buttons (I used small Halloween ornaments)
- Patio Paints, colours of choice
- Raffia
- Wood Ball for nose
How to:
 Prepare your pots for painting. Paint the base colour of all your clay pots. Allow the paint to dry completely.
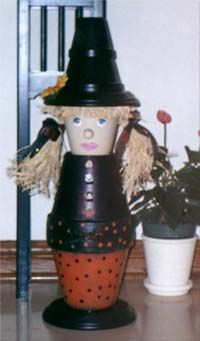
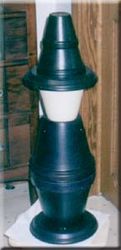
Glue the pots together as shown in the photo. Allow this glue to dry for at least two days before disturbing.
Now you need to paint the details. I used a purple paint for the body, a black paint for the base and hat and sponged on orange paint on the lower body and gold paint on the upper body. With the eraser end of a pencil or other similar tool, add polka dots to random areas of the body.
 Refer to the Photos for Detailing:
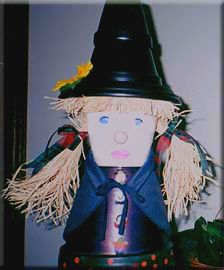
» Color placement
»Glue wood ball to face and paint face.
»Glue on buttons.
»Glue sunflower or other embellishment of choice to the hat.
On the inside rim of the hat (saucer) glue on tied-together strands of raffia all around the perimeter of the hat rim. Pull raffia in two equal sections to make hair tails and tie with ribbon. You can trim the excess raffia once the raffia is all in place on the figure. Trim hair tails and bangs.
Shown in the photo is a small black napkin that I wrapped around the neck area to form a small black cape. This cape eliminates the need to add arms.
Copyright © 1999-2015 Susan Spatone All rights reserved. Published with permission from CraftAtHome.com


Leave a Reply