Last updated on April 2nd, 2018 at 09:48 pm
How to Grow Iris
– with tips on planting and care, including how to divide irises
by Marilyn Pokorney
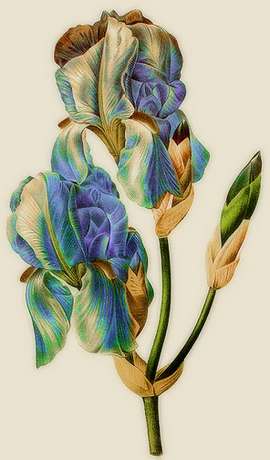
The beautiful Iris is a very easy plant to grow.
There are two basic kinds of Iris; Bearded and plain. There are also miniatures that grow only eight inches tall as compared to the traditional Iris which grows up to about three feet tall.
 Planting Tips:
The Iris is a perennial plant that grows from a root called a rhizome. Plant them about 12 inches apart. The rhizome should be planted even with the soil with the top of the
rhizome above ground.
 Dividing Iris: Tips From Penn State University Extension
Divide bearded iris every three to five years. Do it from midsummer until the end of August in order to maintain vigorous clumps, reduce crowding, and remove rhizomes infested with iris borers.
The rhizome is a thickened underground stem. It stores food produced by the leaves. Fibrous roots grow from it in the spring until after flowering, and again in the fall during moist cool weather. During midsummer, few new roots grow, so you can dig up, divide and transplant iris. Finish the job before October so plants can anchor themselves well before winter.
Iris must have full sun and well-drained soil. To divide iris, dig up the old clump, wash the soil from the rhizomes, and examine them. Cut off any parts of the rhizomes that are rotting or have iris borer holes. Put these rhizomes and any diseased leaves in the trash rather than adding them to your compost pile. Cut the healthy rhizomes into sections. Each division must have a fan of leaves, several inches of rhizomes and healthy roots. You can also make a larger division with two fans of leaves and a V-shaped portion of rhizomes. Cut the leaves back to one third their full height.
Dig a shallow hole in your selected sunny site. Make a cone of soil in the center and place the rhizome on it with the roots spread outward. Fill in the soil, just barely covering the rhizome with soil. Water well.
Space iris divisions about 18 inches apart. You can plant divisions of the same variety in a triangle with the fans facing outward. This gives a good color display the first blooming season.
Plant Irises in full sun or partial shade. Iris needs well drained soil. Root rot can result if they are planted in soil that stays too wet. They tolerate drought very well, needing water only during the driest part of the summer. Fertilize lightly about 6 weeks before bloom time.
Plant in July, August, or September. For southern states October and November are not too late. The plants need to be well established to get through the winter.
Mulching is a matter of preference. A little mulch will help keep down weeds but the rhizomes need sunshine so do not mulch very deeply.
 Divide Iris every 3 to 4 years or when they stop
producing as many blooms which is a signal that they need more space. Dig up and plant only the newest part of the rhizome tossing the older parts into the compost pile. When transplanting be sure each rhizome has some root and at
least a couple of leaves.
Pest Control
Irises aren’t bothered by many insects. The root borer is the major pest of iris. It is a caterpillar that chews on the rhizomes and causes the rhizome to rot. Thrips can cause damage to the buds but can be easily controlled by spraying insecticidal soap or by dusting the buds with diatomaceous earth.
At the end of blooming time the stems should be cut off but the leaves should be left to grow the rest of the summer. The leaves are making food for the rhizome so the plant can flower again next season. Any leaves that have brown spots or look unhealthy should be removed.
More Iris Resources
American Iris Society
Database of registered Iris varieties.
About the Iris Conjuration and its Ancestors
Illustrates the Iris family tree.
Species Iris Group of North America
Studies the wild species of the genus Iris and related irids.


Leave a Reply