Last updated on April 22nd, 2025 at 11:01 am
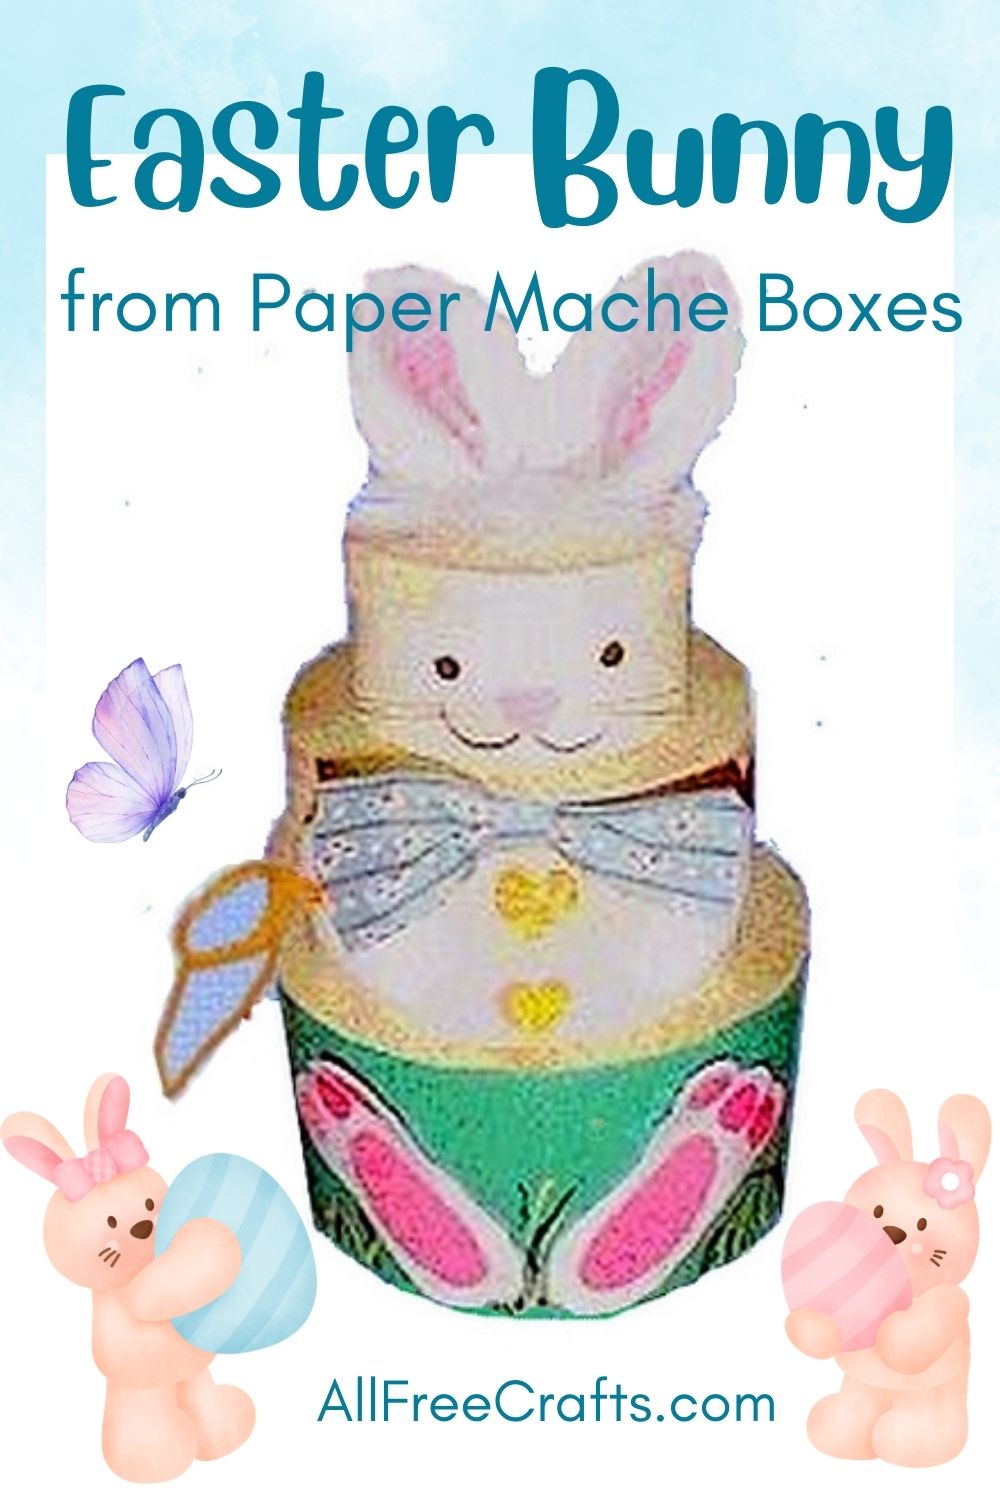
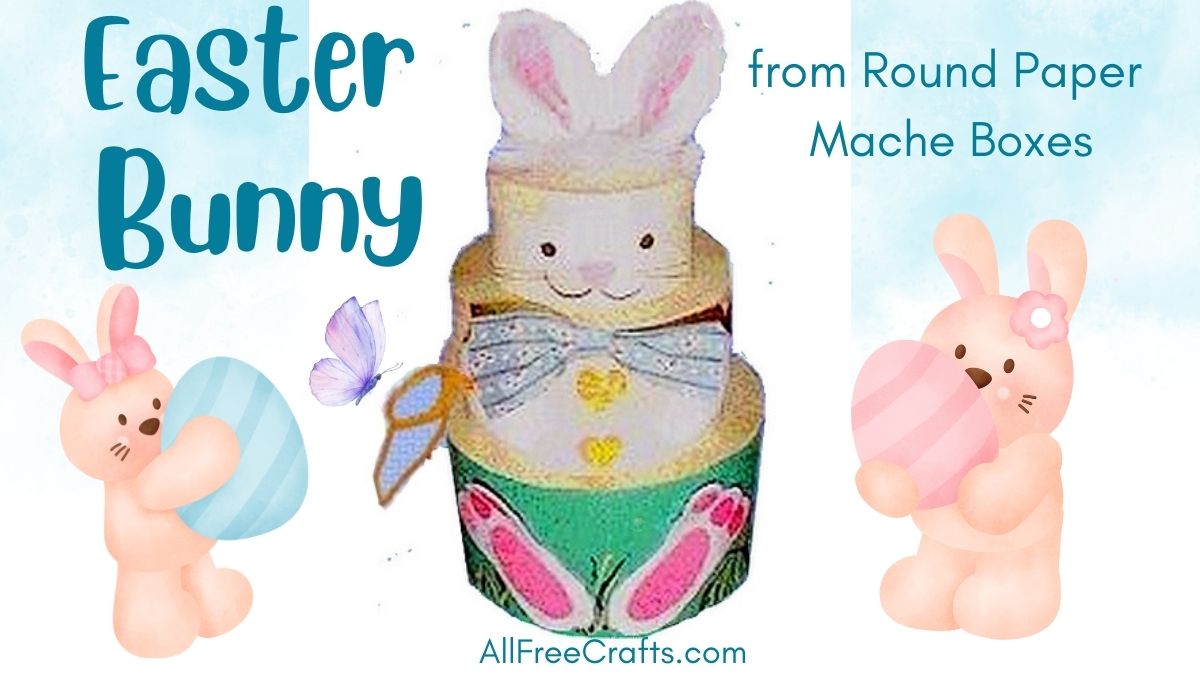
Use our free printable pattern and three round paper mache boxes to make this adorable Easter bunny who is on the hunt for butterflies!
How to Make Easter Bunnies from Round Paper Mache Boxes
by Twila Lenoir
Supplies:
- 3 round paper mache boxes – 3 inch, 4 inch and 5 inch sizes
- felt or fun foam – small amounts of black, pink, yellow and white
- craft paint in white or off white, several shades of green
- small flowers
- blush makeup for cheeks
- chenille stem
- tulle netting
- 1 pompom for the tail
- wide ribbon for the bow
- small piece of white yarn
- Printed Pattern
Instructions:
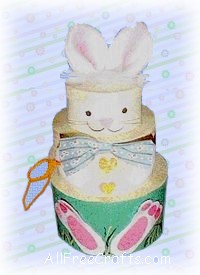
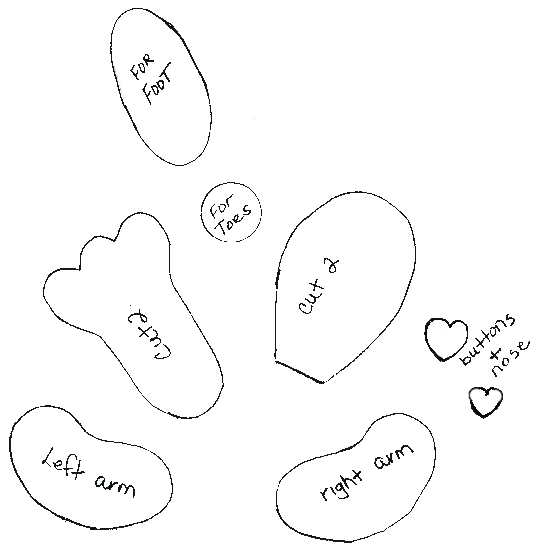
1. Print and cut out the Rabbit Pattern Pieces. Trace the pieces onto felt in the appropriate colors and cut out.
2. Paint the top two smaller boxes in white or off white.
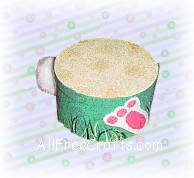
3. Paint the bottom box and the side of its lid in green. Paint the top of the lid in a different lighter green. Once the paint is dry, paint some contrasting green lines at the bottom of box to represent grass.
4. On the small box, which is the bunny’s head, glue on two small black circles for eyes, or use “goggle” eyes. Cut a small heart from felt for the nose and glue in place. With black paint, draw on a smile beneath the bunny’s nose. For the ears, brush on a bit of blusher, shake off any extra residue and glue in place. Brush a little more pink blush on either side of the pink pompom nose to create cheeks.
5. If you wish the bunny to hold a butterfly net, as shown in our photo, then form a loop at the end of a chenille stem and glue on a piece of netting to make a net. Decide on the placement of the bunny arms, then glue the net in position under one arm. Now glue both arms in place.
6. Cut four hearts of two different sizes. Glue the smaller hearts on top of the larger ones then glue in place as buttons.
7. Make a bow tie from wide ribbon and glue in place above the buttons.
8. On the bottom of the box, glue the feet in place. The feet will extend past the lid line, so make sure keep the glue below this point to ensure the lid can easily be taken off and replaced. See the small photo, above right, for details.
9. Glue a big white pompom on the back for the tail.
10. Fill the bunny with Easter candies.
More DIY Bunny Projects: Recycled CD Bunny, Washcloth Bunnies, Glove Bunny, Happy Easter Bunny Signs, Six Pompom Bunny Crafts.
Suggestions:
Use heart-shaped paper mache boxes to make these Stamped Valentine Conversation Heart Boxes to hold treats for your sweetheart!
When Easter is over, just store the boxes inside each other and put away until next year – although my daughter already wants our bunny to keep her jewellery in!


Leave a Reply