Last updated on October 10th, 2015 at 11:59 pm

Homemade Snow Globe
My grandmother kept a row of snow globes on a high shelf in her drawing room. When we went to visit, I’d stare at her collection, longing to shake each of the glass globes and watch the snow falling on the miniature scenes inside. Nan would take each one down with great care and reverence, polishing each globe with her apron before letting me shake it. I’ve loved snow globes ever since.
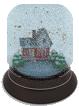
This year, I made a Christmas snow globe of my own. I chose a small church scene for inside, and experimented with glitter to get the right falling-snow effect. You can reuse all sorts of glass jars for this craft, from baby food jars to pickle jars. This one was a small jam jar, providing a wide enough base for my chosen ornament.
by Jane Lake
Snow Globe Craft Supplies:
- glass jar with tight fitting lid
- distilled water, or boil some water and use when cool
- glycerin (helps slow the falling snow; buy in most drug stores and some craft stores)
- white or silver glitter, or fake snow crystals (avoid ultra-fine glitters; they float rather than fall!)
- clear silicone sealant (aquarium sealant is great)
- small waterproof ornament or figurine
- plastic jar lid, to fit inside the jar as a base to elevate the ornament (or try florists clay)
- another plastic jar lid, or wooden circle, a bit larger than your jar lid, for a stand (optional)
- acrylic paint for the ornament
- coiled Christmas rope or ribbon
- craft glue to attach the decorative rope
Craft Instructions:
Check to make sure your ornament will fit inside your jar.
You will likely find that the ornament needs to be elevated somewhat to be seen nicely inside the globe. Use a small plastic bottle lid to create a base; the white plastic lid that I used to do this is visible in the photo, showing as a white area just below the ornament.
Make a trial run. Invert your globe jar and remove the glass part, leaving only the lid. Place the plastic base in the center of the lid, then position the ornament on top of this. Place jar over the ornament and check the fit. If the ornament is high enough to view clearly, use silicone or aquarium sealant to glue the ornament firmly to its plastic base, then glue the base lid to the center of the inverted globe lid. Allow to set, following sealant manufacturer recommendations.
Use another small jar to test the snow fall. Fill the test jar with distilled water, or cool, boiled water, then add a scant teaspoon of glitter. Put the lid on and shake to see if you like the effect. If the snow is too sparse, add a little more glitter. Add a few drops of glycerin and test it again. The glycerin should slow the rate of the snow fall quite nicely.
I have read that you can use mineral oil instead of water and glycerin, but I haven’t tried it.
Working over a sink, pour water and glitter into the globe jar, filling to the top. Invert the ornament assembly into the water and screw lid into place. Some water will spill over the top of the jar. Wipe the jar dry and shake it up! I enjoyed this part the most, because the little church looked so pretty in the midst of a glittery snow storm.
If desired, use sealant to glue the jar to a wooden base or another plastic lid for extra stability. I did use a wooden base for my snow globe, but didn’t glue the two together – this way, I can just pick up the jar to shake it.
Paint base and jar lid in your colors. I used terra cotta brown.
Once paint is dry, glue on any added embellishments such as a coiled Christmas rope or Christmas lace.


Leave a Reply