Last updated on April 4th, 2025 at 12:24 pm
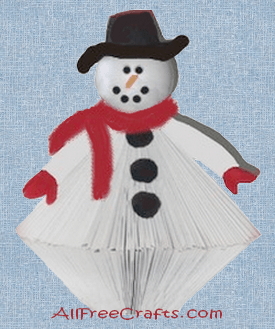
Recycle a paperback book to make this retro snowman with echoes of the groovy seventies.
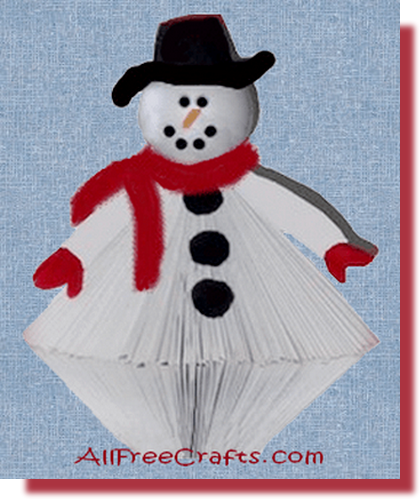
How to Make a Snowman from a Paperback Book
By Jane Lake
This paperback book snowman is part of a set that I created for Christmas. You can make it from a recycled paperback book or from old Reader’s Digest magazines. Although there is lots of page folding, the work is easy and quick.
If you’d like to try the other models, see the Paperback or Reader’s Digest Santa Claus, which is made using the same folding method, or Paperback Christmas Tree, which is also made in a similar way.
Paperback Snowman – Instructions
Body:
Choose a paperback book with a strong spine and remove the front and back covers.
Cut down the spine with a utility knife, separating about 200 pages (or slightly more, as some may come loose) to make half of the snowman body.
Open the 200 page book section at the halfway point. Begin folding as shown in the photo below.
On the first page of the right side, bring the upper right hand point down toward the spine, creating a right angle.
Bring the lower right hand point up toward the spine, so that it meets the former fold.
This leaves a slight angle between the lower section and the spine and therefore a flat line at the base area. Repeat with all pages on the right.
Now begin the same process on the left hand side, reversing the angles.
This completes one half of the snowman body and should look similar to our photo here.
Take another 200 pages of the paperback book and repeat all the steps to make the second half of the snowman body.
You Will Need:
- paperback book of at least 400 pages
- white spray paint
- styrofoam ball for the head
- three black pom poms or buttons
- cardboard cup cut from an egg carton
- circle of cardboard to glue to the base
- scraps of white, red and black felt
- two chenille stems
- fabric, yarn or fleece to use as a scarf
- small scrap of orange craft foam or felt for nose
- black beads for mouth and eyes
- white craft glue
- serrated knife

Body Assembly:
Glue together the two halves that you have just made to make a complete circular snowman’s body.
Turn the body upside down and measure the diameter of the base. Cut a cardboard circle to fit, then glue the circle to the bottom of the base.
Paint the snowman body with white spray paint. It will take several coats to paint the body completely.
Head:
Use a serrated knife to slice a small flat piece from the bottom of a styrofoam ball.
Push black beads into the styrofoam to form the mouth and eyes. Poke a small hole into the styrofoam for each bead, dip the bead in white glue, then press into the hole.
Cut a small triangle of orange craft foam or felt and glue in place as the nose.
Cut a cardboard segment from an egg carton and paint it black. Glue this to a circle of black felt to make the hat. Glue the hat in place on top of the styrofoam head.
Glue the flat bottom of the styrofoam ball to the top of the snowman’s body.
Arms:
Twist two chenille stems together lengthwise to make a frame for the arms.
Cut a rectangle of white felt two inches wide and two inches shorter than the chenille stem then center the chenille stem on top of the felt. Fold the felt in half over the length of the chenille stem. Run a bead of glue along both long inner edges of the felt, pressing the glued edges together until the glue holds to form the sleeve.
Cut four small mitten shapes from red felt. Glue two mitten pieces together, over one end of the chenille stem. Repeat on the other side to make the snowman’s hands.
Bend the arms in slight curve. Apply glue to the inside center section and press in place at the top back of the snowman’s body, just below the back of the head.
Finishing:
Glue three black pom poms or buttons down the front of the snowman. Tie a scarf around the snowman’s neck (this can be made from your choice of ribbon, fabric or yarn).
Variation:
Check out the Recycled Book Club paperback Snowman in this how-to video from the Northwest Regional Library System, Florida. You can make him with, or without, a hat!


Tammy Odom says
I love this, thank you for sharing
Jane Lake says
Thank you for your lovely feedback. I’m looking forward to seeing this snowman again. We meet every year when I unpack for Christmas!
April Z. says
Would it be possible to round the points to make it more circular?
Jane Lake says
Yes, it’s possible, although I haven’t tried it. Watch the embeded video shown above, for a more curvy snowman. It involves using a pattern and cutting it out, a few pages at a time. So it is definitely possible, but it’s more time-consuming.
I’d love to hear from you if you try this!