Last updated on November 9th, 2015 at 11:04 pm
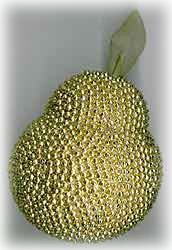
Golden Beaded Pear
Homemade Beaded Pear Christmas Ornaments
Here’s how to make a slightly unusual Christmas ornament for your Christmas tree – a golden pear, studded with golden beads. Each one of the beads is individually placed on the ornaments – not hard to do, but rather time-consuming, so this is a good little project to occupy your hands while listening to the radio or watching television.
Once you have all the gold beads in place, the effect is one of luxurious simplicity.
Craft Supplies
» 3 inch styrofoam ball
» 5 inch styrofoam ball
» Gold beads
» Gold straight pins
» Small twig piece
» Tacky glue
» Small leaf
Craft Instructions:
Cut your 3 inch styrofoam ball in half and gently remove some of the inside centre area of where you cut the ball. This ball needs to fit snugly to the other ball to form the pear shape. Once you have your 1/2 ball ready to fit, secure it with tacky glue and allow to dry completely before going to the next step.
Using a small piece of twig (1 inch long), poke through the top centre of the pear shape with the twig and leave approximately 1/2 inch of the twig exposed (refer to photo). Remove the twig from the hole you have just made in your ball and fill the hole with a little tacky glue. Insert your twig along with a small leaf into the hole and allow the glue to dry.
Create a little indent at the bottom centre of your pair, by poking gently with your finger. This creates the indent found on a real pear.
Now comes the part where you’ll need tons of patience. Beginning at the top of the pear and working your way down, place a pin through the bead hole and push the pin into the ball. Continue doing this until all of the ball is covered with beads. Don’t worry if some of the beads become a little loose as you are working.
Now that your ornament is complete, prepare a mixture of one part tacky glue and one part water. Holding the ornament from the twig, dip your entire beaded ball into this mixture, making sure that the entire beaded area has been immersed in the solution. Allow the excess glue to drain from the ball. With a wet hand, gently press all the beads in place and at the same time wiping away any excess glue around the ornament.
Set your ornament on a piece of wax paper or plastic wrap to dry completely.
Copyright © 1999-2015 Susan Spatone All rights reserved.


Leave a Reply