Last updated on March 16th, 2024 at 06:28 pm
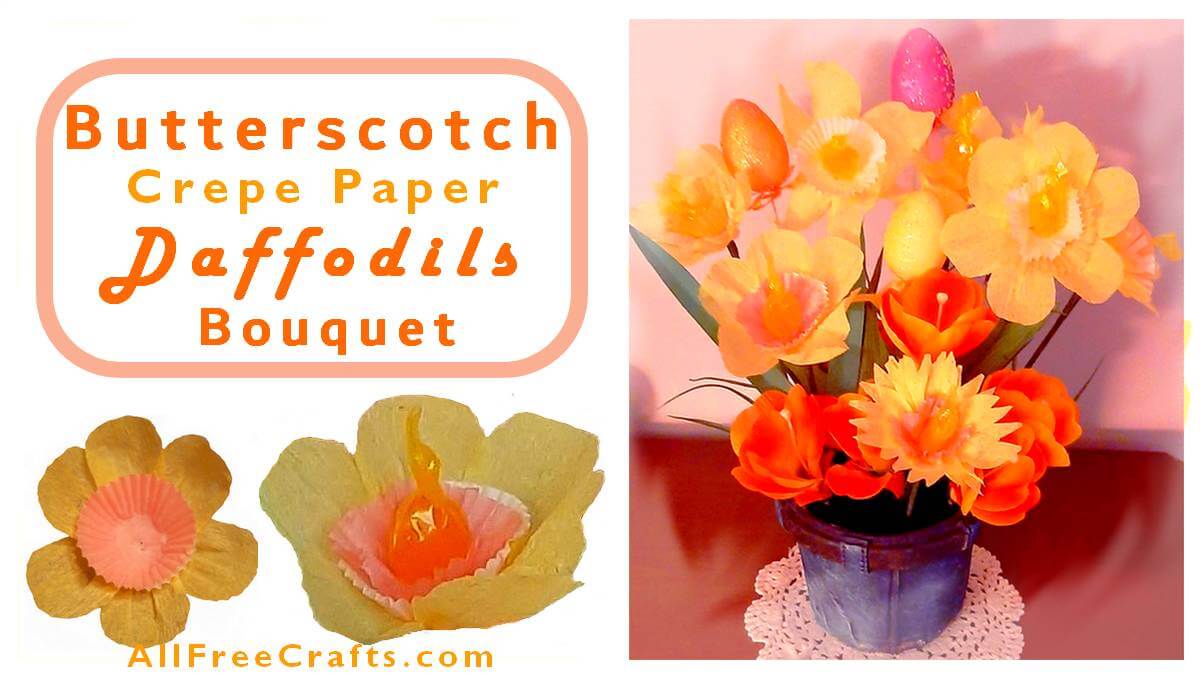
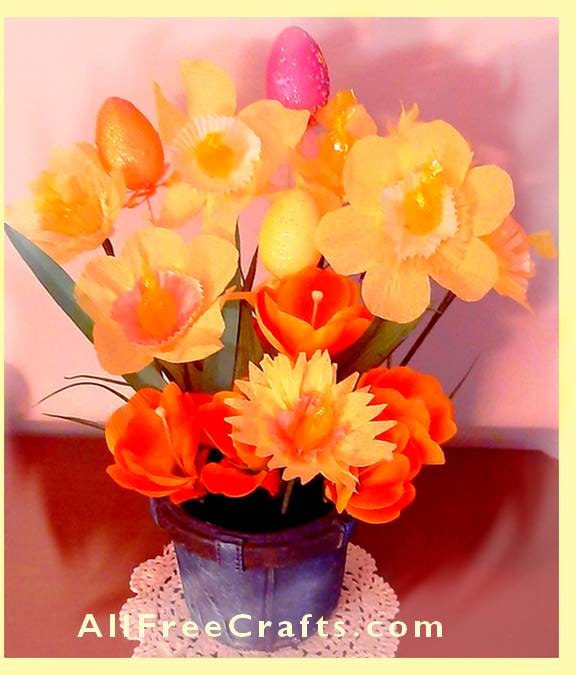
Here’s how to make a bouquet of crepe paper daffodils with each flower nestling a butterscotch candy. It’s a sweet way to welcome spring, celebrate Easter or brighten Mother’s Day and easy to make from crepe paper streamers and a few inexpensive supplies.
Display these with paper plate Easter lilies, if you like. Or simply add pretty styrofoam eggs on stems for Easter, heart-shaped picks for Valentine’s Day, or any other inexpensive bouquet addition from the dollar store.
AllFreeCrafts is reader supported! Many supplies are found at thrift stores so try that first! However, if you buy from an affiliate link on this site, I earn a commission at no extra cost to you. As an Amazon associate, I earn from qualifying purchases. This has kept AllFreeCrafts.com online since 2002. Thank you!
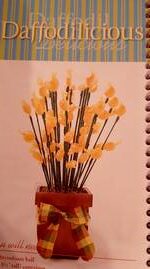
My inspiration for this project came from Candy Bouquets: Create Your Own Gifts and Centerpieces (Amazon), a lovely little spiral-bound book full of candy-themed homemade gifts.
I adored their Daffodilicious project, which is a pot of butterscotch disks attached to green stems (shown at right). It makes a few bags of candy look like a pot of daffodil buds about to burst into flower.
But, I wanted the flower! I’m always eager for the first spring bulbs to appear through the dregs of winter snow. Daffodils are one of my favourite bulbs. And when you can’t wait for the real thing, it’s time to get creative.
In fact, these crepe paper flowers are beautiful on their own; adding the butterscotch candies is completely optional.
You Will Need:
- crepe paper streamers in yellow, white, orange or your choice of flower color
- mini cupcake liners – 1.25″ size
- bamboo skewers
- green floral tape
- non-toxic white glue
- vase or container for your bouquet
- floral foam or styrofoam ball cut in half
- optional: green construction paper for leaves
- optional: individually wrapped butterscotch candies
TOOLS: pencil, ruler, scissors
TIP: Short on time? If you can’t make your own flowers, pick up a multi-stemmed bouquet of silk daffodils (Amazon link) a nice vase, and butterscotch candies. Simply apply non-toxic white glue on the covered end of each butterscotch candy, then insert into one candy into each daffodil “trumpet” for an instant candy bouquet.
How to Make Crepe Paper Daffodils
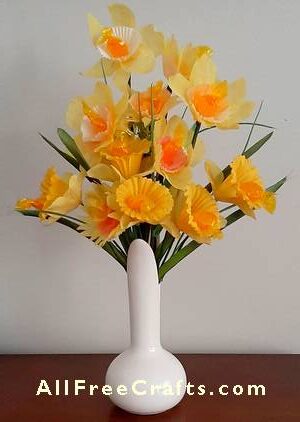
Did you know that daffodils come in different colors? I used traditional yellow and white streamers to make my flowers, but I also varied the look with peach and pink colored cupcake liners.
Let’s Make Crepe Paper Daffodil Petals
To make your first daffodil, you’ll need a crepe paper streamer. Daffodils have six petals so you’ll cut six petals from the streamer for each flower. The easiest way is to fold the streamer in zig-zag pleats, each about 1.5 to 1.75 inches wide.
Just fold your first pleat, then fold back again, repeating this until you have six layers. Cut the rest of the streamer away. Use a pencil to draw a petal shape on top of your layers then use scissors to cut out the petals through all the layers.
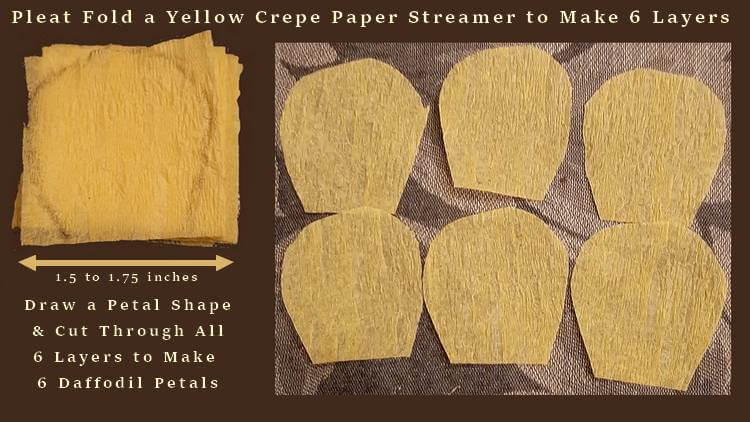
You do NOT want the flower petals attached at the sides. For each flower, you just want six daffodil petals that are more or less the same size and shape as each other.
The petal sizes are limited, as you can see, because the crepe paper streamer is quite narrow. However, you will overcome this limitation in the next three little simple steps.
Attach the Petals to a Mini Cupcake Liner
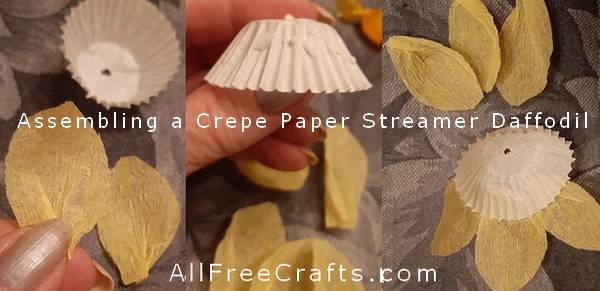
- Pinch each crepe paper daffodil petal together slightly at the base. Poke a small hole through the center of the mini cupcake liner (the liners used here were 1″ size).
- Next, apply small dots of white glue reaching half way around the outside of the cupcake liner.
- Attach a petal to the beginning of the glue line. Attach the next petal just slightly overlapping the first one. The third petal should cover half the cupcake liner. Add three more petals in the same way to complete the head of the daffodil.
- Optional: If desired, cut a circle from the paper streamer, poke a hole in the center, and glue this circle to the back of the flower, covering the cupcake liner in the center.
Create a Butterscotch Candy Center for the Daffodils
The next step is preparing the butterscotch candy center for each of your daffodils. It’s another three easy steps!
- Take a wrapped butterscotch candy and twist one of the wrapped ends into a tight spiral.
- Take another miniature cupcake liner (your choice of color) and poke a hole in the middle of it with a skewer.
- Now push the twisted end of your butterscotch candy into the hole in the cupcake liner. Use your fingers to scrunch the cupcake liner up around the candy, as shown.
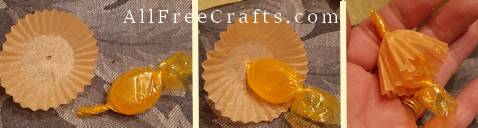
You have just created the “butterscotch” stamen part of Butterscotch Daffodils. Repeat this step for each flower that you make and set aside.
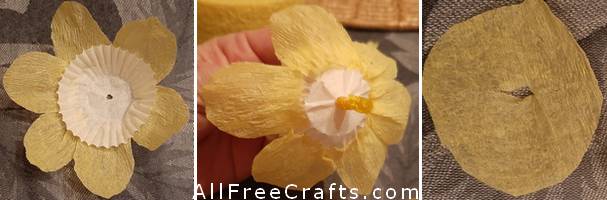
Combine Candy and Petal Sections and Add a Bamboo Stem
Now you must join the candy part of the flower to the daffodil petals by threading the twisted butterscotch wrapper through the hole in the daffodil cupcake liner.
This is where you can change the look of your daffodil, mixing or matching the colors and textures of the petals and the little cupcake liners. See more about variations of crepe paper daffodils at the end of this post.
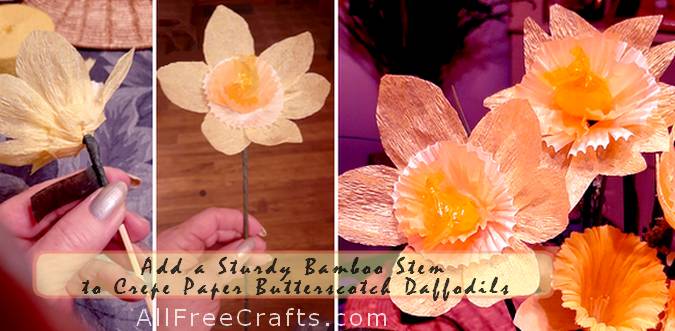
Attach a Strong Bamboo Skewer Stem
Whatever variation you use, you must attach a stem capable of supporting the flower and the butterscotch candy without bending or breaking. For me, this was bamboo skewers, the kind used to barbeque kabobs in summer. They are very sturdy and readily available, in any dollar or grocery store, or you can order inexpensive bamboo skewers from Amazon.
I tried regular floral wire stems but they were not strong enough to hold the flower and the candy combination. If you are making crepe paper daffodils without the candy center, a regular floral stem should be fine.
Steps to Attach a Butterscotch Daffodil Flower to a Bamboo Stem
If you followed the steps above – creating a butterscotch center and nestling it inside another mini cupcake liner with petals, then you’re ready to join the stem. Follow these steps:
- Cut about six inches of green floral tape and attach it about one inch from an end of the bamboo skewer. This can be tricky at first, but floral tape gets more adhesive and sticks to itself well as you stretch it out, so work at it until you have the tape secured and working toward the end of the skewer.
- Bring the back side of your daffodil flower to the bamboo skewer laying the twisted end of the butterscotch candy against the end of the skewer. This piece already goes through two cupcake liners, as you stacked the candy center into the petals, so now is where it all comes together.
- Stretch and twist the green floral tape over BOTH the twisted candy wrapper end AND the end of the skewer, firmly attaching them together.
- Once you have the butterscotch daffodil flower firmly attached to the top of the stem, simply add more floral tape, pulling it gently as you wind it down, around itself, covering the whole skewer. If desired, also use the floral tape to attach long, thin daffodil leaves (cut from green construction paper) to the bottom half of the stem.
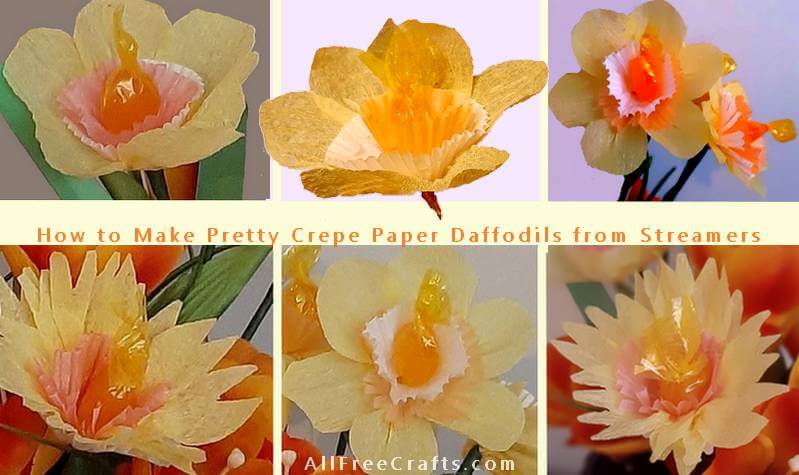
Creating Daffodil Variations
From this point, you can create lots of interesting crepe paper daffodil variations.
You can double up the cupcake liners, feather the second one by cutting into each fold to make a feather effect, scallop the edges with pinking shears or just use one liner with the candy inside as the daffodil “stamen.”
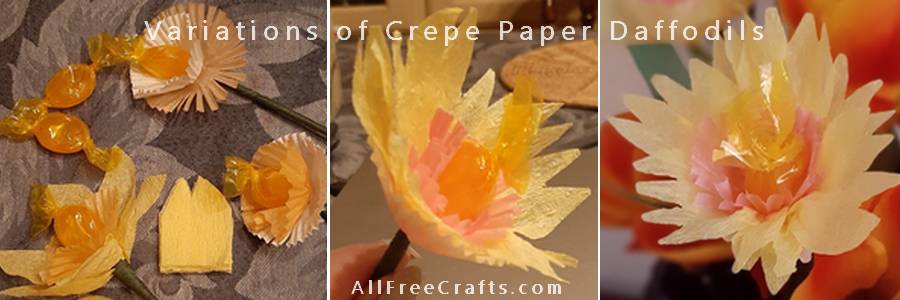
Cutting a simple “V” shape at the top of each petal, (see first photo, above, left), creates the effect of a frilly, “double” daffodil, shown in the center and at right.
Or you can stick to the classic, yellow trumpet flower with (or without) a simple candy center.
However you decide to make them, these crepe paper daffodils look sweet, bringing all the glorious spring colors that we long for after an endless winter landscape. Happy Spring!
Resources:
Paper Plate Easter Lilies are made from paper plates and yellow chenille stems.
Candy Bouquets: Create Your Own Gifts and Centerpieces (Amazon)


Leave a Reply