Last updated on February 27th, 2021 at 11:34 pm
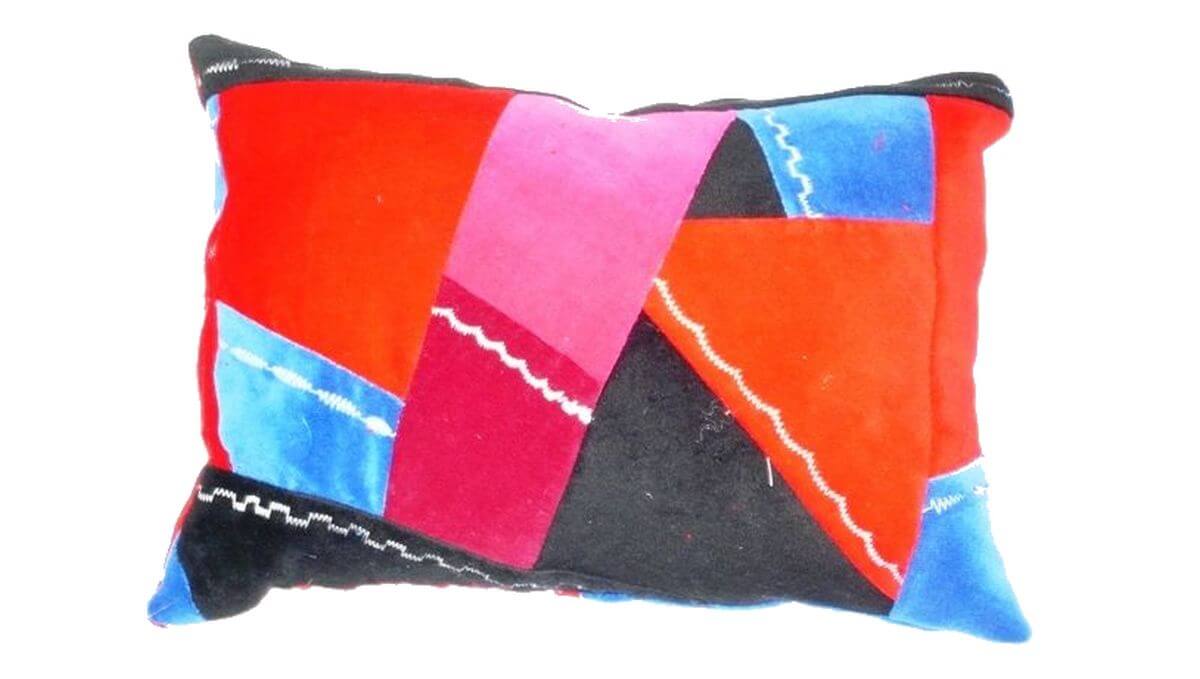
How to Sew a Crazy Quilt Pillow
Crazy quilts were popular in Victorian times, when ladies of the day would stitch together small fabric scraps to make a larger piece of fabric for use as a quilt top. The seams of the pieced quilt would often be embroidered with ornate or fancy stitches, resulting in a much treasured work of art.
You can make a modern version of the crazy quilt to use as a pillow front, or make the pillow entirely in crazy quilting, if you wish.
Although you could hand-embroider the seams, now is also your chance to put those embroidery stitches on your sewing machine to good use.
Crazy Quilt Fabric Selection:
First, select your fabrics. Although you can mix and match fabric scraps, it’s wise to use fabrics of similar weight, although lots of different textures or designs can be interesting. The contrast between a small floral pattern, and a broad stripe, for instance, can often work well in a crazy quilt
Iron any pieces that are wrinkled or that have fold lines, then cut your fabrics into small pieces.
Cutting the Fabric Shapes
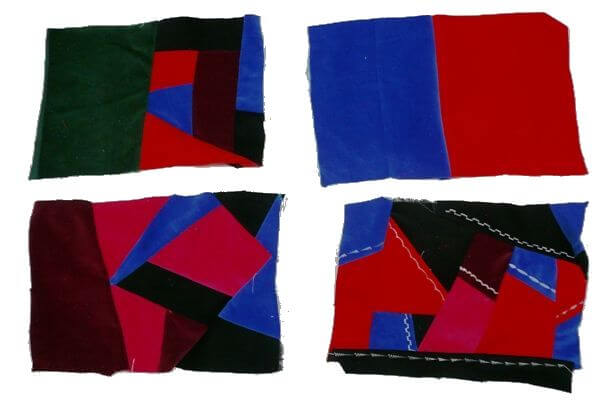
Try cutting some odd shapes with straight sides – for example, a large triangle could meet or join a smaller rectangle, a square, or a rhombus.
There’s no right or wrong way to piece together a crazy quilt, so let your sense of color and creative design be your guide. Lay fabrics out on the table and experiment until you have look you like, then begin sewing.
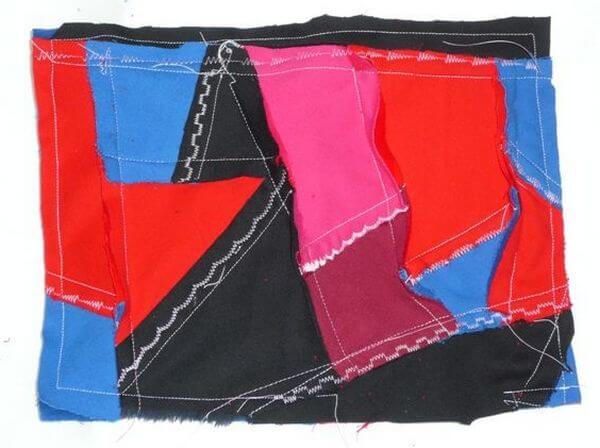
Piecing the Fabric Together
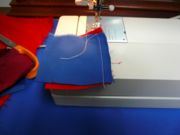
Sew along one side of two pieces, right sides together. Then make another pair and continue on until you have enough to make a pillow front when pieced together.
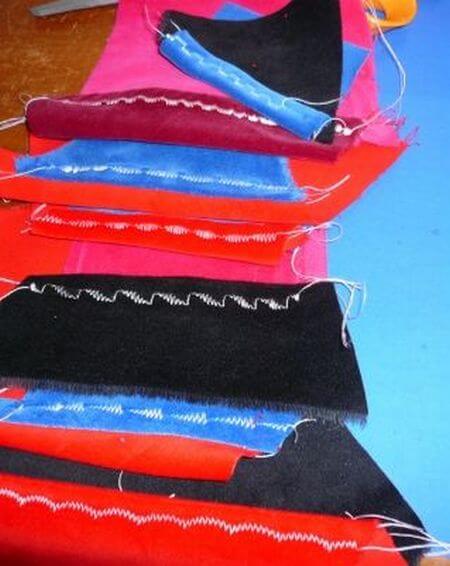
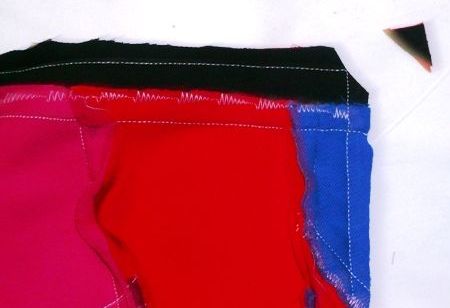
Take each sewn pair and open the fabric out, wrong side up. Fold both edges of the pieced seams to one side and, if necessary, iron to hold in place. Turn the fabric right side up, and top stitch near the seam (using a fancy embroidery stitch on your machine) so that the folded seams on the other side are caught by the embroidery stitches and permanently held down on one side
You may leave some seams plain, if you like, using the embroidery only where it will make a nice contrast.
Begin to stitch these sewn pieces together until you have a mosaic of fabric large enough to make our pillow front.
Alternatively, you can sew as you go, adding pieces in a random fashion until you reach the desired size.
Cut the pieced fabric to the desired size of your pillow.
Cut a backing of the same size – this could be another mosaic of fabric, so the pillow is reversible, or a single piece of fabric.
Finishing Touches
Place both pieces of fabric right sides together and sew all around, leaving an opening about five inches long to turn the pillow right side out.
Before turning though, clip the corners as shown, taking care not to snip the seam stitching. This avoids too much fabric bulk and helps shape the pillow corners.
Use the opening to turn the pillow right sides out. Stuff the pillow with polyester fiberfill, or another type of pillow stuffing, filling to a comfortable level.

Close the opening by hand, sewing a line of slip stitch, or blind stitch, until the opening is closed.
Congratulations! Your crazy quilt pillow is now complete.
Adapted from the wikiHow article: How to Make a Crazy Quilt Pillow
by Creative Commons license.


Leave a Reply