Last updated on October 16th, 2015 at 09:21 pm
DIY: How to Make a Flower Press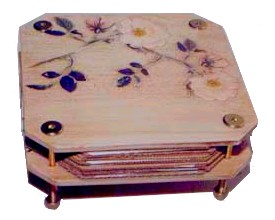
Use this homemade flower press to preserve and press flowers from your garden for crafts, cards, scrapbooks or decoupage projects.
Pressed flowers are also useful to make these pretty Botanical Bookmarks.
Supplies:
2 wooden squares, each at least 1/4 inch thick
4 Carriage bolts and wing nuts to fit and end bolts
Sandpaper
Drill
Cardboard
White paper
Craft Knife
Small Clamp
Craft Project Instructions:
You can either purchase small shelf planks or have 2 pieces of wood cut to the same size. Home depot will cut wood pieces for you.
Clamp your two pieces of wood together, lining up all edges and drill a hole in each corner, drilling through both pieces of wood. The drill bit size will depend on the size of carriage bolt you will be using.
 Once you have your holes drilled, sand your wood to a smooth finish with fine grit sandpaper. Insert your bolts through the holes to make sure they fit. If you purchase bolts longer than required (I did), the bolts act as a stand to display your flower press and attaching the rounded end nuts, will help to protect surfacing from becoming scratched, when displaying your flower press.
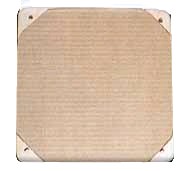
Now you need to cut some cardboard pieces that will be used to separate your layer of flowers. Place your wood piece on a piece of cardboard and trace around the wood piece to make a template for all your cardboard pieces. With a craft knife, cut out your first piece of cardboard. Now cut the corners of your cardboard to allow the bolts to be inserted through the 2 wood pieces (See illustration at right). Using this piece as a template cut as many inserts as you require from your cardboard.
To protect your flowers from any dye transfer of the cardboard, cut two pieces of white paper with your template, for each cardboard insert you have cut.
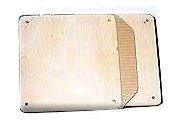
Beginning with one board piece (laying flat), place one cardboard piece on top of the board, then 2 pieces of white paper, another piece of cardboard, 2 pieces white paper, and continue until all your cardboard is used up. Place your second piece of wood on top and insert your carriage bolts through each hole. Secure a wing nut to each end of the carriage bolts, attached your rounded nuts, as shown in photo, above, and you have your flower press.
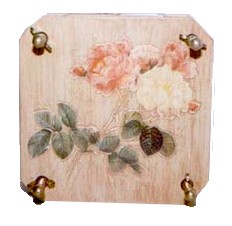
These presses can be painted, decoupaged, or faux finished. A nice pressed flower decoupage is a pretty addition to these flower presses. I simply glued a cut out flower to each piece of wood. Once the glue is dry, using a sponge or cloth, wipe over all of the wood and the picture with a burnt umber acrylic paint or a very dark brown paint or stain to add the appearance of a very old piece.
The photos above show each side of the press. The top of the press is done with a white flower print decoupage and the bottom is done with a pretty pink and white rose print. You can decoupage dried pressed flowers to these too. I have several of these presses and use them regularly. They are great for pressing your own flowers to use in craft projects and it’s really a lot of fun to experiment with different flowers and leaves.
Not all of nature’s pretty colours will press perfectly, but experimenting with them is half the fun.
Copyright © 1994-2015 Susan Spatone All rights reserved.
Published with permission from CraftAtHome.com

Flower Pressing at Amazon
For more design ideas, as well as information on what flowers press well and how to grow a pressing garden, see Fragile Beauty: The Victorian Art of Pressed Flowers.
If you are pressed for time, there are ready-made Flower Presses to choose from at Amazon, including a well-reviewed Microwave Flower Press
for making pressed flowers that can be used almost immediately.


Leave a Reply