Last updated on February 21st, 2016 at 10:59 pm
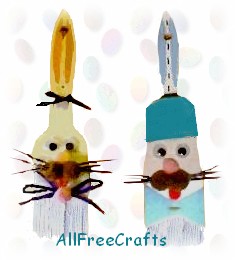
Paint Brush Bunnies
These cute bunnies can be made from old, clean paint brushe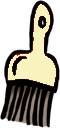 s that are past their prime, or from cheap brushes from the dollar store.
by Jane Lake and Twila Lenoir
Who would ever have thought that plain old household paint brushes could make such cute Easter bunnies?
Supplies:
- 2 inch paint brushes with wooden handles
- white craft paint
- google eyes
- plastic scoop (i.e. recycled kool-aid or small laundry detergent scoop)
- scraps of felt or craft fun foam in red and light blue
- ribbon
- ribbon roses or other small floral decoration
- tiny pink pom pom
- 2 small brown or tan pom poms
- artificial animal whiskers, string…or pull a few bristles from the paint brushes before you start this project!
Instructions:
1. Begin by painting the brushes – even the bristles – with white paint. Let dry and repeat if the coverage is a little thin.
2. Use paint or a permanent marker to make a broken line (a line broken by spaces) down the center of the handle.
3. Check the photo for details, then paint the inside of the bunny’s ear on either side of the painted center line. Use pink paint for the girl bunny’s ears and blue for the boy bunny.
4. Assemble the bunny’s face on the metal part of the brush, above the bristles. First, glue whiskers in the middle, followed by the tiny pink pompom. Under the pink nose, glue on the two brown or tan pom poms.
5. Cut a small oval from red felt or fun foam, and glue on beneath the brown or tan pom poms.
6. For the girl bunny, glue on a bow and a small ribbon rose, just below the tongue.
7. Next, glue on the google eyes, where the metal meets the wooden handle. For the girl, add another small bow just below the ears.
8. Make the boy bunny as you did the girl, but leave off the bows and roses. Instead, take a piece of square felt and cut a triangle out of two opposite sides to make a bow tie. Glue the bow tie under the tongue.
9. For the boy’s hat, cut a plastic scoop in half and cover it with two coats of light blue paint. When the paint is dry, glue the hat above the eyes, as shown in the photo. And enjoy!


Leave a Reply