Last updated on March 6th, 2016 at 12:12 am
 How to make a spring flower straw hat to welcome friends at your door.
by Twila Lenoir
Here’s a fresh change from the traditional wreath — a welcoming basket of spring posies made from a straw hat! Have some fun choosing the flowers, or use decorations you have left over from other projects. Either way, the results are sure to be eye-catching hanging on your door or wall!
Supplies
- plain straw hat
- scissors
- silk flowers – 2 bouquets from the discount store is ample
- acrylic craft paint
- florists foam
- wire or pipe cleaner
- lace
- glue
- cardboard or doily
- spray sealer
Craft Instructions:
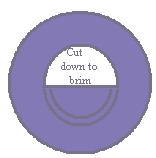 Start by cutting through the top of the hat in the middle, going down to beginning of the brim, as shown in the diagram to the left. This forms a basket in the straw hat to hold your flowers.
You will need to cover the back portion of the hat with a round doily or a cardboard circle. This should cover the inside circle of the hat (the part that would normally cover your head if you wore it). A dinner plate might serve as a good template for this; just trace around the plate on cardboard, cut it out, then glue the cardboard or doily in place.
Glue pre-gathered lace on the rim of the pocket.
Now glue a square piece of the green florists foam in the pocket part of the hat. Arrange your flowers in the foam base so that it is nice and full.
Make a six loop bow with tails and attach at the top of the hat. Glue the tails down along the side, leaving enough space to write your saying. I wrote with paint, “Welcome Friends”. Lightly spray a sealer over the painted area.
Lastly, poke a piece of wire or pipe cleaner through the top of the hat for a hanger. Enjoy !


Leave a Reply