Last updated on September 5th, 2015 at 08:04 am

Valentine Candy Dish
Made from Salt Dough with Heart Shaped Handle
Salt Dough Folk Art Projects
The art of making objects using salt dough has become very popular in recent years with the only requirements to get started in this folk art hobby are flour, salt, water and basic equipment found in the kitchen.
These include:
» A bowl to mix your dough
» A rolling pin for producing smooth sheets of dough
» A grater for making decorative imprints on your dough
» A garlic press for making strands for hair and foliage
» Toothpicks or a small pointed knife for cutting and indenting details
» An assortment of pastry cutters and moulds for decorative shapes
You May Also Like:
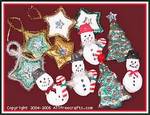 Microwave Salt Dough Ornaments
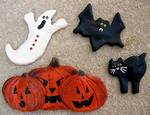 Halloween Cookie Cutter Salt Dough Ornaments
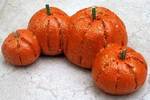 Salt Dough Pumpkins
Salt Dough Books:
 Salt Folk Art: How To Make Beautiful & Lasting Objects From Flour, Salt & Water
Salt dough crafts are becoming more popular, partly because salt dough is an inexpensive, non-toxic modeling medium that is easy to make at home.
This well recommended book by Cheryl Owen has rave reviews from readers. It features forty original step-by-step salt dough projects, including citrus fruit plates with oranges and lemons so realistic they look ready to pick up and eat. Try making a sun plaque, a court jester, folk angel, gingerbread heart, or fruit-filled cornucopia. Metal embedded bowls, a checkerboard covered with lizards, or a cowboy theme clock are wonderful decorations for contemporary homes.
Salt dough is an ideal medium for children and this book offers how-to’s for animal finger puppets or fun dinosaur models.
All techniques, from kneading, coloring, drying and baking, painting, glazing and varnishing are clearly explained, along with hints on how to use household items such as scissors and wire to create fantastic effects.

To make your salt dough I have found the following recipe to be a good all round recipe for most projects:
Basic Salt Dough
2 Cups of Plain Flour (not self-raising)
1 cup Fine grained plain salt
1/2 cup water at room temperature
Mix the salt and flour in a large bowl and then add the water. Knead the mixture for about 5-10 minutes until it becomes smooth and elastic. Cover with cling wrap to stop the dough drying out and let the dough sit for 30 minutes before using.
To improve the elasticity of the dough add dry wallpaper paste to the basic mixture.
The addition of 1-2 teaspoons of vegetable oil improves suppleness of the dough making it easier to work with.
Two other recipes that I often use, depending on the project I am working on, include:
Fine dough
This recipe is good for filigree work
2 Cups flour
1 cup salt
100g cornstarch
1/2 cup water
Firm dough
Firm dough is good for making tile and plate objects.
2 cups flour
1 cup salt
2 tablespoons wallpaper paste
1/2 cup water
Make these recipes up the same way as the basic recipe.
Fresh dough is best for modelling. However, if you find you have any leftover dough it can be wrapped in cling wrap or an airtight container and stored in a cool place for a few days.
Different coloured dough’s can be made using any of the following:
– Food colouring (red, green, blue, or yellow). Two or more food colours can be combined to make different colours and shades or for a marbled dough effect.
– Add spices that act as natural dyes e.g. cinnamon, curry powder, saffron or paprika.
– Add cocoa powder or instant coffee for different hues of brown.
– Wearing protective gloves add a little paint to the mixture then knead the dough until the paint is uniformly distributed through the mix.
The dough is now ready to use and the next step is to shape your project.
For flat or rolled projects it is best to roll out the dough straight onto a baking sheet then it can be put straight into the oven.
Models or larger pieces can be assembled on a piece of hardboard that has been oiled with vegetable oil to prevent it sticking to the board.
When finished and happy with your results you have a choice of Air Drying or baking your project in the oven. Ensuring your projects are correctly dried ensures they will last a long time so it is important that this is not hurried.
Air drying is suitable for flat, small pieces or for coloured pieces where baking will alter the colour of the finished project.
Oven drying is the most popular method and requires careful attention to accurate temperature control to avoid burning. Bake for approx 2 hours using a low temperature setting 50-70C for the first half hour then increase temperature slowly to 90-100C and cook until the piece is uniform in colour.
While baking if any air bubbles appear pierce the bubbles with a pin and gently depress the dough. If the dough starts to darken before cooking is complete cover with a piece of aluminium foil.
The dough is cooked when it hard and sounds hollow when tapped. Turn the oven off and leave in oven until cool.
Any burns can be sandpapered off with fine- medium grade sandpaper. An Emery board or small file can be used for delicate or intricate sanding on objects.
Your finished projects can be left unpainted but they must be sealed on all sides (including underneath) with varnish, gloss or matt, for protection otherwise they will not last long when exposed to air.
When thoroughly dry sand any imperfections. At this stage you can paint your projects then seal with a final coat of varnish.
Brightly coloured pieces will look more vibrant painted with a glossy finish and neutral muted colours are suited to a matt finish.
Using a polyurethane varnish on food coloured models instead of water-based varnish helps to intensify the colour.


RACHEL KLEYPAS-SPARROW says
I am interested in many craft ideas and I have always wanted to try my hand at doughcraft. My sister-in-law use to do it, and that is when I became interested, as it could go with my knitting and crochet projects. I am a certified microbiologist, but I mean to say that I am certified in General, Natural, Biological Sciences with an interest in TARDIGRADES. I would like to make one out of dough, so I can show people what they look like.
I am really glad I found this site.