Last updated on March 6th, 2016 at 12:34 am
Free Folk Art Painting Pattern – Counting Hounds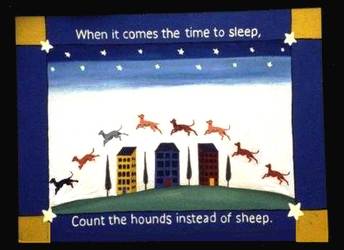
by Greyhoundmanor
When it comes the time to sleep, Count the hounds instead of sheep.
This delightful country primitive painting is surprisingly easy to paint, even for beginners. Romping hounds bound through a clear night sky while stars twinkle above. The strong colors and cheerful message add charm to any room. And with so many hounds in the painting, it’s easy to customize the hounds to match your own.
To view larger images of the painting in progress, just click on each image that you would like to magnify.
You’ll find step by step instructions to this folk art painting complete on this page.
Supplies:
- 18″ x 24″ canvas or piece of masonite (thin wood available at home stores)
- Frame for 18″ x 24″ finished piece
- Gesso or primer
- Assorted art brushes
- printed greyhound pattern
- carbon or transfer paper
- Acrylic craft paint in at least the following colors: Barn Red, Forest Green, Military Blue, Navy Blue, Antique Gold, Light yellow, Black and White, Dark Brown, Tan, Rust or “fawn” color
Instructions:
Step 1 – Prepare the Canvas
Whether using canvas or masonite, you need to coat the painting surface with 2-3 coats of Gesso or primer. This will give you a clean surface on which to paint and the white base will keep your colors strong. Dry thoroughly between coats. Sand between coats if using masonite.
Step 2 – Add Grass and Sky
 This will seem very wrong and sloppy while you’re doing it. Just trust me that it will work in the end. Adding the 2.5-inch border around the entire piece really finishes off the edges and hides the sins that might occur in your grass and sky.
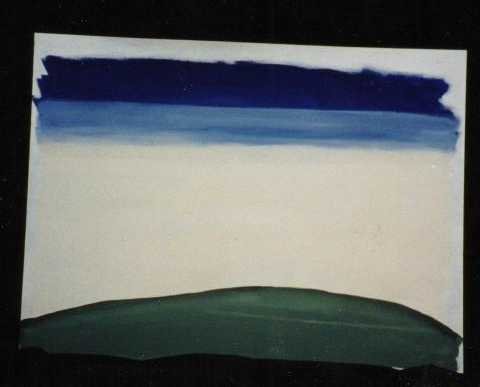
Starting about 2.5 inches from the top edge, paint a 2.5-inch swath of navy blue that runs the entire length of the painting. This is the top of your sky.
While the navy blue is still wet, mix white with navy blue to form a light blue and paint a 2-inch swath across the length of the piece, merging and overlapping the color with the navy blue.
While the light blue is still wet, mix white with a bit of tan to form a beige. Paint the remainder of the sky, going down into the area where the grass will be. Overlap and merge the beige with the light blue, but don’t get too hung up on the blending. The stars will help with that later
Mix forest green, white, light yellow and tan to form an olive green. Paint a curved mound to serve as the grass. The top of the mound should be 4-5 inches from the bottom edge. Come back with forest green to form a hard, clean edge for the top of the grass.
Mix a bit of brown with water to form a wash and add a swath just above the grass. This will add a very nice touch.
 Step 3 – Add Borders
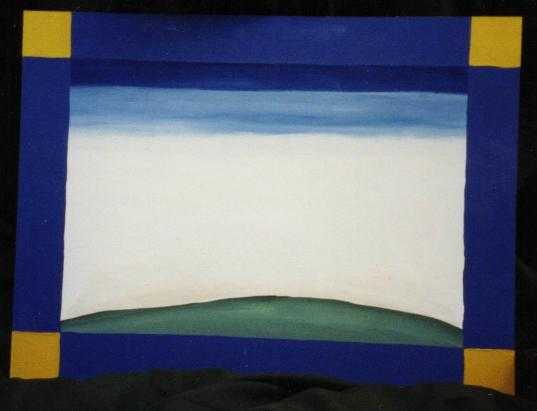
Using a ruler, draw a border 2.5 inches from all edges. Paint the border using military blue. Use antique gold in the corners.[clear]
Step 4 – Add Houses
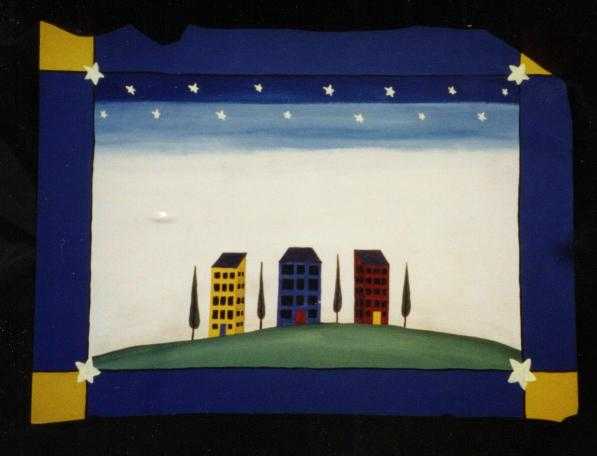
Using a ruler, draw three simple houses on the top of the hill. Make them 3-4 inches tall. Paint the houses using barn red, antique gold and military blue. For the shadowed sides of the houses, mix the primary color with black to get a darker shade. Paint the doors a contrasting color. Paint the windows black. Mix a little white with black to get dark gray for the roofs.[clear]
 Step 5 – Add Stars
Using a ruler, draw dots to mark where your stars will be in the sky. Try to keep them in the dark blue and light blue swaths. Space them pretty evenly and in two rows. Using light yellow, paint simple 5-pointed stars at each dot. Make some bigger and some smaller. Add a large, light yellow star in each corner of the border.[clear]
 Step 6 – Add Hounds
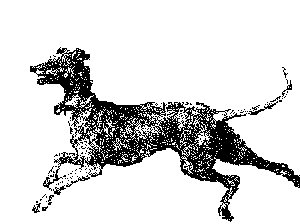
Use carbon paper to transfer the hound at left to your painting. Space the hounds as you’d like. I usually have 6-8 hounds on a painting. Paint the hounds to match your hounds. If you’re making brindle hounds, paint the entire hound in the base color (like fawn), then add the stripes.[clear]
OPTIONAL: Step 7 – Add Words
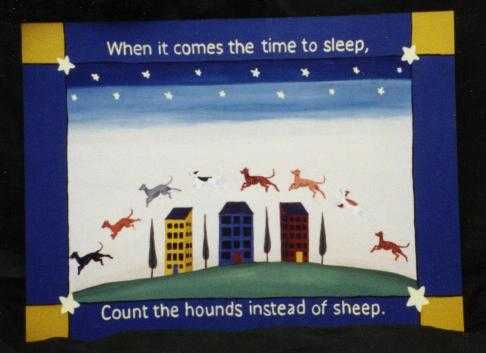 Pencil (or trace) the words on to the canvas. In the top border, put the phrase “When it comes the time to sleep.” In the bottom border, put the words, “Count the hounds instead of sheep.” Use light yellow for the words. Be sure to allow room for the frame.[clear]
Step 8 – Protect Painting and Add Frame
Add a coat of polyurethane to the entire painting to protect your work. Add the frame and hanging hardware.


Jane Lake says
Thank you, Chris. Yes, I’ve been working for hours on technical issues, as they say. I’ve made some progress, and I’m hoping to fix it all soon. Thanks for letting me know.