Last updated on October 31st, 2015 at 02:18 am
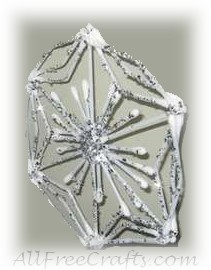
Cotton Swab Snowflakes
Q-Tip Snowflakes
By Emma Snow
I first heard this idea at a teacher’s convention, and have been making Q-tip snowflakes with my elementary classes for years. The activity was so enjoyable that we do it at home too, and hang the intricate snowflakes from the ceiling using fishing line. The result is incredible – transforming hallways, windows, and entries into a winter wonderland. When making the snowflakes with my elementary students I always read the book Snowflake Bentley, by Jacquelyn Briggs Martin, about the first man to successfully photograph snowflakes. The story is engaging, and it also teaches facts that you can use to make prettier, more accurate snowflakes.
Equipment Needed: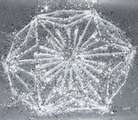
- Elmer’s Glue, 1 small bottle per person
- Q-tips, 30-60 per person, or more, depending on the number and size of snowflakes you want to make
- Waxed paper, one 18 inch sheet per snowflake
- Glitter, optional (glitter glue also lends a neat effect)
Procedure:
Spread a sheet of waxed paper on the table surface. This is your working space. Using Q-tips, design a snowflake on the waxed paper. Q-tips may be bent, broken in two, or used whole for different effects. In general, the end with the cotton swab should create a corner with a neighboring swab.
An interesting fact about snow crystals is that they are made up of water molecules frozen to ice in a hexagonal lattice formation, which accounts for their six-fold symmetry. The best-looking, most accurate snowflakes, therefore, are six sided, although three-sided works well too. Experiment by arranging three or six Q-tips in a sunburst fashion, with one end meeting in the middle. These will be your stems. Using more Q-tip pieces, repeat patterns between the stems. Keep in mind that every Q-tip must be connected to the whole.
When you have finished your snowflake design, squeeze a puddle of glue over each joint. Do not skimp! Use lots of glue. A large puddle is needed to connect Q-tips together. Don’t worry if the puddle spreads and loses shape – it will harden clear and contribute to the overall crystalline effect of the snowflake. For a sparkly effect, shake the snowflake with glitter before the glue dries.
Set the snowflake on the waxed paper aside until the glue dries. This will take several hours, and maybe even overnight. Continue making more snowflakes! You can use the Caltech Snowflakes and Snow Crystals photo gallery for ideas to model your snowflakes. Try different sizes by using different lengths of cotton swaps for the stems.
When the glue has dried completely, carefully pull the snowflake away from the waxed paper. If not enough glue was used to hold the Q-tips together, simply return the snowflake to the waxed paper and cover with more glue. You will have to wait again for the glue to dry. Then remove the snowflake from the waxed paper. Use clear fishing line to hang from the ceiling. Voila! An instant blizzard! Make some hot chocolate and enjoy!
About the Author: Emma Snow is a creator at Craft Kits, leading portals for crafts and creative individuals.


Leave a Reply