Last updated on July 28th, 2021 at 11:39 am
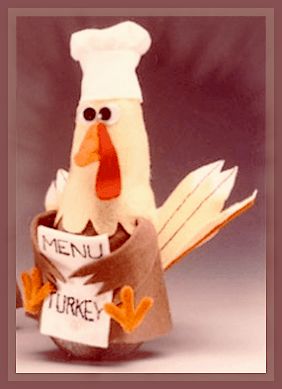
Set out this Styrofoam Gobbler Wobbler and he’ll be the star of your Thanksgiving decorations for years to come!
Print out our free pattern for the turkey body parts then cut these out from felt and secure with glue.
The secret to the “wobble” is creating a hollow in the bottom area of the turkey then filling it with marbles. This rolling, movable weight enables the turkey to rock back and forth without falling over.
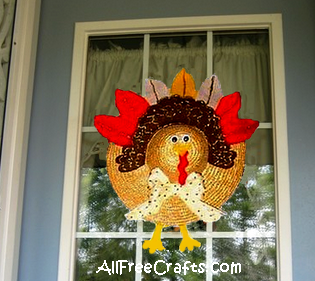
For another awesome turkey project, see how to make a turkey from a straw hat which is perfect for hanging on the front door to greet visitors on Thanksgiving Day.
MATERIALS NEEDED:
Gobbler PDF Pattern file – 442KB
STYROFOAM* Brand Foam:
12″ x 4″ cone, one
4″ ball, one
Other Materials:
Clear glass marbles
Felt, 9″ x 12″ sheets: brown, flesh, two each; white, orange, red, one each
Orange chenille stems, 14
1/2″-3/4″ wiggle eyes, two
Fine-gauge spool wire
Paints: black dimensional fabric; brown acrylic (optional)
Scissors, Ruler, Pencil
Fine-line black permanent marker
Compass
Metal tablespoon
Extra-long straight pins
Large-eye sewing needle
Serrated knife
Candle stub or paraffin
Wire cutters
Needle nose pliers
Awl or ice pick
Medium flat paintbrush
Disposable palette
Paper towels
Thick, white craft glue
Low temperature glue gun and glue sticks
Time to Give Thanks
Thanksgiving is traditionally observed on the second Monday in October in Canada, and on the fourth Thursday of November in the United States.
INSTRUCTIONS:
1. Press opposite sides of foam ball on a hard surface to flatten slightly. Wax serrated knife with candle stub or paraffin and cut ball in half.
2. Refer to diagram to cut top 4″ from foam cone. Mark a line around cone 5″ from base. Indent cone on line by pressing foam onto square edge of a counter or table. Note: This will become turkey’s neck.
3. Refer to diagram to hollow out lower 5″ of cone and one half ball by scooping out foam with a tablespoon. Leave approx. 1/4″-1/2″ outer shell intact, working carefully to avoid cracking foam. If desired, paint bottom 1″ of cone and half ball brown to match robe.
4. Place a chenille stem over beak pattern and shape, following outline. Trim the excess stem and then glue shape to orange felt. Let dry and then cut felt beak around chenille stem outline.
5. Cut two chenille stems in half. Using patterns, cut one wattle from red felt and two wings from brown felt. Glue wattle and two wings to matching felt, sandwiching a chenille stem between layers. Let dry and then cut wattle and wings from doubled felt, cutting around original shapes. Trim chenille stem flush with wattle but do not trim stems at base of wings.
6. Cut out remaining turkey patterns as indicated. Also cut two 2-3/4″ x 4-1/4″ menus and one 8″ x 2″ hat bottom from white felt.
7. Glue a white tip to top of each flesh tail feather, overlapping pieces approximately 1/8″. Glue a chenille stem vertically to center back of each assembled feather, letting it extend 1″ at bottom. Layer and glue felt menus together. With black dimensional paint, draw a vertical line down center front of each feather and lettering on menu (see photo). Allow to dry.
8. Following patterns, overlap corresponding edges of head and robe pieces 1/4″ and glue to form tubes. Turn. Gather felt at top of head 1/4″ from edge. To gather felt throughout, use a large-eye needle with fine-gauge wire and hand sew gathering stitches where indicated. Gather felt on wire and then twist wires together to secure. Trim excess wire.
9. Place robe on cone with top of felt 1/4″ above indented neck. Gather robe around neck. Place head on cone, positioning robe seams at sides and head seam at center back. Spot glue head to body.
10. Fold beak in half diagonally with chenille stem to inside. Glue layers together and then glue base of beak to center front of head (see photo). Glue narrow end of wattle to base of beak and then shape. Glue wiggle eyes side by side above beak.
11. Refer to diagram to shape a chenille stem, forming a forked foot with attached leg. Trim stem as necessary. Bend leg perpendicular to foot and then wrap bottom portion with a separate chenille stem. Leave approximately 1/2″ at top of leg unwrapped. Repeat to make a second foot/leg.
12. Use an awl or ice pick to form tiny holes in sides of robe near top and bottom to attach wings and feet/legs. Glue chenille stems extending from wings into armholes and feet/legs into remaining holes. Bend wings forward and then glue menu between them with lettering facing front.
13. Overlap and glue short ends of hat bottom to form a tube and then turn. Glue hat bottom to head just above eyes with seam at center back. Hand sew gathering stitches around hat crown 1/4″ from edges. Pull threads to gather stitches and form a fabric yo yo, knotting ends to secure. Glue yo yo, gathered side down, centered on hat bottom to form chef’s hat.
14. Insert and glue feathers in foam body at lower back of robe. Shape feathers, letting them fan out toward sides.
15. Turn cone body on end and weight hollow area with glass marbles. Align hollow half ball on bottom of cone with flat sides together and pin in place temporarily. Test turkey’s rocking motion, adding or subtracting marbles as necessary. When satisfied, remove pins and glue ball to cone permanently.
Gobbler Wobbler Thanksgiving craft project courtesy of Dow Crafts
Copyright © The Dow Chemical Company (1995-2007). All Rights Reserved.
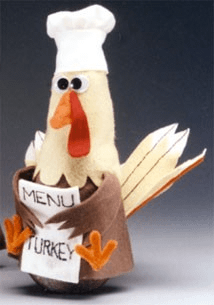
Made this a number of years ago. We put it out on the table every Thanksgiving. Also a fun craft to make. Highly recommended.
Thank you for sharing your family Thanksgiving tradition, Susan. I’m so glad that you and your family are still enjoying this gobbler craft!