 Here’s an interesting use for popsicle sticks or craft sticks – make a country cottage-style picket fence switch plate.by Twila Lenoir
Supplies:
- 9 popcicle sticks
- Old pair of scissors
- White paint
- gold paint or brown
- Green paint
- Hot glue or modeling glue
- Small silks flowers (or small wooden flowers would be perfect)
- Clear enamel
- Light switch plate
 Picket Fence Switchplate Instructions:
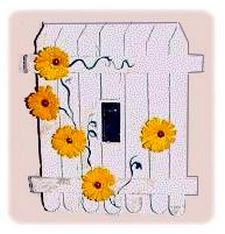
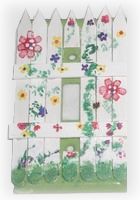
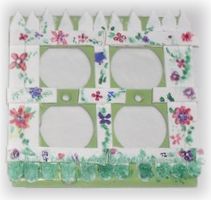 I painted my switch plate white (shown above), but I think green would be better, as it will show the fence better. Here are two photos of the picket fence switchplate done by a reader; aren’t they pretty with a green base?
Paint the switchplate in your base color and set aside.
Note: Now I screwed my switch plate on and then I glued my fence on, but it is safer to drill some holes in the fence to accomodate the switchplate screws, then glue the fence to the switch plate (leaving the screw holes accessible) then paint as directed. Please be very careful when working around electricity and work safely when you do your crafts!
Cut the tips of the popcicle sticks in an arrow at the top, making sure that all 7 sticks are even. With the 4th stick, cut the popcicle stick so that the switch is available; the 4th stick will be cut so a little is showing on the bottom of the switch and the point is up to the top and the middle is cut out. Cut the 2 remaining sticks so they hang across the top and the bottom of the 7 sticks. Cut the tips off on both sides.
Line up your 7 sticks closely together making sure the space for the switch is available. Take the last 2 sticks and glue them across the 7 sticks, one at the top and one at the bottom, look at the picture for a guide line.
Paint your fence white, let dry and with a dry brush, brush on some gold paint or brown. just a little for a rustic effect.
Glue on some flowers and with a very thin brush, paint on some vines. Spray with enamel to preserve.
Enjoy !
Thank you to my mom for taking this picture of my craft. I love you mom!


Leave a Reply