Last updated on January 5th, 2024 at 09:57 am
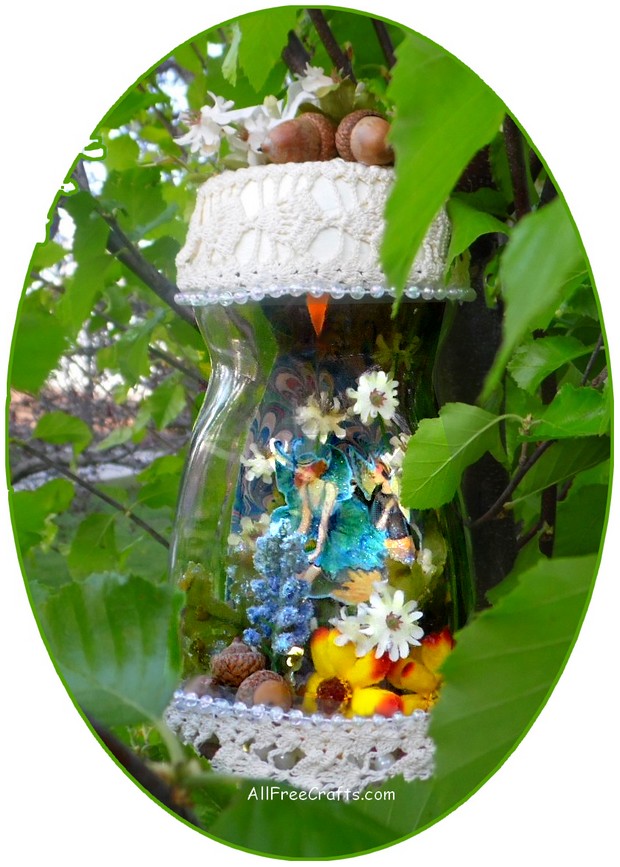
Print an enchanted pair of fairies then create a miniature, magical home for them in a recycled coffee jar.
Capture a pretty pair of fairies (using just your computer printer), then bring them to life in an imaginative fairy jar setting with the help of an empty glass bottle, some pearl beads, a bit of lace, glitter nail polish (or glue and glitter), tiny silk flowers and/or any other elements that appeal to you (and, of course, the fairies).

A Note About Copyright
Please do NOT link directly to my printable fairy images or share them on your blog, Facebook or elsewhere. Instead, be nice, and link to this This Fairy Jar page so people can enjoy the original content from the person who created it.
Thanks!
You Will Need:
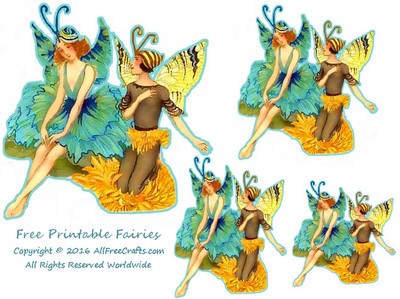
- free printable fairies
- computer printer and printer paper or card stock
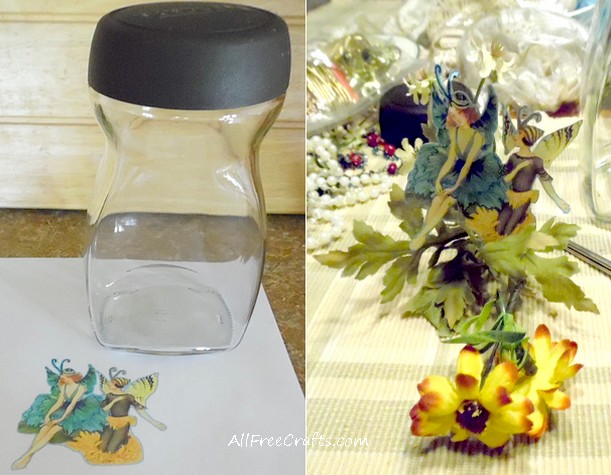
- glass coffee jar or similar glass bottle
- scraps of lace edging
- small string of pearls or pretty beads
- small artificial flowers and wired leaves
- acorns
- moss
- glitter nail polish or white glue and glitter
- decoupage medium and a small piece of scrapbook or wrapping paper
- cream acrylic paint
- tacky or white glue; hot glue gun and glue sticks
- optional: tiny gold confetti (I used hearts)
- TOOLS: pencils; sandpaper; small, sharp scissors; long tweezers; paint brush; cotton swabs; dinner plate.
Lighting: If you wish to give your captured fairies their own ambient lighting system, you’ll also need a battery powered tea light and a small circle of adhesive velcro.
Captured Fairy Jar Instructions:
1) Print the Fairies and Choose a Jar:
Click on the fairy collection shown at the top of the supply list to reveal the full-size version which has four different sizes of the same two fairies. Print this on computer paper or card stock, then carefully cut out the image size that will fit inside the bottle that you have chosen. I recycled a Nestle instant coffee jar and used the smallest pair of fairies.
2. Capture the Fairies:
In this step, you will glue the fairies to a bouquet of silk leaves. Snip a small bunch of wire-stemmed leaves to fit the bottom of the jar. Adjust stems, arranging leaves in a pleasing way, test fit inside the jar, then remove.
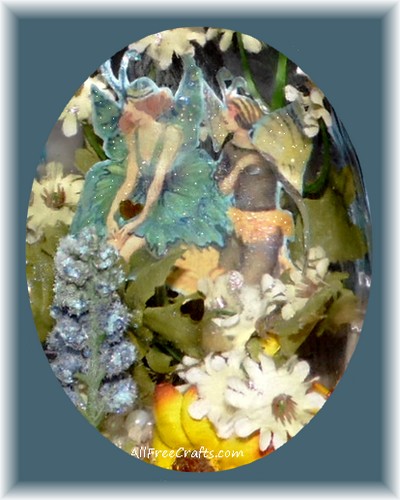
Place the fairies among the top leaves and gently … very gently … curve the legs of the fairy on the left slightly downwards and bend both pairs of fairy wings slightly backwards. You may also slightly move the arm of the right fairy and the antennas. Take care not to tear the fairies! They are delicate little things, you know!
Use tacky glue, in various spots on the back of the image where it brushes against the leaves, to fix the fairies in place. Take a few stems of tiny flowers and glue them so to the flowers appear above the fairies with a few of them in front.
Once the fairies are settled on their bower of leaves and flowers, apply fine glitter nail polish, or white glue and fine glitter, to the wings, antenna and dresses. Let dry. This transforms the paper fairies into three dimensional figures with a little mystical shine.
Set the fairies somewhere safe while you get things ready for them to move in.
3. Add a Carpet of Pearls:
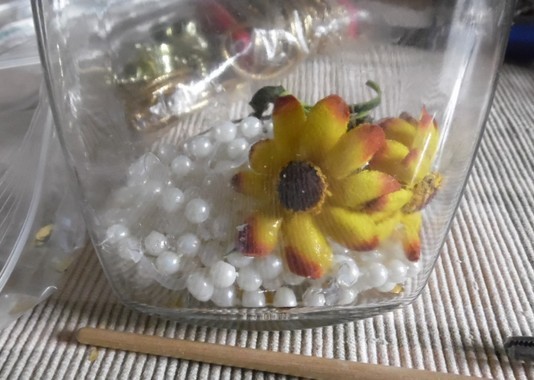
A string of medium artificial pearls carpets the floor of my fairy jar. You could substitute a layer of moss, seashells, sea glass, pebbles, or what have you … but whatever you choose must be firmly anchored to the bottom of the glass jar.
To do this with a strand of pearls, drop hot glue from a glue gun onto the bottom of the jar and quickly add the string of pearls. If the pearls seem loose, add a little more hot glue or some drops of tacky glue to stick some more of the pearls together.
This pearl carpet elevates the scene and helps bring the fairies to the center of the jar. It also allows for gluing lace around the bottom of the jar without obscuring the fairy scene.
Glue two daisies, rosebuds or other pretty flowers in the bottom right corner, on top of the pearls.
4. Make a Magical Fairy Jar Home:
Settle the fairies in their bower of leaves onto the carpet of pearls, behind the flowers. Apply tacky glue to the bottom of the leaves before setting in place. Where leaves brush against the glass jar, use long tweezers to hold them away from the glass, then apply dabs of tacky glue on the underside with cotton swabs or a paintbrush. Let the glued leaves fall back against the glass and let the glue set.
Use long tweezers to place a few decorative elements in front of the fairies. I added a tiny blue tree, applying glue around the bottom of the stem before snuggling it in among the pearls.
At the front of the scene, on the bottom left, I added a connected pair of acorns and two single acorns.
Fairies like glimmer and shine, so I dabbed little bits of white glue here and there to hold tiny gold confetti hearts. You can see the larger fairy has one of these nestled between her hands.
5. Back Up the Scene:
Adding a paper backing, either plain or patterned, helps create the three-dimensional scene within the glass jar. It not only hides the plain back of the printable fairy image, it also adds depth and interest.
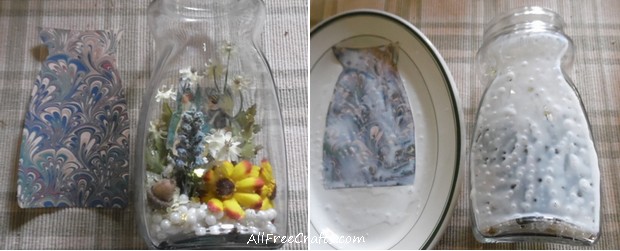
Trace the shape of your jar onto a plain piece of paper and cut it out. Place the paper against the back of the jar and make any needed adjustments; you want the paper to fit neatly around the back of the jar but not to extend around the sides. Use this shape as a pattern to cut out the same shape from scrapbook paper or wrapping paper.
Cover the back of the glass jar with decoupage medium (or white glue thinned with water). Add a puddle of decoupage medium to a dinner plate and spread it around. Set the backing paper, right side up, into this puddle and slide it around a little bit to get decoupage medium all over the back of the paper. Paint more decoupage medium on the front of the paper.
Let the backing paper sit for a minute or so to soak through, then carefully pick it up and apply it to the back of the jar, with the printed surface against the glass. Slide it around until it’s in the right position then smooth it down gently with your fingers. Dab gently against the paper and the glass to remove excess decoupage medium. Let dry, then add another coat of decoupage medium and let dry once again.
Alternative Backing: Apply decoupage medium to the back of the jar and cover it with overlapping pieces of tissue paper.
6. Lighten Up
Fairies like a little ambience, so the glow of a tea light sets the scene for them quite nicely.
Installing a battery-operated tea light in the jar lid is quite easy. Use self-adhesive velcro circles to keep the light in place, attaching one half to the back of the tea light and the other half to the inside of the jar lid. My velcro circle covered the battery door but that hasn’t been a problem so far; just make sure that you don’t cover the On/Off switch.
7. Embellish the Glass Jar
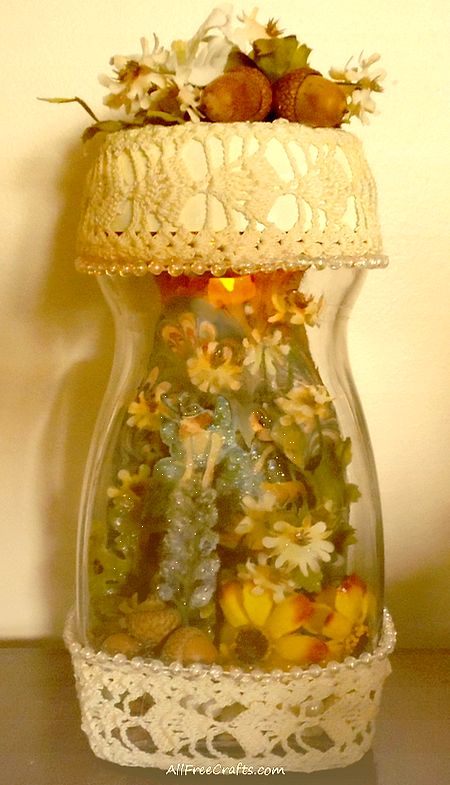
Dressing up the jar with lace and pearls, along with a few elements copied from inside, really captures the mood and brings everything together nicely.
You’ll notice that I painted my jar lid with cream colored acrylic paint to match the lace edging. After the paint dried, I hot glued lace all around the jar lid, allowing a little to extend beyond the lip of the lid so that I could also glue a row of string pearls to the bottom of the lace.
Complete the lid by hot gluing a few tiny silk flowers to the top along with a pair of acorns. To finish your fairy jar, also hot glue a lace band around the bottom of the jar, topped by another row of string pearls.

Leave a Reply